Almost all residential buildings during construction or reconstruction are equipped with one or another air purification system. And no matter what type of ventilation, the passage through the roof is an important step in its construction. For each type of roofing material, the arrangement of passage nodes should be carried out according to its own scheme. In order for the system to serve without fail for more than one year, all actions for its installation should be carried out with skill. Familiarize yourself with the methods of installing a roof vent pipe, and this information will help you in your work.
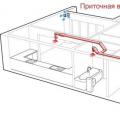
Extraction of exhaust air from the house
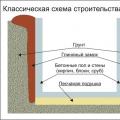
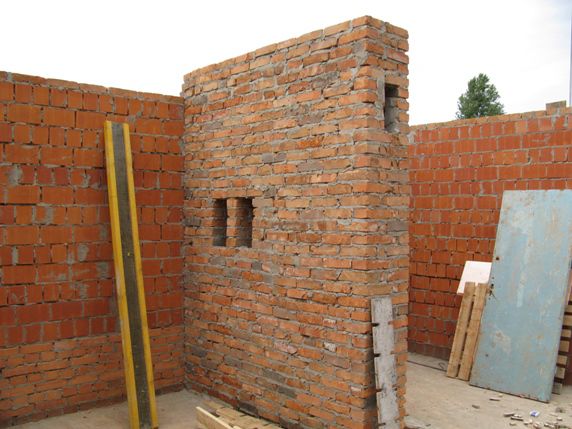
If you are starting to build a cottage from scratch, then be sure to consider the construction of ventilation ducts in the brick walls of the interior. Natural ventilation does not require expensive equipment and will constantly provide the rooms in your home with fresh air.
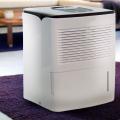
If necessary, you can supplement the system with a forced exhaust fan. But extra expenses will not be needed if you wisely draw ventilation to the roof.
The higher the ventilation pipe on the roof of a residential building, the stronger the draft will be in it.
Often, designers pay insufficient attention to the installation of risers and the height of ventilation shafts above the roof of the building. Due to their shortcomings, a number of unpleasant phenomena can occur:
- smells penetrate from the bathroom and from the kitchen into the living rooms due to the unlawful combination of ventilation ducts into one common one on the roof;
- the effect of the hood is insignificant due to the insufficient length of the pipe;
- the hood operates in reverse mode due to the wrong choice of location for installing the ventilation pipe on the roof slope;
- channels and pipes freeze through without thorough insulation.
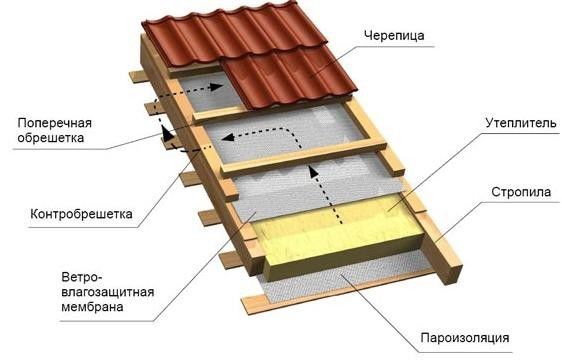
The cause of problems when installing ventilation pipes on the roof is often the complex design of a modern roof, which is called the “roofing pie” due to its multi-layeredness.
In case of improper installation of the ventilation pipe on such a roof, the rafters and the crate may be damaged. There may also be gaps in the places where the vent cover is installed, and rainwater will seep through them. Therefore, in order to maintain the tightness of the roof, it is recommended to use passage elements specially designed for this.
Planning passages for ventilation
You should start equipping the ventilation system properly with thinking through and drawing up a schematic diagram of the ventilation of your entire home.
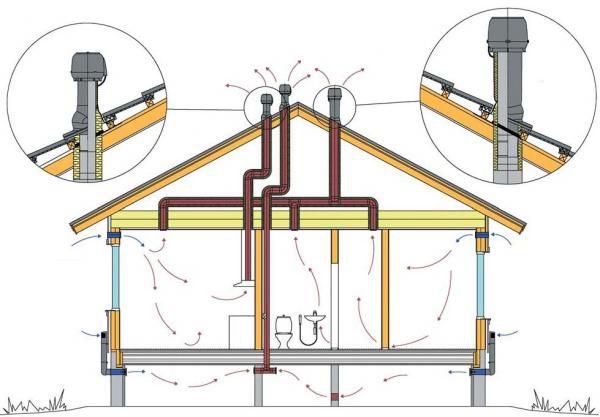
Let's take this situation as an example: according to the plan for the reconstruction of a residential building, the roof is to be replaced. Through the new roof, you need to remove the hoods from the rooms, from the bathroom, the ventilation duct from the basement and the kitchen hood. The question arises, what will happen if we do not make four passes, but bring all the channels together and put only one ventilation pipe on the roof?
Knowledgeable people say that nothing good will come of such savings. Nevertheless, it is desirable that there be a separate ventilation passage through the roof for each of the air ducts. Otherwise, if all of them are combined, an unpleasant smell can spread throughout the house when weather conditions provoke back draft.
When installing a new roof, you can plan in advance the location of the ventilation pipes on the roof and make passages for them, if the exact location is known.
Purpose and types of roof penetrations
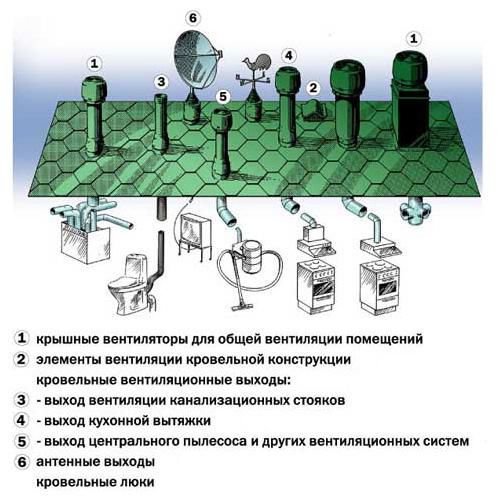
Passages through the roof are arranged for the withdrawal of different types of ventilation:
- internal living quarters of the building;
- sewer riser pipe;
- attic under roof space.
In addition, it may be necessary to arrange the exits of chimneys and television antennas.
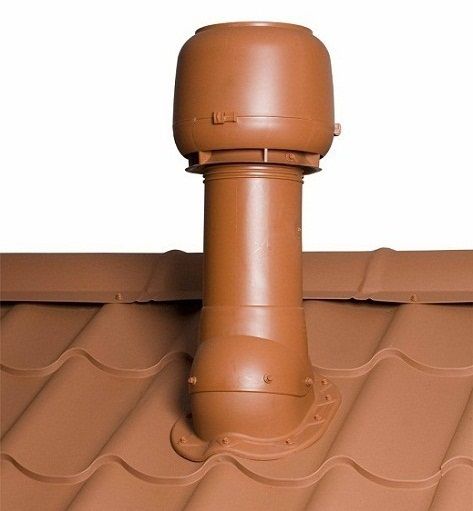
The final top element of the duct system is a specially made section of pipe called a vent outlet. A properly installed ventilation pipe on the roof provides air exhaust from the premises and does not allow water to leak under the roof. In those places where it is necessary to arrange the passage of ventilation through the roof, install passage elements corresponding to a certain type of roofing materials.
Homeowners can purchase ready-made kits of various ventilation outlets for installation on hard and soft roofs. With their help, it is easy to bring the ventilation riser to the roof in such a way that the roof does not leak and does not lose its aesthetic appearance. Such devices also protect the ventilation ducts from the ingress of dirt and precipitation.
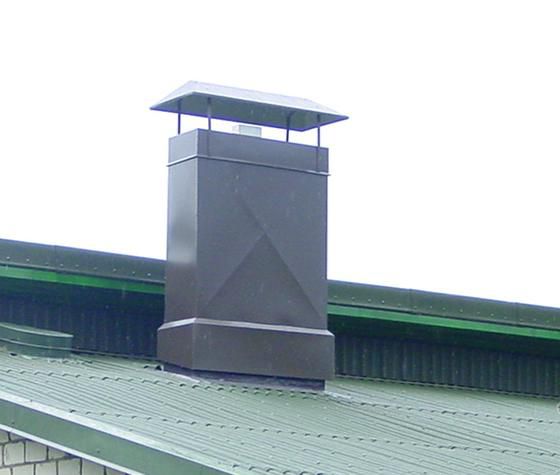
Depending on the design of the roof of your house and the type of ventilation output, the passage through the roof can be of different heights and shapes. In addition to round exhaust pipes, rectangular roof ventilation ducts are also used.
In order for the ventilation pipes on the roof not to cause a violation of the tightness of the roof, the places of their passage should be equipped with special care.
The device of the ventilation penetration unit
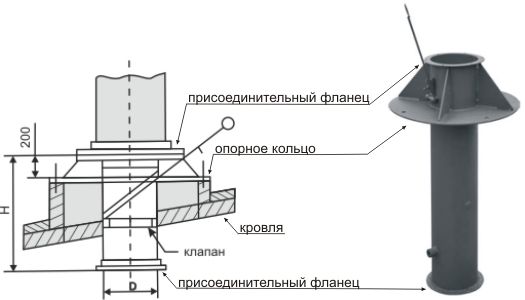
The design of the simplest nodes for the passage of a ventilation pipe through the roof is a metal pipe that is inserted into the hole and fixed on a reinforced concrete or steel cup. The roof outlet can be equipped with a closing valve and a condensate collection ring. An outlet air duct is connected to the pipe from below through a flange. From above, this node can be equipped with a deflector or a simple protective umbrella. There is an option with insulation, which is used as mineral wool.
Products for a new level of quality are considered to be more in line with the technical and aesthetic requirements of the modern era. The principles of the device of such ventilation outlets are almost the same regardless of the manufacturer, they are distinguished only by small differences. From a number of similar products, the most popular are roof ventilation outlets, ventilation covers and ventilation fungi on the roof of the Vilpe Vent brand.
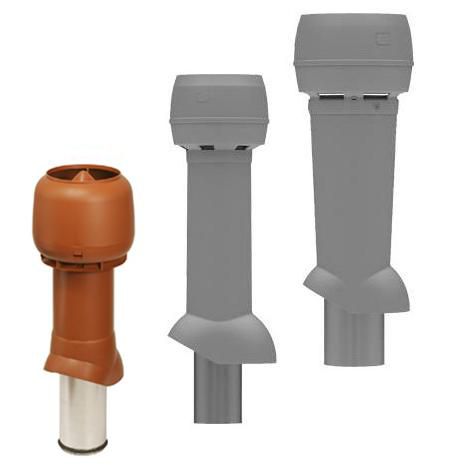
Their advantages:
- the inner tube is made of galvanized steel, and the outer tube is made of durable and lightweight polypropylene;
- the outlets are mounted on a reliable pass-through element of the appropriate shape;
- pipe height varies in different versions from 400 to 700 mm;
- the lower part of the pipe is equipped with a seal and can be inserted into the air duct to a depth of 300 mm;
- the inner diameter of the ventilation outlet pipe is from 110 to 250 mm;
- the ventilation outlet pipe is thermally insulated to prevent the formation of condensate and ice plugs;
- it is possible to put an electric fan on the ventilation outlet;
- a cap with a deflector protects the pipe from precipitation and enhances traction.
In some cases, the passage element is not included in the kit and must be purchased separately. Choose it taking into account that the shape of the overlay of the passage element matches the type and profile of the roofing.
Pass-through elements provide the versatility of installing a ventilation pipe on any roof. Their installation can be carried out both simultaneously with the construction of the roofing, and on the finished roof. With the help of these products, there is no doubt about the stability and tightness of the ventilation outlets.
The importance of roof aerators
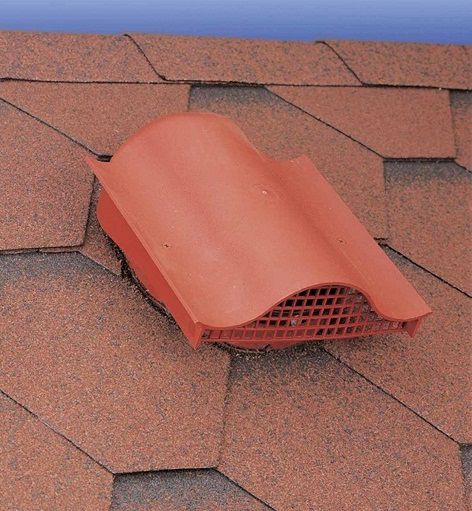
In winter, condensation forms inside roof structures and in attics. In order to protect the roof from dampness, the formation of fungus and mold, you will need to ensure ventilation of the space under the roof.
The roof ventilation unit is extremely simple in design. Air should move naturally from bottom to top under the roof. For its entry, holes in the eaves will serve, and it will exit through aerators with a ventilation hole cover, arranged in the roof closer to the ridge.
To cover the hole from precipitation, a cover is used for ventilation of various configurations, including a ventilation fungus on the roof, which is actually a decorative cap.
Location of ventilation outlets on the roof
Experts advise making the location of the ventilation pipes on the roof exactly above the corresponding riser. In this case, without bending the channel, the efficiency of the air flow will be maximum. If this is not possible, then you will have to use corrugated adapters to connect. On pitched roofs, it is rational to arrange roof penetration closer to the ridge. The advantages of this option are that the long inner part of the pipe will remain warm under the roof, and the shorter top element will be much more resistant to wind blows.
The height of the ventilation shafts above the roof of the building is also important. At a low location, the thrust will be weak, and a pipe that is too long will have to be fixed with braces. Based on building codes, you should install a vent pipe on a sloping roof 50 cm above the roof. If the roof is flat, the height of the pipe can reach 30 cm. In the case when there are recreation areas on the flat roof or it is operated in another way, then the height of the ventilation outlet must be at least 2 meters.
Whichever option you choose for the location of the ventilation pipes on the roof, the main thing is that their ends are above the so-called wind backwater zone. Otherwise, a strong wind can block the airflow and even direct it backwards.
Proper installation of duct penetrations
Consider an example of how to install a ventilation pipe on a roof made of metal. The design of a roof ventilation unit will be similar for other types of roofs, with only a few differences.
The sequence of steps for mounting the ventilation outlet on the roof:
- Determine the installation location on the roof of the pass-through element.
- Outside, on the upper wave of the metal tile, draw the contours of the hole according to the template supplied with the product.
- Cut a hole in the tile with a chisel and metal scissors for the ventilation pipe to exit to the roof.
- Cut appropriate holes in the bottom waterproofing layers of the roof.
- Mark according to the template and drill a series of holes for self-tapping screws.
- Clean the surface of the metal tile around the hole from moisture and dust.
- Apply a layer of sealant to the bottom surface of the gasket.
- Lay the gasket in place.
- Install the passage element on the gasket and fix it with self-tapping screws.
- Insert the exhaust outlet pipe into the passage element and check it for verticality.
- Fix the pipe with screws in the correct position.
- Ensure the tightness of the ventilation outlet for metal tiles to the roof from the attic side.
At the end of the installation of ventilation on the roof, the base of the passage element must be pressed so tightly against the roof that excess sealant is squeezed out from under the gasket.
On the video brought to your attention, you can familiarize yourself with the process of installing a ventilation pipe on a corrugated roof. In the same simple way, you can install a ventilation outlet on the metal roof of your house.
Time to take stock
You could see that in the process of installing ventilation on the roof and installing the pipe that we have considered, there are no particular difficulties. Your ventilation system will certainly be effective if you calculate in advance the height of the ventilation shafts rising above the roof of the building. And the service life of the roof, disturbed by the passage of a ventilation outlet through it, will not be reduced at all if you take a responsible attitude to the quality of installation work.