Still think buying silicone molds is a thoughtless waste of money? You are wrong! These colorful molds are not only beautiful, but also very convenient for baking products, especially cupcakes. After all, no matter how you grease the tin, the tender dough will still stick to it. Baking paper is also not a salvation. It gathers in folds and sticks to the finished product even worse than tin. And silicone molds do not require grease. And finished products from them are very easy to get.
Are special recipes required for Not really. You just need to know some rules for handling this modern material.
In this article we will provide recipes for cupcakes in silicone molds with photos of the products. If you are used to making dough for this type of baking according to your own rules, there is no need to change your customs.
But products are prepared in silicone a little faster than in tin forms, and this must be taken into account. Try working with the new material and you will see how easy it is to use.
What a housewife needs to know about silicone
Why are these modern molds better than grandma’s old, trusted tin? Firstly, the soft material bends and even turns inside out. Those who have ever tried to pick a cupcake out of a tin mold with a knife will understand the advantage of silicone.
Secondly, the material does not need to be lubricated with grease. It is environmentally friendly and does not impart a metallic taste to products.
And finally, thirdly, you can bake cupcakes in silicone molds both in the oven and in the microwave. But you can’t put a tin in a microwave oven.
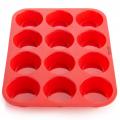
What types of silicone molds are there? Separate ones - both for a large cupcake and for small portioned cakes. There are also single cast forms with a number of recesses. These are convenient to fill with dough and, if necessary, turn in the oven.
Silicone molds also differ in outline. But the classic ones are more popular - in the form of a truncated pyramid with corrugated sides.
If you are going to use silicone molds for the first time, you need to wash them thoroughly in hot water and grease them before filling with dough. In future culinary processes this will no longer be necessary.

Secrets of successful baking
Whatever recipe we choose for cupcakes in silicone molds, the oven must be set to a constant temperature. Do not open the oven door slightly during the first 20 minutes of cooking, otherwise the dough will fall. It is also not recommended to move or rotate the molds. To make the dough more airy, it is worth separating the whites from the yolks. But it is not recommended to put them in the refrigerator - all ingredients must be at the same temperature. Want your cupcakes to stay fresh for a long time? Then add a little (spoon) starch to the flour. It is best to check the readiness of the cupcakes with a toothpick: if the splinter comes out dry, you can turn off the oven. But what to do if the product starts to burn on top, but it’s still damp inside? Cover the cupcakes with a piece of foil. It is not recommended to remove finished products from the molds while they are hot. Let them cool completely. Then the shape of the cupcakes will not be damaged. Glaze - if provided for in the recipe - is also applied to cold products.
in silicone molds with sour cream
We prepare the dough for the products in the traditional way, just as our grandmothers did, preparing to bake them in corrugated tins. Any cake requires premium wheat flour, sugar, milk or milk derivatives, as well as eggs (although now, to please vegetarians, people have come up with recipes without them).
To make the product fluffy, all ingredients must be at the same temperature. So take three eggs out of the refrigerator ahead of time. Sift one and a half cups of flour through a sieve. This will saturate it with oxygen, which will make the dough even more fluffy.
Now let’s look at how to make cupcakes in silicone molds, step by step:
- Melt butter (180 grams) and cool slightly.
- Beat the eggs with a whisk with 200 milliliters of sour cream and 185 g of sugar.
- Add oil. Beat again.
- Mix flour with baking powder. Gradually combine the bulk and liquid masses.
- Knead the dough. Vanillin can be added for flavor.
- We fill silicone molds to 2/3 of the volume, since the dough rises during baking.
- The oven should already be preheated to 180 degrees.
- Cupcakes should be baked based on the volume of the molds. As soon as the products are browned, turn off the oven.
- Leave the cupcakes in the molds until completely cooled. We take out the finished products and sprinkle them with powdered sugar.

With milk
We already know how to make simple cupcakes in silicone molds with sour cream. A recipe that uses milk is no more complicated.
This time we will complement the vanilla taste of the cupcakes with raisins. Dried grapes (preferably seedless) must first be filled with hot water and left for ten minutes to swell. Then the raisins should be strained and dried a little.
- Beat three eggs with 160 grams of regular sugar and one teaspoon of vanilla sugar.
- Melt 150 grams of butter. Cool it a little and pour it into the eggs.
- Sift flour (260-300 grams) and combine with a bag of cookie powder. Add this loose mass to the egg-butter mixture, stirring all the time.
- Heat a little milk (about a quarter cup). Add to the dough.
- Throw in a handful of prepared raisins. Knead the dough. It should turn out a little liquid, the consistency of thick sour cream.
- Preheat the oven to 180 degrees.
- Fill the silicone molds one-third full with dough. Place in the oven for 40 minutes.
- Cool and remove the products.
The undoubted advantage of silicone molds is that they are turned inside out. Therefore, getting baked goods out of them is a matter of a couple of seconds.

Chocolate cupcakes
Let's see what else you can bake in the oven in silicone molds. The recipe for chocolate muffins is as easy as using dried fruits. But there are nuances in preparing such a dough that you need to know.
- First, melt 50 g of natural chocolate without fillers (dark or milk).
- Then heat 165 grams of butter and mix it with 150 g of powdered sugar.
- Continuing to beat the mixture with a mixer, add three eggs to it.
- Add a spoonful of baking powder and a pinch of vanillin.
- Pour in 40-50 milliliters of warmed milk and melted chocolate.
- Sift 350 grams of corn flour over a bowl with the future dough.
- Mix everything thoroughly, carefully moving it with a wooden spoon from bottom to top.
- The oven for chocolate cupcakes should be preheated to 200 degrees. Place the molds there, one-third filled with dough. Bake for 25 minutes.

Recipe in silicone molds
If desired, for these products you can use baby cheese mixture - with vanilla, raisins, dried apricots or prunes. You will need 250 grams of this curd.
- Soften half a stick of butter and beat with three eggs, regular sugar (one and a half cups) and vanilla (a bag).
- When the mass becomes homogeneous and the crystals dissolve, begin to mix in the curd.
- If this ingredient is not smooth, but has grains, add 50 milliliters of milk - warm or at room temperature.
- Beat the mixture with a mixer.
- Add a packet of baking powder. Baking soda will significantly increase the volume of the mass.
- Now add wheat flour portionwise. It will take about 450-500 grams. The dough will turn out, as professional chefs say, “like pancakes” - liquid, but not quite. The main thing is that there are no lumps of flour left there.
- Fill the molds one third full. Curd muffins should be baked at a higher temperature - 210 degrees. They will be ready within half an hour.

On kefir
This muffin dough in silicone molds is more airy due to lactic acid bacteria, which fluff it up.
- Separate the yolks from two eggs and grind them with 200 grams of powdered sugar.
- Let's beat the whites.
- Add 200 grams of butter to the yolks, brought to room temperature. Beat with a mixer.
- Carefully add the protein foam to the mixture.
- Add 300 milliliters of kefir (the fattier it is, the better). Let's not forget about vanillin for a pleasant baking smell.
- Quench a teaspoon of soda with vinegar. Add to the dough.
- Now start adding two glasses of pre-sifted flour in small portions.
Chocolate fondant
This dessert is extremely popular in Western Europe. The difference between it and ordinary cupcakes is that the fondant is served hot, and inside it has a liquid filling. In our recipe it will consist of melted chocolate. To prepare this fondant, you can use silicone muffin tins.
- First of all, turn on the oven at 200 degrees - because the dough cooks quickly.
- Melt 150 g of dark chocolate and 50 g of butter in a water bath.
- Pour two eggs into a separate bowl, add 40 grams of sugar and a pinch of salt. Beat until fluffy.
- Add the chocolate-butter mixture.
- This recipe requires very little flour, only 40 g. Sift it and mix it with a pinch of baking powder. Now add it to the dough.
- Mix everything carefully with a spatula.
- The fondant is taken out hot, so we grease it with oil, despite the fact that they are silicone.
- You need to cook the cupcakes for about 10 minutes. Enough for the dough to rise and harden into a “cap.”
- Serve the fondant with a scoop of ice cream.

Muffins without flour (bran)
Silicone muffin tins can also be used by those who watch their figure and scrupulously count calories. Instead of flour, this recipe calls for the use of bran - oat or rye (optional).
Because of them, the dough turns out more loose, so we can’t do without silicone molds here.
- Mix low-fat cottage cheese (250 g) with two eggs. If the mass is too dry, you can add a little milk, kefir or sour cream.
- Add two tablespoons of sugar and bran. At this stage, you can diversify the taste with shavings, raisins, grated chocolate, cinnamon or lemon zest.
- Place the dough in the molds and place in an oven preheated to 180 degrees for 20 minutes.
Curd muffins with berries
The moist filling perfectly complements the dryish dough of the products, and the fruity sourness harmonizes the sweet taste. Strawberries are suitable for this recipe, as well as other berries that give abundant juice. Prepare the dough in the usual way.
- Beat two eggs with 200 grams of sugar.
- Melt the butter (120 g), cool slightly and pour into the total mass.
- Beat again and add 250 g of cottage cheese. Let's mix.
- Combine sifted flour (250 g) with soda (half a teaspoon). Gradually add it to the dough, stirring it constantly.
- Fill the silicone molds halfway.
- Strawberries need to be washed ahead of time, the stems torn off, and dried.
- Add a berry to each cupcake in silicone molds. In the photo below, the berries in the dough are visible, but during baking it will rise and completely hide the filling; it will only be noticeable when cut.
- We bake these cupcakes for half an hour at 180 degrees.

Dough without eggs
Vegans can enjoy cupcakes too if they follow this recipe.
- Peel a large apple, remove the seeds, and puree in a blender.
- Add half a glass of water, 70 grams of vegetable oil, a handful of dried cranberries and a couple of pinches of fried sunflower seeds. Let's stir.
- We extinguish half a spoon of soda with lemon juice and pour it into the total mass.
- Now add 160 g of flour in portions.
- Add 140 g of brown sugar and a pinch of salt.
- Knead the dough well and fill the silicone muffin tins with it.
- Bake at 180 degrees for about half an hour.
Almost every housewife has muffin tins, as they are inexpensive and practical. There are many simple and very tasty dishes that can be prepared using these useful gizmos!
Since the forms appeared on sale relatively recently, most likely many of the recipes are unknown to you. Therefore, we decided to prepare for you 10 cool ideas for using culinary molds. Enjoy it for your health!

Ingredients:
- 6 eggs;
- 1.5 tbsp. milk;
- 1/4 tbsp. sugar (brown if possible);
- 1 tbsp. l. vanilla extract;
- 1 tbsp. l. ground cinnamon;
- 1/2 tsp. salt;
- half a loaf of white bread;
- condensed milk or cream (to taste).
French toast muffin: step-by-step preparation
- In a large bowl, whisk together eggs, milk, sugar, vanilla extract, cinnamon and salt. Add diced bread to the mixture and stir.
- Cover the bowl with plastic wrap and place in the refrigerator for 10 minutes. Then take it out, mix the mixture again and put it in the refrigerator for 20–30 minutes.
- Grease each hole in the mold with vegetable oil. Pour the mixture from the bowl into the mold.
- Preheat the oven to 180 degrees. Bake for 25-30 minutes.
- Then let the cupcakes cool for 5 minutes and top them with condensed milk or any cream to taste.

Ingredients:
- 4 carrots (grated);
- 1 finely chopped sweet pepper;
- 1/2 tbsp. peas;
- 1/2 tbsp. corn;
- 8 eggs;
- salt and pepper (to taste);
- 12 tbsp. l. grated cheese.
Low-calorie muffins: step-by-step recipe
- In a large bowl, mix carrots, peppers, peas, and corn.
- Grease muffin tins with vegetable oil. Fill each hole in the pan 2/3 full with the vegetable mixture and set aside.
- Break the eggs in a separate bowl, add salt, pepper and beat well.
- Add 2-3 tablespoons of beaten eggs to each pan.
- Then sprinkle well with grated cheese.
- Preheat the oven to 180 degrees.
- Bake for about 20 minutes. Then leave the muffins on the top rack in the oven for 10 minutes.

Ingredients:
- grated potatoes;
- filling to taste (cheese, bacon).
“Nests”: step-by-step recipe
- Coarsely grate the potatoes.
- Place it in greased muffin tins.
- Add any ingredients to taste (cheese, chopped bacon, ham) and bake at 180 degrees for 20 minutes or until golden brown.

Ingredients:
- bacon;
- eggs;
- milk;
- hard cheese.
Original snack: step-by-step recipe
- Place bacon in muffin tins.
- Pour eggs beaten with milk inside, add grated cheese and bake at 175 degrees for 30 minutes.

Ingredients:
- 6 eggs;
- 1 tbsp. flour;
- 1 tbsp. milk;
- 1/2 tsp. salt;
- 10 g vanillin;
- 1/4 tbsp. melted butter.
For the syrup:
- 1 tbsp. water;
- 1/2 tbsp. Sahara;
- 3/4 tsp. lemon juice;
- 10 g vanillin;
- 2.5 tbsp. l. corn starch;
- 1 tbsp. berries (blueberries, raspberries, currants, etc.).
German mini pancakes: step-by-step preparation
- Mix eggs, flour, milk, salt and vanillin until smooth. It is best to use a blender.
- Fill greased muffin tins with the mixture.
- Preheat the oven to 200 degrees. Bake for 15 minutes.
- Preparation of syrup.
Combine water, sugar, lemon juice, vanilla and cornstarch in a small saucepan and cook over medium heat until thickened. Then add the berries and cook over low heat for about 10 minutes. Top each pancake with berry syrup.

Ingredients:
- 400 g very ripe bananas;
- 100 g margarine;
- 130 g sugar;
- 2 eggs;
- 1 tsp. slaked soda;
- 250 g wheat flour;
- 50 g chopped walnuts.
Muffins with banana and nuts: step-by-step preparation
- 1. In a large bowl, cream margarine and sugar.
- 2. Add eggs and beat.
- 3. Peel the bananas, mash the pulp with a fork until it becomes a paste. Then add them to the bowl and mix well.
- 4. Add slaked soda and flour. Knead a soft dough.
- 5. Place the batter into the muffin tins. Place in an oven preheated to 180 degrees. Bake for 15–20 minutes.

Ingredients:
- 1 zucchini;
- 2 eggs;
- 150 g flour;
- 50 ml milk;
- 70 g hard cheese;
- 50 ml olive oil;
- 2 tbsp. l. semolina;
- 10 g baking powder;
- dill;
- salt, ground black pepper (to taste).
Zucchini muffins: step-by-step recipe
- Peel the zucchini and grate it on a coarse grater.
- Grate the cheese on a coarse grater and mix with the zucchini.
- Add eggs, mix.
- Combine flour with semolina and baking powder, pour into the zucchini mixture and mix.
- Pour in milk, salt, pepper, olive oil, stir.
- The dough for muffins with zucchini should have the consistency of thick sour cream.
- Place the mixture in molds and place in the oven, preheated to 180 degrees, for 20 minutes.

Ingredients:
- spaghetti (half a regular package);
- 2 tbsp. l. vegetable oil;
- 50 g butter;
- 1/2 tbsp. grated cheese;
- 1/2 tbsp. tomato sauce;
- 12–15 meatballs.
Spaghetti muffins: step-by-step preparation
- Prepare spaghetti.
- Then pour vegetable oil into them and mix. Add ground black pepper and herbs if desired.
- Sprinkle half of the grated cheese into the spaghetti.
- Grease a muffin tin with melted butter and place the spaghetti in it.
- Top fields with tomato paste.
- Now add the meatballs. They can be replaced with canned food, pieces of chicken, and boiled eggs.
- Meat fields with a small amount of tomato paste.
- Sprinkle these original muffins with grated cheese. Place the dish in an oven preheated to 180 degrees for about 20 minutes.

Ingredients:
- 500 g cottage cheese;
- 4 eggs;
- 100 g sugar;
- 70 g butter;
- 300 g flour;
- 1 tsp. baking powder;
- vanillin (to taste);
- 1/2 lemon (zest only).
Curd muffins: step-by-step preparation
- Mix cottage cheese with sugar and eggs. Grind until smooth. Add melted butter, vanillin and zest. Stir.
- Add flour and baking powder, knead the dough well.
- Place it in muffin tins, you can put the filling inside (pieces of chocolate, cherries and much more). Experiment!
- Bake in an oven preheated to 180 degrees for about 15–20 minutes.

Ingredients:
- 1 tbsp. flour;
- 1/3 tbsp. powdered sugar;
- 3/4 tsp. soda;
- 3/4 tsp. baking powder;
- 1/2 tbsp. yogurt;
- 1 egg;
- 10 g vanilla powder;
- 250 g blueberries.
Donuts in the oven: step-by-step preparation
- Mix flour, powdered sugar, baking soda and baking powder.
- Add yogurt, egg and vanillin to the dry mixture.
- Add blueberries. Other berries are possible.
- Grease a donut pan (you can use a muffin pan) with vegetable oil and place 2/3 of the dough into each cavity.
- Preheat the oven to 180 degrees and place the pan there for 10 minutes.
A distinctive feature of silicone baking molds is their high thermal conductivity. Any cake bakes more evenly, does not burn and rises equally on all sides. It is better to make the dough liquid, like for pancakes, then it will take up all the space.
Preparation:
- Sift the flour twice and mix it with baking powder.
- Grind the eggs with sugar until white. The grains should completely dissolve.
- Melt the butter. Add it to the egg-sugar mixture, add sour cream and mix thoroughly.
- Add flour and baking powder, stir with a mixer at low speed to remove all lumps.
- Separate about a third of the dough and combine it with cocoa. Place this part on the bottom of the shaped form - it will look beautiful if it looks like a flower.
- Pour the white part of the dough around the edges.
- Bake on medium heat for 30-40 minutes.
Do not rush to remove the finished cake from the mold. Let it cool a little and then it will easily come away from the walls. Invert the baked goods onto a plate. When serving, you can sprinkle a little powdered sugar.
If you use baking recipes in the oven in a silicone mold, the dish will surely turn out excellent. You can not only bake in such containers, they tolerate freezing well and hold up well when making jellies and jellied meats.
How to use the silicone mold:
- Choose products only from a trusted manufacturer. It shouldn't smell. It is better to take a neutral and calm color.
- Before baking for the first time, carefully rinse the container under warm running water. Do not use harsh abrasives or chemical cleaners. Dry and grease the container with oil. You won't need to lubricate it anymore.
- Silicone products can be washed in the dishwasher, but choose the delicate cycle.
- Do not place the container on an open fire. In a gas oven, it would be wise to use a tray or baking sheet.
- Silicone tolerates temperature changes well. You can freeze the semi-finished product and then immediately put it in the oven or microwave.
If a dark coating appears on the walls, do not rush to scrub it off. This is a normal phenomenon; the material has darkened, but has not lost its properties.
The shapes of unusual configurations will pleasantly diversify your menu and will especially delight kids.
?Not long ago, silicone baking molds appeared on store shelves. These colorful molds of different shapes and sizes immediately caught my attention. True, at first I could not even imagine that they were intended for baking in the oven at high temperatures.
To begin with, I was confused by the fact that silicone, in my understanding, I think many will support me, is not a particularly durable material, and even more so, not the most resistant to elevated temperatures.
Secondly, even if the silicone does not melt when baking in the oven, will any harmful substances in baking when using them?
After reading and listening to rave reviews from happy owners of silicone molds, I made up my mind. And I didn’t regret it!
Friends, the thing is really worthwhile and very convenient.
Silicone molds have a number of advantages.
· They do not need to be lubricated with oil, only before the very first use. Subsequently, you can safely fill them with dough without prior lubrication. The only thing is that if there is no fat in the dough, then before filling the mold it is advisable to wet it from the inside with water so that the baked goods do not stick.
· Baked goods in them almost never burn and are baked very evenly. 
· Pleases with the abundance of shapes and sizes. Now you don’t have to be a professional pastry chef to bake a cake in the shape of a rose or a bear pie.
· The finished cake is very easy to remove from the mold, no matter how intricate it is. In this case, the integrity of the cake is not compromised.
· Quite affordable even for not very rich people (you can choose many forms within 50 hryvnia).
· The bright colors of the molds please the eye not only of the cook, but also of the child, who has something to do in the kitchen. The cooking process is more fun.
· The forms are easy to clean in the dishwasher! And they do not take up much space when stored, because they are very flexible.
· In silicone molds you can not only bake, but also freeze. For example, vein. The molds can withstand negative temperatures very well.
 Regarding my initial doubts, I canconfidently say, to high temperaturesSilicone molds are very stable. I personally baked pies at a temperature of 250 degrees. The forms did not change either color or appearance. As for harmful substances, I did not analyze the finished baked goods.
However, I can assure you that no unpleasant odors that usually accompany chemical reactions were noticed. I've been using the forms for about a year.
Some tips for using silicone molds.
1) When choosing a uniform in a store or market, pay attention to its smell. There should be no strong toxic odor.
2) Before baking from low-fat dough, pre-wet the pan with plain cold water.
3) Before filling the silicone mold with dough, place it on a regular iron baking sheet and put it in the oven in this form. That is, the silicone mold with the dough in the oven should stand on a baking sheet.
4) Avoid contact of the silicone mold with flames.
Recipe for baking dough in a silicone mold.
There are so many housewives with so many opinions about how, where and what to use to prepare various dishes. Some people prefer ceramic, glass, refractory utensils for baking, others prefer cast iron or even disposable ones, but the popularity of silicone utensils is increasingly gaining momentum. A large selection of sizes and shapes provides the opportunity to use your imagination. For those who are still new to this wonderful invention, here is our selection of information about the properties, types and rules for using silicone molds.
Are silicone molds harmful to health?
Some housewives are still afraid to use silicone utensils, but in vain, because they are very convenient and practical to use. In order to confirm or dispel some myths about whether silicone molds are safe, we suggest taking a closer look at the properties of the material from which such products are made.
- Upon careful inspection, make sure that the form, although flexible, is elastic, then it will not “float” when the temperature changes.
- A pungent odor and very bright color of the product indicate low-quality raw materials that should not be used for contact with food.
- Choose silicone utensils that are neutral in color, such as medical grade silicone. It does not oxidize when interacting with foods, does not react with food acids, does not emit toxic substances when heated, and therefore does not harm human health.
- If the molds are made without any violations of technological processes, all rules are followed, and only high-quality materials are used as raw materials, you don’t have to worry about your health.
- Choose products from well-known manufacturers TVS, Ballarini, Tescoma, Vinzer, Moneta, Ikea, Lurch, who guarantee and confirm with quality certificates that their products are safe.
Types of silicone molds
Silicone baking molds come in different shapes and sizes: round, oval, square, cup, heart, crescent. Some are suitable for baking small muffin cupcakes, then one general form can contain from 4 to 12 cells. Larger pies, hot dog buns, breads, waffles and muffins are baked in individual pans that may have smooth or ridged sides. For baked goods that will be intended for children, shapes in the form of animals and flowers are provided. Among all children's forms, Barney Bear and Baby Dragon are very popular.

How to properly use silicone baking pans
In order for silicone baking dishes to serve you for a long time and be reliable assistants in the kitchen, you need to follow a few simple but mandatory rules for caring for such specific utensils. Step-by-step recommendations on how to clean and store the molds will help you obtain the necessary information that will be useful so that you can use simple and convenient utensils at the right time.
What to do before first use
After purchasing a new silicone mold, be sure to wash it under running water using detergents: it is necessary to wash off any possible dust. Dry completely so that not a drop of moisture remains. Lubricate the entire surface with vegetable oil and leave for a while so that it is absorbed in the right amount.
Do I need to grease the pan before baking?
When the first stage before use has completely passed, then in the future you no longer need to think about how to lubricate the mold; there is no need for this. When you plan to bake a large pie, you can lightly moisten the pan with water.

Do not allow the mold to come into contact with open fire, as this may cause it to melt. Too high temperatures are also contraindicated; the optimal temperature is from 180 to 210 degrees, which often corresponds to the recipe for a culinary product. Sometimes the mold itself indicates the temperature of use - up to 260 degrees.
How to remove baked goods
After the baking process is completed, the pan should be carefully removed from the oven and allowed to cool slightly for 5-7 minutes. The edges come off easily if you peel them off a little by hand. By turning the pan over or tilting it to one side, remove the baked goods without problems or breaks. Do not use cutting or sharp objects that could damage or puncture the mold. The best helpers will be wooden, plastic, and silicone spatulas.

How to clean after baking
After finishing baking, wash the pan immediately or immerse it in water for a while. Residues of dough can be easily removed from the smooth surface of the silicone (with a sponge and detergent).
How to properly store silicone molds
More convenient to store dishes have not yet been invented. Silicone products are easily folded, placed inside each other, when unfolded they immediately take their original shape, and are not afraid of temperature changes.
What to cook in silicone molds - recipes with photos
Cooking in silicone molds is a real pleasure. Such dishes are useful for both the oven and the microwave with a multicooker. Original forms of dishes (cup and saucer, fruit-shaped) add variety to kitchen life. Prepare delicious baked goods with your own hands in convenient silicone containers according to our recipes, which we have selected especially for you.
In the oven
Recipe No. 1 – Chocolate muffins
Ingredients:
- Flour.
- Cocoa powder.
- Baking powder.
- Butter.
- Sugar.
- Eggs.
- Vanilla sugar.
- Kefir.

Preparation:
- Mix the dry ingredients - 100 grams of cocoa, 250 grams of wheat flour, 1 teaspoon of baking powder, salt and soda, half a teaspoon of vanilla sugar.
- In a separate bowl, melt 100 grams of butter, add 250 grams of sugar, 2 eggs and 200 grams of kefir.
- After mixing all the products, add 200 grams of chocolate and mix again.
- Pour the dough into the prepared silicone molds and bake for 25 minutes in the oven, which is heated to 200 degrees.
Recipe No. 2 – Marble Cake
Ingredients:
- Flour.
- Butter.
- Sugar.
- Milk.
- Eggs.
- Baking powder.
- Cocoa.

Preparation:
- Soften 250 grams of butter and beat well with 1 cup of sugar and vanilla.
- Gradually add 4 eggs and half a glass of warm milk.
- Add one packet of baking powder and 2.5 cups of flour and mix well.
- Divide the dough into two parts, add three tablespoons of cocoa to one.
- Place the liquid white and chocolate dough alternately into the silicone mold, 1 spoon at a time, without mixing.
- Place in the oven when the temperature reaches 200 degrees. Baking lasts 40-45 minutes.
In the microwave
Recipe No. 1 – Cupcake “Curd Tale”
Ingredients:
- Semolina.
- Cottage cheese.
- Sugar.
- Sour cream.
- Eggs.
- Soda.
- Flavored alcohol.

Preparation:
- Mix 200 grams of cottage cheese and semolina and leave for 10-15 minutes for the cereal to swell.
- Add 2 eggs and 2-3 tablespoons of sour cream to the resulting mass. Stir thoroughly, whisking, add 80 grams of sugar.
- Separately mix half a spoon of soda and one tablespoon of alcohol, add everything to the dough. Beat with a mixer at high speed.
- Fill silicone molds a little more than half the volume. Small muffins will be ready in 4-5 minutes, large muffins will take 8-12 minutes.
Recipe No. 2 – Five Minute Cake
Ingredients:
- Flour.
- Starch.
- Egg.
- Vegetable oil.
- Sugar.
- Baking powder.
- Milk.
- Cocoa.
- Sour cream 10%
- Powdered sugar.

Preparation:
- Beat one egg with four tablespoons of sugar, add two tablespoons of cocoa. Add a mixture of flour (4 spoons), baking powder (0.5 teaspoon) and starch (1 spoon), stirring.
- Pour in 5 tablespoons of milk and 3 tablespoons of butter.
- Bake at maximum power of 1000 W for 3-5 minutes.
- Grease with sour cream and powdered sugar.
In a slow cooker
Recipe No. 1 – Cupcake with jam
Ingredients:
- Sugar.
- Sour cream.
- Baking powder.
- Sour cream.
- Eggs.
- Butter.
- Flour.
- Jam or preserves.

Preparation:
- Mix fat sour cream (25-30%, 200 grams) with one chicken egg and two tablespoons of sugar.
- Add 50 grams of softened butter to the mixture. Beating with a mixer will make the cake more tender.
- Mix one teaspoon of baking powder and a glass of flour. Mix with liquid mixture.
- Select the desired silicone mold so that it fits into the multicooker, fill it with half the dough.
- Place jam or marmalade on top, then the remaining dough.
- “Baking” mode, after 1 hour the cake with jam is ready.
Recipe No. 2 – Cottage cheese casserole
Ingredients:
- Cottage cheese.
- Sugar.
- Eggs.
- Vanillin.
- Starch.
- Citrus zest, nuts.
- Milk.

Preparation:
- Beat the whites of two eggs into a thick foam.
- Mix 600 grams of cottage cheese, 100 grams of sugar, 250 ml of milk, two chicken yolks, 50 grams of starch and half a bag of vanilla sugar.
- Add chopped nuts and candied fruits to the mixture.
- Stirring carefully, add the whites.
- Set the “Baking” mode for 50 minutes.