Any student class, from the youngest to the graduate, required place to study lessons.
Desk for schoolchildren should be functional, convenient and uncluttered. Most often chosen for children wooden desks.
Today, when from the first grade students work with computer, There should be room on the table for it too.
Manufacturing DIY school table - significant saving for the family budget. You can decorate the tabletop in the most incredible ways, and then the table you made yourself will look like an expensive designer thing.
School desk options
Table for first graders should be spacious so that there is enough space for textbooks and notebooks.
For more adult student, you can purchase or make a multifunctional table with retractable panel for keyboards and with many shelves or drawers on the surface.
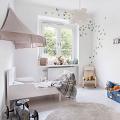
It is very important that workplace the child was as comfortable as possible, and all the necessary for classes things were at hand.
School tables can be completely various in appearance and design - from simple angular and straight to creative

Folding table

Table-desk

Desk for schoolchildren
 We won't consider typical desks that stood in all Russian apartments in the 90s of the last century. Such tables boring in execution.
Let's consider unusual table with A-shaped legs (trests) and solid long tabletop. You can use an old one as a countertop door canvas with a smooth surface.
Stages of work
Step 1. Draw and cut out table top. We process it with sandpaper or a grinding machine. You can make a special edging on the sides finishing edging, which is sold at any hardware store.
Note: with the edging, the width of the finished tabletop will be 72 cm!
Step 2. Cut 8 boards long no less 75 cm (if necessary, the edges will need to be trimmed with a jigsaw), sand them.
Step 3. Corner tilt boards for trestles should be such that the height of the legs in total with the thickness of the table top was 75 cm. To do this, cut out small bars, which will be located between the upper parts of the supports. The width between the lower parts should be 22 cm.

Step 4. In two boards 70 cm long drill two 9 mm holes (for mounting the trestle). The holes should be equal distance! Above retreat about 3.5–4 cm, it all depends on the width of the board. Drill holes in the middle of the upper part of the legs 9 mm. Furniture bolts we fasten legs and strengthen the structure self-tapping screws.
Note: The size of the bolts is 6 mm, and the diameter of the holes for them is 9 mm! This is necessary because the table legs are attached at an angle.
Step 5. At the bottom there is a goat we fix two bars long 19 cm. The height of the fastening of the bars is not less than 3 cm from the floor. On bars we lay two boards each that will serve shelf, We fix them with self-tapping screws.

Step 6. Having measured the distance between the goats, screw it on wooden blocks to prevent the tabletop from moving.

For the best sustainability It is recommended to use countertops dowels. To do this, drill holes in the supporting boards with a depth of 8 mm, and in table top – 22 mm. The dowels should be dipped in glue PVA and drive into the board, then carefully place the tabletop on them. For such massive table you need to make 2-3 dowels on each side.

Step 7 All wooden parts of the table should be handle impregnation. For a children's table you need to apply no less 3 layers(so that it is impervious to moisture). Each layer should fully dry out. After the last layer has dried, the table is painted or varnished. Can be mixed with varnish a little dye to give it the desired shade.
Note: The table can be decorated as desired. The best decorative technique for a children's table is simply choosing a cheerful picture or decorating the tabletop with images of your child's favorite characters.
School table for two children
Convenient and practical option for two children can be angular table. Each child is provided with a workplace and retractable storage boxes for study supplies.
Tabletop width - 600 mm, thickness - from 16 mm.
Stages of work
Step 1. Execute sawing material or order it from a carpentry workshop.

Step 2. Collecting everything boxes. There should be 6 large ones (3 pieces for each table base) and 4 small drawers for various small items under the tabletop itself. Holes for confirmations drill using a Fostner drill. We nail hardboard to each box.
Note: confirmations can be replaced with ordinary self-tapping screws, but their connection is not so reliable.
Step 3. Using corner clamps assembling the cabinet. Fasten with self-tapping screws guides for boxes.

Step 4. We assemble the table. Tumbu and lateral We fasten the wall on top with small chipboard. Cover the part with a larger sheet rear walls. We install guides on small drawers and facades.

Step 5. In the same way we collect second the table that will longer due to two cabinets.
Step 6. We install the tabletop on short table. To do this, screw it onto small sheets.
Step 7 We attach the tabletop to second table.

Step 8 Install facades on large boxes, attach to them pens. We nail hardboard.
 So that the child has comfortable work at a new desk, you should take account following:
- Width The table for a child should be from 60 to 80 cm, length from 120 cm.
- Boys require more workspace than girls.
- Workplace It is recommended to organize a schoolchild near the window.
- Definitely worth installing on a desktop lamp with bright lighting. For right-handers, the light should fall from the left, for left-handers - from the right.
- The chair should be comfortable, it back – rigid with bending. Good decision - orthopedic armchair.
- Screen monitor should be located during operation below eye level at an angle of 15-30 degrees.

- Color spectrum The workplace should be selected based on the child’s wishes, but you should not make it too colorful and full of poisonous colors. A tacky table can distract child from doing homework. It is enough to choose bright accessories and furniture.
- Accessories are worth choosing creative shapes: and the children's table should have its own zest. Business minimalism – not the best option for a child.
How to make a table for a schoolchild with your own hands, see video:
And he soon needs to go to school; parents inevitably face the problem of arranging a comfortable workplace.
Both his academic performance and health depend on this.. When the search for a suitable desk ends in failure (it takes up a lot of space, it is made of low-quality material, it does not correspond to the child’s height, etc.), dads come to the idea that they should make something similar on their own.
A homemade children's desk, which can be made, should be folded and save space, is not so difficult to make. However, it is necessary to take into account a number of points.
What you need to know when making a desk for a schoolchild
When making furniture for the younger generation, be it a desk or a children's table, there are points that cannot be ignored:
Creating and decorating a work area for a schoolchild- Environmental friendliness of the material. Preference is given to wood species: oak, pine, birch.
- Accounting for the features of the anatomy of the student. You should not make a desk for growth, since the child’s spine is not yet fully formed, and attempts to “adapt” to the height of the table will lead to scoliotic changes in it with the possibility of complications in subsequent years. The best option that will give a child’s room additional space is a transformable desk, which can be adjusted in height and angle with your own hands.
- Convenience. A children's desk, created by the hands of parents, should be designed in such a way that when sitting at it, the child does not rest his knees on the tabletop. If this happens, it’s a signal that it’s time for the desk to “grow” with it.
- Adjustable table height and tilt angle. It is desirable that the desk have a simple but reliable adjustment mechanism, accessible even to our child. If treated well, she can last all school years.
What to pay attention to when making
- Safety (all corners are rounded, surfaces are polished, there are no protruding parts that a student could get caught on and get hurt or tear clothes);
- The design of a children's table should not be flashy, so as not to distract the child's attention from learning activities;
- Covering the tabletop with glossy varnish is not welcome, as this can create glare at a certain angle of incidence of light, which negatively affects the student's vision;
- Stability (a children's table created according to their own project and with their own hands must be stable, not slip on the floor).
Preparation of necessary materials and tools
For self-production of children's furniture, you will need a standard set of tools:
- hacksaw,
- clamps,
- hammer,
- cutters,
- electric drill,
- sandpaper,
- measuring instruments (tape measure, square),
- carpentry glue,
- screws.
The materials for work are as follows:
- plywood 10 mm,
- piano hinges,
- axles for wheels 250 mm in diameter (if there is a desire for easy transportation of the table),
- wheels,
- putty,
- primer,
- enamel for painting.
If you live, then in order to make a children's table according to the original project, you will need to remember the drawing lessons and complete the drawings of the blanks with your own hands, then you should take them to the carpentry shop. This will save you from having to cut, which entails the appearance of fine wood dust and shavings. And from the finished parts you can already begin assembling the desk.
Instructions for assembling a desk for a schoolchild
- First you need to cut out the front panel (provided that you do this yourself, work with a hacksaw at an angle of 35-40 degrees relative to the surface), carefully go over it with sandpaper and round the upper corners.
- Then mark the places for the long piano loop (on the right) and the vertical bar (on the left). D
- In order for the right folding wall of the desk to slam shut with the left, the bar is placed under the left hinge. P
- At the same time, the thickness of the sidewall should be 15-20 mm less than the plank.
- The hinges and the bar are secured with screws, glued with glue, and the remaining parts are connected using a system of grooves.
- The side walls of the desk should have a special recess and grooves. They are made slightly wider than the thickness of the plywood itself from which the structure is constructed.
- In order for the grooves to be uniform on both sides, the templates are pressed against each other with a clamp.
- During assembly, the grooves of the lid and shelf (on the front pillar) and the seat (on the rear pillar) should fit into these grooves.
You have seen that making a children's table is not at all difficult. To ensure that it does not interfere during the holidays, it is collected and placed in a special case-frame, which is also prepared for this occasion.
Making a case for an assembled desk
The frame is made of thin boards and plywood corners in such a way that the front panel can be placed in it, resting it on the crossbar. The other side of the frame is equipped with a stretch cord (for example, from an expander) and corners for fixing the remaining parts of the desk.
The frame is placed on wheels attached using improvised loops (for example, from bent nails), into which a 250 mm axle is inserted (for example, from an old stroller). A handle is mounted on one of the sidewalls.
 Decorating a children's desk
 Desk finishing
DIY children's table decoration is made using hot drying oil. While the first layer dries, prepare a putty mixture from:
- 1 kg putty,
- 10 g bar soap,
- 30 g wood glue,
- 500 g ground soap,
- 180 g drying oil,
- 0.2 l of water.
Boil water with glue, then, stirring, pour in the remaining ingredients. At the end, chalk is added for thickness. The mixture is applied hot, smoothing with a spatula. After drying, it is sanded and painted again.
And only after this is it possible to apply paint and varnish.
Recently, it has become fashionable to decoupage a children's table, but in relation to a school desk it is inappropriate to do this, since unnecessary details will only distract the child's attention. If desired, you can decorate the children's table with your own hands on its sides to harmonize with the surrounding interior.
The first table, as expected, has four support legs. But they are not connected to the tabletop as a common frame, but in pairs with each other. The legs are made of single planks 600x80x20 mm. From below they are attached to supporting crossbars made of the same planks 500 mm long with thrust bearing bosses and reinforcing triangular struts on both sides of each leg - for greater stability. At the top, each pair is connected by double horizontal ties, located between them; the entire assembly is secured with two furniture screws and wing nuts. The same screws are used to secure the tabletop posts, which also fit between the screeds, close to the legs, thereby ensuring the necessary rigidity and stability of the structure. Dimensions of the board-racks are 650x80x20 mm. Each rack has eight holes drilled for screws - this allows you to adjust the table in height and tilt. At the top, the racks are connected by crossbars, on which a tabletop measuring 1200x800x20 mm is placed, which has an anti-skid rail attached to one edge, holding the shield on the crossbars in an inclined position. For this purpose, ledges for the rail are cut out in the crossbars.
The second table-desk is distinguished primarily by a different solution for the supporting part: it does not have legs, as such. Their role is played by two right triangles.
1 - transverse support (4 pcs.), 2 - triangular strut (8 pcs.), 3 - leg (4 pcs.), 4 - double tie (2 pcs.), 5 - table top stand (4 pcs.), 6 - tabletop crossbar (2 pcs.), 7 - anti-slip rail, 8 - tabletop.

1 - table top, 2 - stiffening panel, 3 - footrest bar, 4 - support cross member of the table top, 5 - external boards of inclined parts of supports, 6 - insert of inclined parts of supports, 7 - external boards of struts, 8 - insert of struts, 9 - boards external vertical parts of supports, 10 - insertion of vertical parts of supports, 11 - external boards of horizontal parts of supports, 12 - insertion of horizontal parts of supports, 13 - holes for adjusting the tilt of the tabletop, 14 - pin strut clamps (pins).
Table of table-desk parts

(Item numbers are shown in the figure)
They can be made from a wooden beam of a suitable cross-section, but better - from a package of planks. The option under consideration has undeniable advantages. And not only in the greater availability of material. The main thing is that by manipulating three boards of different lengths, it is easy to obtain a hinged joint and the desired groove at the ends and even in the middle of the workpiece without any sawing or gouging. Thanks to this, a spike and an eye are formed at the junction of the horizontal and vertical parts of the support, and spikes at their ends - at the junction with the inclined part. The latter, in turn, has eyelets at the ends and a groove-slot in the lower half formed in the same way. The same can be said about the strut: by extending the middle plank relative to the outer ones, we get a tenon on one side, and a hinge-eye on the other. With its spike, the strut moves along the gap in the inclined part of the support and is fixed in one of its holes, setting the required slope of the tabletop.
The triangular supports are connected in two places: from below - by a step-bar, from behind - by a stiffening panel. The joints are provided either with inserted round tenons (dowels), or metal corners, or wooden blocks.
The planks that make up the support and the strut are connected to each other in any convenient way, from nailing down to gluing under a press (wood glue, casein, PVA). After manufacturing, they are sanded and polished (if it is intended to be coated with furniture varnish) or putty and then painted. The same applies to the countertops. If it is made of thick plywood, then it is quite possible to varnish it, since the wood has a beautiful pattern. It is better to paint a typesetting made from individual boards or chipboard, having first carefully sanded it with sandpaper, puttyed it and sanded it again. It is advisable to apply the paint in several layers with intermediate drying for the period indicated on the can label.
A good aesthetic effect can be achieved by using multi-colored enamels. So, if the tabletop and its supporting crossbar with a brace are painted in one color (for example, lilac), and the triangular supports along with the stiffening panel and the bottom bar are painted in another, say, purple, then in combination with the originality of the design this will immediately turn homemade furniture into “ branded."
How to make a children's table so that it can be both an original desk for the child and at the same time a playhouse for toys. In this article we will tell you how to do all this in one day.
Many parents prefer to buy a ready-made table for their child and not bother. But there are also those who simply cannot afford it. Or they like to do everything with their own hands and to the required dimensions of their interior. The advantage of this table is its versatility. This is a desk, a playhouse, and a place to store toys.
In order to make a wooden desk, you need to purchase material, a sheet of furniture chipboard, of a suitable color. Or you can construct it from leftover material from previous creations, or from unnecessary furniture. This is exactly the economical option that will be described in this article, and besides this, you can read what else you can do
Required tools and material
— Electric jigsaw (hand-held circular saw)
— Hacksaw for metal
— Manual milling machine (can be replaced with a feather drill for wood of the required diameter)
- Drill
— Corner with a ruler
- Stationery knife
- Roulette
- Pencil 
Material
– chipboard
- fiberboard
— Self-adhesive film of a suitable color
— End tape on chipboard, corresponding color
— Self-tapping screws or furniture screws, nails
Accessories
— Piano loop 1 pc.,
— Furniture hinge 4 pcs.,
Let's move on to the dimensions of the parts and the drawing
First, you need to sketch out a drawing on paper; do not forget that the dimensions can be changed if desired. 
— Sidewalls 2 pcs. (300 mm x 790 mm), angle can be 90 - 60 degrees;
— Shelves 3 pcs. (520 mm x 300 mm), shelf length taking into account the thickness of the side walls;
— Doors 2 pcs. (280mm x 120mm);
– Roof 2 pcs. (295mm x 600mm), you can make one half of the roof from fiberboard;
— Back wall 1 pc. (520 mm x 560 mm), it can also be lightened and cut from fiberboard.
Cut out the details of the table - house
So let's get to work. On the surface of the prepared material, draw parts according to size with a pencil and cut them out with an electric jigsaw. 
Attention! The width of the roof parts must be two centimeters wider than the main structure on each side 
The ends where chipboard parts are cut must be glued with adhesive-based end tape. Attach the tape to the end and carefully iron it with a hot iron, placing a sheet of paper between the tape and the iron. Cut off the excess tape with a sharp knife. 
We connect the prepared parts
Making the base
Screw three shelves to one side panel. On the other side of the shelves, attach the second side panel in the same way. In order to hide the screws, they must be recessed into the body of the material. To do this, drill holes in the desired location with a drill larger than the diameter of the screw head. On the front side, the caps can be puttyed if you plan to decorate the end later. Otherwise, use furniture screws with plastic plugs or stickers. It turned out the frame of the future desk 
Installing the roof
We take a piano loop and measure the required size, cut off the excess with a hacksaw. We fasten the loop to the upper shelf and the sidewall of the roof at the level of the chipboard thickness. In order that, when laying out the table, the loop would not separate the working area of the desk.
The second part of the roof is simply screwed to the base. 
Installing doors
Table doors can be attached both to the piano hinge and furniture hinges. It must be remembered that when using a piano hinge to secure the door, you need to install stops.
Consider the second method of fastening - a furniture loop.
Important! The doors must be the correct size, as they serve as the legs of the folding table.
To fasten the door using a furniture hinge, a milling machine was used (or use a special drill). Handles can be made either in the form of holes (decorate them in a child’s style), or they can be screwed onto any furniture handles.
We simply nail the back wall of fiberboard.
decoration
All visible parts (if desired, internal parts) can be painted or covered with decorative self-adhesive film. In order for the film to last a long time and stick as tightly as possible to the product, you need to use a soft cloth and a hair dryer.
The children's table and desk is ready, this is how it looks when assembled and looks more like a house: 
And this is how it looks disassembled and looks more like a desk or table: 
Children's furniture is always in demand. When purchasing it, every parent pays attention to the material from which it is made. Headsets made from natural wood are especially popular. However, the cost of such furniture is always higher than average, and not every buyer can buy it. Today we will look at what a do-it-yourself children's desk can be. It won’t be difficult to figure out the drawings and necessary equipment. We will tell you how to make comfortable furniture with minimal knowledge, lack of experience and a small amount of money.
Small desk made from natural materials
A children's desk is a must-have for children's education. This furniture accessory can be used not only at school, but also installed at home. At the same time, in order to make it, there is no need to spend huge amounts of money.
Important! To make a children's desk with your own hands, you need to understand the drawings from the very beginning, and based on them, purchase all the necessary components. In fact, all furniture “patterns” are identical to each other and can only differ in the size of the resulting desk.
Materials for work
To make a desk at home you need to have:
- confirmations;
- self-tapping screws;
- piano hinges, 50 cm long;
- metal corners;
- sandpaper;
- cutting plywood according to the drawing;
- screwdriver;
- jigsaw;
- Sander.

Instructions for assembling the table:
- All plywood template cuttings must be sanded. Achieve the best possible result. Let them be more smooth and less uneven. To perform this operation, you can use a grinder or similar machine.
Important! When sanding wooden surfaces with sandpaper, this operation must be done in three stages. At the first stage, process with P40 grain, then with P120 and P220. In this case, you will achieve the best result.
- All sharp corners on the furniture piece must be rounded using a jigsaw.
- For convenience, we recommend cutting semicircular recesses in the sides of your future home desk. They are necessary to make it more comfortable for the child to sit and learn lessons.
Important! When forming this design, your child will not rest his knees when turning, and he will not be disturbed by the sharp corners of the table.
- At this stage you need to attach the legs to the bottom of the box. This operation is performed with the help of confirmations. Before doing this, you should drill holes for these fasteners.
- Now you need to lower the bottom eight centimeters lower than the edge of each leg.
- We fix the front wall of the resulting workpiece.
Important! It is worth considering that the top edge should be level with the legs. This is necessary to ensure that the structure is almost even and perfect.
- Using a screwdriver, attach the screws to the back wall of the workpiece. At this point you will have a protrusion. It will be several centimeters higher than at the edge of the legs of the structure.
- We secure the tabletop using piano hinges. Once you secure this piece of furniture, you will have a drawer in which you can store various items for homework, drawing, or other items.
Important! Please note that:
- the child should easily lift and lower this structure;
- it should move without sticking or difficulty;
- When closing the countertop, the surface must be level.
A DIY school desk is ready! Now you can start making the chair.
Important! A desk for a schoolchild is very easy to make with your own hands. With minimal knowledge, a lot of desire and a small amount of money to purchase basic materials, you can make an excellent piece of furniture for your child.
Making a desk chair at home
If you are making a children's desk with your own hands, have figured out the drawings and made the entire structure, then you can start making a chair. Moreover, this accessory is present in the schemes for making furniture for schoolchildren.
- At the first stage, you need to cut out the parts for the children's chair according to the drawing.
- Then smooth out all the rough edges and round the corners.
- We assemble the chair according to the sketch.
- We fasten all the parts to each other using a screwdriver and confirmations. We advise you to secure all the parts as best as possible, especially the backrest and the crossbar under the seat, since all children love to ride on the legs of the chair.
Important! If desired, you can give a unique design to the chair. For example, cut out a particular shape on the back of a chair. For example, a heart, a circle or a flower. This must be done using a jigsaw.
- The final stage in making a desk for a schoolchild with your own hands along with a chair is varnishing.
We make a height-adjustable table with our own hands for schoolchildren
If your child has gone to school, then one of the most important problems that parents face is choosing a desk for the child. This question concerns furniture installed at home. We suggest you make a height-adjustable table with your own hands. It has a large number of advantages compared to other pieces of furniture for teaching lessons and the cost of this desk is quite low.
Important! Making an adjustable table will allow you to change the height of the tabletop from 57 to 72 cm, in increments of 5 cm. In addition, you can change the angle of the table from 0 to 90 degrees. The last indicator is theoretical, the adjustment step does not exceed 5 degrees.
- for drawing use 0-5 degrees;
- letters - 10-15;
- for reading - 20-30 degrees.

Materials for work
To make a height-adjustable table with your own hands you will need:
- base;
- lifting mechanism;
- countertop.
Important! The desk with an adjustable tabletop is made of planed wood. This material will need to be pre-polished, as described in the first part of our article.
Instructions for assembling the adjustable table:
- We purchase planed wood.
- We grind the surfaces.
- According to the design on the guide board, we mill a special groove. Its size is 1x1 cm.
- We round off all sharp corners on the structure. This is best done with a sander. Can be done with different types of sandpaper.
- We connect the adjustable tabletop. To do this we need threaded rods, nuts and washers.
- We attach the top shelf and footrest using confirmations.
- The lifting mechanism is manufactured according to the drawing.
- It is necessary to mill two grooves measuring 1x1 cm on the lifting mechanism. Four holes with a diameter of 2 cm should be drilled in the center of the surface.
- When assembling the structure, you need to insert the lifting mechanism into the base, then secure the tabletop. This is done using studs, nuts and bolts.
The height-adjustable table is ready!