In addition to its functional mission, the mirror serves decorative ornament the entire interior of the room, regardless of its purpose. Basically, mirrors are purchased ready-made, and the products offered are produced mainly in standard configurations, but you can also purchase a designer thing, but its cost will be quite high.
You can solve the issue yourself by making a frame for the mirror with my own hands or decorate the existing one with the help of improvised materials and personal imagination.

If your imagination is a bit tight, you can always resort to the help of Internet resources, where you can see a lot of photos with options for decorating mirrors.

Mirror Decoration Ideas
Perhaps, almost everyone knows the amazing property of mirrors - the expansion of the space of the room, making it visually larger than the actual size, and the role of a stylish interior decoration.


You can decorate mirrors various materials available in sufficient quantity for everyone. And your indefatigable imagination and great desire will translate into reality any ideas for decorating mirrors, moreover, made with your own hands, which will make your creation truly priceless and unique.

The main field for creativity in decorating mirrors is not the mirror surface, but its frame, i.e. frame. To decorate it, you do not need special knowledge or work experience at all, this process is quite accessible to everyone, the main thing is to have good taste and be creative in the design process.

To decorate a frame for a mirror, you can use: seashells, pieces of broken glass or ceramics, tile fragments, paper, newspapers, jewelry items, mosaic remnants, bamboo sticks, tree branches and much more.


Using broken dishes
It is easy to make a mirror decor from fragments of broken dishes with your own hands. Did your favorite cup or plate break? Do not rush to throw away the fragments, because they can be used to build a decoration for a mirror frame.

Cut the mosaic pieces with the appropriate tool. Prepare in advance a draft of the future creation and a field for creativity.

Glue the mosaic components on top of the workpiece using ordinary glue, small beads and pebbles with mother of pearl will not be superfluous, in addition, you can use other details at your discretion. At the end of the process, it is necessary to grout the frame surface and wipe it with a soft cloth.

Decor with shells
Decorating a mirror frame using shells is as easy as shelling pears, with glue, acrylic-based paints and a sufficient variety of shells on hand. Prepare the surface of the frame in advance, clean it from dust and dirt. Apply glue on top of it and lay the prepared shells in the intended order.


Straight lines, wavy, in the form of circles or bends, and other configurations will look beautiful. Dry the composition for some time, then cover acrylic paint or fix with varnish.

Stone decoration
The frame, decorated with stones, looks quite expensive and stylish. When using glass drops, do not forget that they are quite massive, which means that it is worth leaving space around them free. Do not combine stones of different types and textures.

For decoration, the ideal choice would be: smaller than average pebbles, glass in the form of a drop, crystal elements, artificial or natural stones, rhinestones and other materials. As a fixing, use a special transparent glue.

We decorate the wall with mirrors according to the rules
In order not to spoil the wall with future creations, and to make the decor of the mirrors on the wall successful, you must follow certain simple rules:
- give preference to mirrors of the same dimension, it is better to use products no larger than average;
- products of non-standard forms, as a rule, are not placed in frames;
- round or square mirrors should be decorated with a beautiful frame;
- a composition of the same type of mirror frames will look solid, regardless of the size of the mirrors;
- use no more than 5 mirrors in the composition with a spectacular and stylish frame, otherwise break the harmony;
- a win-win option would be to use mirror frames, which are ideally combined with the whole style of the interior solution of the room.


Photo decor mirrors


Required mirror materials nautical style
- Mirror (any shape);
- Starfish, river pebbles, various small shells. If it so happens that you do not have the opportunity to collect such materials immediately near the sea, you can buy ready-made kits in stores;
- pearl beads different size;
- Adhesive composition (optimally - super-glue);
- Adhesive paper or bandage.
- Necessary labor tools: scissors, as well as tweezers.

How to decorate a mirror in a marine style
1. Before starting work, you need to clean the surface of the mirror with a glass detergent, it is advisable to thoroughly rinse the shells, river pebbles, this is quite important point, because the adhesive composition does not hold greasy or dirty surfaces together well.

2. Using an adhesive bandage (or paper), we will make a frame on the mirror.

If necessary, you can also glue the shells on the mirror surface, but the advantage of this “frame” is that it will help you clearly limit the place of gluing (serves as a contour), and in case of an oversight, the bandage is easier to separate from the mirror than very fragile materials.

3. Let's start gluing small shells. First you need to glue the shells on the frame big size. It is highly desirable that they be arranged symmetrically.
Try not to overload the frame, otherwise it will look overly cumbersome

Before applying the adhesive composition to the material, attach the selected shells to the frame, create several steps back at once, look at the mirror from afar. This will help to determine in advance which shells are much better combined with each other.

Glue must be applied to the shells.

4. Moving from the already glued large figures, we will attach small shells to the frame and, in addition, medium-sized sea river pebbles. Instead of river pebbles, you can also use very light, very flat pebbles, sold in flower shops to decorate potted plants. Don't forget to leave room for the beads.

5. Carefully enough, you need to glue the starfish. The important thing is that they are quite fragile. Therefore, at first, it is much better to glue the stars on an empty certain space, and only then place the rest around them.

6. It remains to fill the empty spaces with small small shells, pebbles, beads. For convenience, I advise you to use tweezers. This will make it easier to apply the adhesive to a small material.
Using tweezers, we will also fill in all the other gaps with beads.
In the same case, if you are unable to fill out absolutely everything empty seats between small shells (for example, along the edges or even small “holes”), leave them empty - only thanks to the bandage frame they will not be conspicuous.
For all those who live near the sea, there is Alternative option- fill the "holes" with adhesive and, accordingly, pour clean sea mountain sand into them. After some time, when the adhesive is completely dry, you will need to shake off excess clean mountain sand. Another method is to use small rather light beads instead of pure sand, for example, light cream, very light sand color tones.

7. Let's move on to the last stage of decorating the mirror in a marine style. When all the materials are glued to the frame, it remains to wait until the adhesive composition dries. Following this, you need to clean the surface of the mirror, as well as the shells from the remnants of the adhesive composition.
Following this, the decorated frame can also be covered with a completely colorless lacquer composition. However, this is not at all necessary: the varnish composition is needed to strengthen the structure.
Marine style mirror - photo


Record dated: 9-21-2016
This year, I finally realized my old dream - I made a decor from sea shells. I have been collecting shells for a long time - from each trip to the sea I brought with me a certain number of rapanchiks. Everyone was going to start making crafts from shells for the interior, but, as they say, “the fees were short-lived” 🙂 The only thing is that the shells were used to decorate miniature gardens in bowls, the creation of which I am fond of.
This year I was lucky to visit the sea near Anapa, in Art. Blagoveshchenskaya, where we camped on a sandy spit. There were absolutely extraordinary shells - the likes of which I had never seen in my life. They were large, bright, some even covered with some kind of limescale reminiscent of coral formations.

Of course, all the time of my vacation I was enthusiastically collecting this beauty, with the aim of subsequently making decor from shells. Other shells are smaller, I collected on the Sea of Azov when we went to the port of Kavkaz near Taman to meet a friend from the ferry.
When we were returning from the sea, we stopped at Ikea near Krasnodar and there I bought two wooden mirrors, hoping to decorate them with shells. I started decorating the mirror with my own hands while on a trip - it's nice to do something creative on vacation when there is a lot of free time. For this, I only needed pva glue, shells and the mirror itself.

How to stick seashells to glass
Many people are interested in me - how and with what kind of glue shells can be glued to glass - I will say with all responsibility that better than glue can't imagine.
You need to glue the shells like this: squeeze the pva glue onto the surface (it should be thick and create a layer of 3 millimeters on the surface. Exactly, and not like many people do - just smear the surface with a brush. In the latter case, the shells will fall off almost immediately.
But if you squeeze out the glue in a thick layer, then carefully place the shells in the glue (do not be afraid, this will not hurt the beauty), then they will stick very well. When the glue dries, its layer will become thinner and it will become transparent and invisible. This is how I glued the shells on the mirror. Large orange ones are collected on the Black Sea, and small ones - on the Sea of Azov.
See the shells yourself in macro photography - the glue is not visible at all!

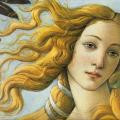
This is the original mirror.

Well, this is how it became after decorating with shells.

The next idea for execution is to make from shells. Fortunately, after the last trip I have a lot of them.
Vacation in the summer on the sea coast promises sure to bring souvenirs in memory of the beautiful hot days. There are many ways to use them at home. There are many options for using shells as decorations. You can decorate any room with your own hands and if available interesting ideas create beautiful decor from shells.
Seashell care
If there are many sea shells available, then at home, without proper care, they will quickly begin to darken. Worst of all is the smell that appears in this process. To extend the life of these souvenirs, you need to follow the step-by-step instructions.
Start caring for such a souvenir from freezing the product itself. Collect the shells in a bag and close it, then place it in freezer For undefined period. When you can handle the shellfish, defrost them. Do not open the package right away or you will smell the fetid smell of sea rotten clams. It spreads very quickly throughout the room and does not volatilize well. Cover your mouth and nose with a cotton-gauze bandage, put on gloves and remove the insides of the shells with tweezers and a knife.

Pour the clams with water and boil for 15 minutes. Drain the water and after complete cooling, carefully remove the internal contents from there with tweezers. Place your shells under running water. Then they will be completely cleansed.

The next step is bleaching. Prepare a glass container, stack your sinks and fill them with some kind of bleach. In this state, you need to leave it all alone for a couple of hours. Then they need to be washed, dried and lubricated with vegetable oil, then covered with a colorless varnish.
ADVICE! When drying seashells, do not get carried away with sunbathing. If you overexpose the shells in the open sun, they will begin to crumble.

Items to decorate
Decorating with your own hands is a very exciting and useful activity. You can give free rein to your imagination and create something new, unique with your own hands. Such an option for transforming the premises will be very economical.
Related article: Burlap accessories: strength and design
New life in the home interior in this way can be given to objects of different sizes:
- mirrors;
- coffee tables;
- lampshades or nightlights;
- dressers;
- jewelry boxes;
- photo frames.
A variety of trinkets of a similar theme will serve as an excellent addition to the main material. It can be sea horses, corals, stars, pebbles, and many other small items. They will be in your home.
ADVICE! Do not overdo it with the decoration of rooms with shells. It should remain light and relaxed.
If you overload the space with such decor, it will look very stupid and ugly. Please note that this natural component is an excellent tool not only for creating a marine image with your own hands in the house. He can make the most strict interior softer and more interesting. Such a result is possible subject to the correct selection of material.

1st idea: shell mirrors
The first thing that many girls think about using a natural component to decorate their home with shells is photo frames or mirror rims. It is these products that are in special demand among ladies.

To design a beautiful mirror with your own hands, you will need:
- mirror (framed);
- hot glue gun (can be used when performing work transparent glue"Moment");
- shells;
- beads, pearls, pebbles from the river and other decorations for decoration (they can be found at home);
- varnish (colorless);
- tweezers.
The very process of decorating a mirror with your own hands is very entertaining, but painstaking.
You need to put a mirror on the table. Cover it with a cloth or paper so as not to spoil it with glue or scratches. Then heat up the glue. Glue small shells along the inner rim.

Advice! To make them better fastened, it is necessary to pour glue on them.
After the outline is ready, start gluing the large shells. Do not forget about their organic placement relative to each other. Then the gaps between the shells are filled with decorative beads, pebbles, pearls, etc. After the mirror frame is completely covered with shells, leave the resulting product. It should dry well. It usually takes about a day. The final stage is to cover the mirror with shells with a colorless varnish.
Related article: 7 options for decorating and decorating curtains with your own hands

2nd idea: photo frame
A stylish photo frame can make every photo unique. It will add a certain charm.
Making a unique frame is quite easy. This will require:
- glue;
- shells;
- rhinestones;
- sequins;
- pebbles;
- pearls.

When all the components are ready for work, you can proceed to the process itself. Take wooden frame. Mark on it the location of the shells and other decorating trifles. Then use glue to bring the idea to life.
3rd idea: candlestick
One of the most interesting and unusual handmade jewelry is seashells as a candlestick. In order for such an interesting little thing to appear in the house, you will need a large shell, a wick and wax.

The process of preparing such a romantic attribute will not take much time and effort. You need to choose the largest shell. It should be comfortable and stable. Fix the wick in it, fill it with wax, and then let it cool.

Conclusion
Shell decor is a great chance to express yourself. It is pleasant to do it with your own hands, dream up, spend time usefully and with pleasure.
Decorating panels and bottles with your own hands (2 videos)
Seashell decor options (43 photos)


Currently, a mirror is an essential attribute of any living room, the purpose of which is not only to admire your reflection. The mirror is also an important element of decor and decoration of any interior. Often, industrial mirrors cannot fully emphasize the individuality of a room's design. And here do-it-yourself mirrors come to the rescue.
Naturally, if we talk about the decoration of an old mirror with our own hands, we should not mean a forged frame or a frame made, for example, of mahogany. There are many ideas for decorating mirrors using readily available and relatively cheap materials that will allow you to make an original decorative element.

V modern home or an apartment, almost every room is equipped with mirrors: an entrance hall, a bathroom, a bedroom or a nursery. Depending on the location in the house, the purpose of the mirrors may be different, but they are united by the fact that modern man just can't imagine life without a mirror. This household item should be in the living room, although many believe that this is not the case.
If the room is spacious enough, the absence of a mirror in it, of course, can be justified, but the presence of this household item in small rooms can visually expand the space of the room.

Room decor with an unusual mirror

Do you like this frame-sun for a mirror? A detailed lesson in this article is.

These 3 very stylish mirrors can also be made with your own hands - follow the link for a detailed master class -.
At first glance, it seems that all the mirrors are similar to each other. You can avoid this by doing the decor of the mirror with your own hands. Consider below the most common decoration options.
The decision to equip the walls of a room with mirrors often leads to problems caused by the need to purchase a product of a certain size, shape and design in order to harmonize with the interior of a particular room. Decorating mirrors with your own hands helps to solve this problem.
It should be noted that this work will require not so much skill and skills in a certain area as the presence of developed imagination and good taste, as well as a creative approach to business.

Wall decoration with small mirrors

An unusual shape or frame for a mirror is a great solution for an empty wall in a room.

Such curly mirrors are easy to make yourself - you need to choose a shape and order cutting

Composition of 16 mirrors

A feather-shaped mirror is a great solution for a relaxation area


7 rules for decorating with interior mirrors
When using mirrors as an element of decor, you must follow the following rules:
- Products are better to choose the same size, preference given to small and medium mirrors.
- If a mirror object It has irregular shape, it should not be framed.
- Rounded or square mirrors are advised to enclose in a beautiful frame.
- To make the composition look like a single whole, it is best choose the same frame.
- It is most important to use the same frames for products of different sizes.
- When creating a composition of mirrors on the wall, you need to try not to create excessive clutter - sometimes in order to create a harmonious image, 5 mirrors with spectacular frames are enough.
- Frames look great, which echo the decor of the room as a whole.
ADVICE! For example, a frame made of wood blends perfectly with a wooden table. In general, as professional designers say, the design that is made by hand with the use of imagination and creativity will look spectacular.
Mirrors are capable of visually expanding the space of small rooms (for example, in "Khrushchev"), but often this will require more than one mirror.
- Three, six, or even ten products of various shapes and sizes will achieve the desired result. In an interior made in classical style, for such mirrors, voluminous frames made of stucco are suitable.
- Modern trends in the design of rooms are ideally complemented by narrow mirror frames of various geometric shapes, sometimes with patterns on the surface.
- When using lamp lighting, a bright reflection in the mirrors will contribute to the visual expansion of the space.

Large mirrors for the living room
You can order the production of "curved" mirrors and place them on one of the walls (in the form of applications or a single size in the form of a square).
Light walls will perfectly decorate the mirrors differing in shape and size. Such a “row of windows” will enliven the room and brighten it even more.

Mirror above the fireplace
Beautiful large mirror perfect to sit above a sofa, table or fireplace. However, the combination of this household item with other mirrors should be abandoned.
DIY wooden frame for a mirror
The tree looks great in almost any interior. It is very popular and time tested natural material. Wood products have excellent performance and attractive appearance. So The wood is ideal for use in DIY mirror decoration.. Square or rectangular household items are well framed with ordinary wood borders, but you can and should experiment with round and oval mirrors.

Mirror sun from branches
Original for any interior will look like this called mirror-sun. It is made using blocks or twigs of wood, plywood frame, primer, special glue, aerosol, sandpaper, and a glue gun.
How to make a sun mirror:
- To begin with, branches are glued with wedges around the entire perimeter of the frames, and alternating long and short, so that it looks like rays from the sun.
- Each bar is necessary hold for 15-20 seconds, so that it sticks well.
- After waiting for the glue to dry, it is necessary to remove its remnants with sandpaper, and then apply a primer and leave for 1 hour.
- Then you need to cover the frame with paint or varnish.

Decor with dry branches

Twigs can be replaced with wooden clothespins. So, a few minutes - and the decorative frame-sun is ready!

Clothespin mirror frame
paper decor
Round and small mirrors can be decorated, using an egg carton. This solution is very original and requires very little effort. It will be necessary to cut out each individual cell, glue the flower and paste over the mirror with them.

Egg carton mirror frame
DIY bathroom mirror decor
By decorating an object is understood the achievement of a form and color scheme that is in harmony with the style in which the interior of the room is made, as well as with its purpose. When decorating a mirror in the bathroom, it is necessary to ensure moisture resistance and strong fixation of decorative elements.

Decor of an old bathroom mirror - acrylic painting
How to decorate an old bathroom mirror:
- First you need wipe off the previous coating from the surface of the frame. For removing old paint use paint remover - it's not expensive and available at any hardware store.
- Then priming occurs in order to prepare the basis for the glue.
- After that, glue must be applied to the places of future fastening of beads or shells. Decoration can be carried out randomly.
The original design idea is a frame made of metal rulers, which are also arranged in the form of a sun.

Mirror frame made of metal rulers
The standard rule for decorating walls with mirrors: if the products are voluminous, then there should be few of them. For example, to decorate a large mirror, you can glue toy cars to it by painting them on top. One product decorated in this way is enough for the room.

Original frame for a mirror from old toys
By fantasizing and using ordinary objects that are at hand at the moment, it is possible to decorate the mirror so that it looks unique and at the same time keeps a piece of the invested soul and warmth.

Also in the bathroom, a backlit mirror looks very relevant - it is very easy to make it with your own hands. Here is the detailed one.
Decor mirror shells
Before starting work, make a pattern of shells by attaching them to the surface to be decorated. The composition may or may not have symmetry. Make the most of your imagination when creating a drawing.

- To avoid contamination of the glass of the mirror, it must be sealed with masking tape. After that, you can begin to glue the shells on the frame. For complete drying of the glue, you need to wait for several hours.
- After making sure the glue is cured, start painting the frame.
- Coloring is carried out in several layers, which are applied every 20 minutes to let them dry out a bit.
- The layers are carefully applied so that they are as thin as possible.
This design of the mirror with the help of shells will decorate any room, the interior of which is made in the "classic" style.

You can also make decorative candlesticks from shells - a detailed lesson:.
Mosaic mirror decor
To decorate the mirror in the bathroom with your own hands, you can use glass or ceramic mosaics.

Bathroom mosaic mirror

If you want to make such a mirror yourself - here is a detailed one.

Frame decorated with sequins

You can make such an original bathroom mirror yourself by simply ordering curly cutting of mirrors.
Decor of a round mirror with a frame of pipes: Master class
A very stylish and modern frame for decorating a round mirror can be made from ordinary polypropylene pipes for water supply.

Frame for a round mirror made of pipes
This will require:
- plastic pipe;
- a saw powered by electricity;
- skin;
- glue gun.
Assembly technology
Step 1
- We cut the rings with great care. However, they must have the same width, otherwise ready product will look messy.
- Therefore, a “trimming” electric saw with fine teeth is ideal.
In the absence of such a saw, you can use the miter box.

We take polypropylene pipes for water supply - you can choose any diameter at your discretion
Step 2
- Immediately before gluing, cuts on each ring processed with fine skin to avoid burrs.
- Since our task is to produce an accessory that has a beautiful appearance, every little thing in it should look neat.

We lay out the rings in any shape you like
Step 3
- Rings fastened with a glue gun, which will provide an inconspicuous fastening. The gluing of the rings can occur in different ways, a different method can be used than in the photo.
- The shape of the composition can be both square and oval. It is recommended to make it in the shape of a mirror.

We glue the rings together with a gun
Step 4
The mirror is also glued to the rings with a glue gun exactly in the middle. It should be noted that all elements must be cleaned of dust particles and degreased before gluing. You can hang the finished product on the wall by the rings.

So, you can make a product that combines 2 or 3 mirrors, and to give a greater effect, it can be supplemented with a glass vase or table.
Master class: Mirror with lace
A paper lace frame looks very unusual and homely. It can be purchased at any store where disposable tableware is sold.

We need:
- Paper lace for cake.
- Double-sided tape.
- Round mirror.
- Coating paper.
- Aerosol paint.
- Scissors.
Technology step by step
Step 1
Take some cake paper lace and paint it with spray paint. Dry well for 1-2 hours.

We paint lace with spray paint
Step 2
Cover the back of the mirror with double sided tape. Then cut off the protruding end of the tape.

Apply double sided tape to the mirror

Cut off excess tape along the contour

We are filming protective film
Step 3
Remove the protective film and place the mirror on the previously dyed paper lace and press well.

We make external mounts for the mirror

We place a mirror in the center of the lace and press the tape well

Hanging a mirror on the wall
The final touch remains, attach it to the wall.

Such frames look especially beautiful if there are several of them!
Master class: Mirror decor with petals
The frame for the mirror can be decorated with artificial petals, they are usually sold in bags in everything for decor.

Mirror decor with petals
For this we use:
- Petals of artificial silk flowers.
- Glue gun.
- Round mirror (or oval).
- Spray paint (any color).
Work order
- Paint the frame white.
- We start from the outer edge, with a hot glue gun, glue the petals.
- And so, row after row, we lay the petals.
- Insert the mirror into the frame. Your amazing mirror is ready!

Glue the petals row by row with hot glue in a circle

Finished mirror with petals

Master class: Mirror decor with gold leaf
An unusual and modern mirror will turn out if its edges are decorated with gold leaf. If you did not find it, you can take the usual thin foil.

Mirror decor with gold leaf
We need:
- Glue gun.
- Mirror of any shape.
- Foil or gold leaf
Decor technology
- Take the foil and tear it with different figures.
- Use a glue gun to glue the edges of the mirror with pieces of foil or gold leaf, adjusting it tightly, one on top of the other.
- Let dry 1-2 hours.

Glue the foil onto the mirror with a glue gun