The command line is a powerful tool for managing the Windows operating system. With it, you can do almost everything that is usually done using a graphical interface. In this article, we will talk about how to format a hard drive or flash drive using the command line.
Step #1: Launch Command Prompt.
If you want or through the command line, then first of all you need to run this command line. At the same time, otherwise you will not be able to use the command for formatting.
There are several ways to run Command Prompt with administrator rights. The easiest option is to use the search in the Start menu. To do this, open the Start menu, type in the search command "CMD", then click right click mouse on the command line and select the option "Run as administrator".
If you are using the Windows 8 or Windows 10 operating system, then you may not even use the search. Just press the key combination Windows + X and in the menu that appears, open the item “Command Prompt (Admin)”.

After that, a warning from User Account Control will appear. To continue, click on the "Yes" button.

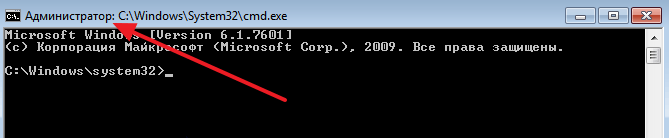
As a result, you should open a command prompt with administrator rights. The presence of administrator rights will be indicated by the inscription "Administrator" in the title of the command line window.
Step number 2. Executing a command to format a hard drive or flash drive.
After the command prompt with administrator rights is launched, you can start formatting. For formatting through the command line, use the "FORMAT" command. To get all the information about this command, type "FORMAT /?".

In order to format a hard drive or flash drive, you need to use the correct parameters along with the FORMAT command. At a minimum, you must specify the letter of the drive you want to format. For example, like this "FORMAT D:". In this case, the standard settings will be used for formatting.

Please note that before formatting a hard drive or flash drive, you will be asked to enter a volume label (disk name). You need to enter the current volume label, not the one you want after formatting. You will also need to confirm the formatting by entering the letter Y (from English YES).

A new volume label can be set after formatting is complete. If a new label is not needed, then you can simply press Enter and the system will use for this disk standard volume label.

By adding other options to the "FORMAT D:" command, you can control formatting more finely. For example, by adding "/FS:FAT32" you can format the drive to the FAT32 file system. And the “/Q” parameter allows you to quickly format a hard drive or flash drive. As mentioned above, to get information about all possible parameters of the FORMAT command, you need to execute "FORMAT /?".
Hello friends. In this article, I want to tell you how to format a flash drive different ways so you can choose the best one for you. A flash drive is by far the most common and convenient carrier of a wide variety of information. But after a certain period of time, it is necessary to carry out the formatting procedure, for a number of very different reasons:
- quick deletion of all files on the media
- cleaning the flash drive from viruses
- the appearance of errors when writing or reading
- slow carrier performance
- the need to create a bootable USB flash drive
Formatting will also be useful if, for example, you want to copy a file larger than 4 GB to a USB flash drive, then you need to format it from FAT32 format to NTFS format.
As you can see, there can be a lot of options for this operation, let's look at the difference from quick and full formatting (this will be discussed later in the article).
With quick formatting, only the file allocation table itself is cleared; if desired, deleted data can be restored. A full format destroys all data completely (overwriting with zeros), and, as a rule, this process takes longer than a quick format.
That's it, we have finished with the theory, let's get down to practice, and I will tell you how to format a flash drive.
Advice! Before formatting, be sure to copy important files to your hard drive or other removable media.
How to format a flash drive - 3 ways
1) Using built-in Windows tools
Insert your removable media into the computer and open the My Computer window, you can also press the key combination:
In the window that appears, right-click on your media icon and select Format.

In the new window, set the required parameters:
Capacity - service information about the size of the media is displayed here, it does not change.
File system– you can select the file system type from the drop-down list (NTFS, FAT32, exFAT). I advise you to choose the type - NTFS.
Cluster size - leave unchanged.
Restore default settings- this button returns the settings to the standard ones, we do not touch it.
Volume label - here you can specify any name that will be displayed when the USB flash drive is connected to the computer.
Check the box next to Quick clear if you need to urgently clear the media memory. If the flash drive is slow and constantly slows down, or it is infected with viruses, then uncheck this box.

Click the Start button and in the next window confirm your actions by clicking the OK button.

After a short period of time, an inscription should appear about the end of formatting.

2) Formatting a flash drive using the command line
Press the key combination:
or the Start button - Run, and enter the command - cmd to open the command line.

In the window that appears, enter the following command:
format H: /FS:NTFS /Q /V:My_Fleshka
format H: is a command that starts formatting removable media marked with the specified letter. To find out what letter is used by your flash drive, open My Computer.
/FS:NTFS - this command sets the type of file system that will be used after formatting the flash drive. IN this example it's NTFS.
/Q - this part of the command denotes a quick format, we do not use it to completely delete data.
/V:My_Fleshka is the volume label or name that will be assigned to your media.

and press Enter.
The following message will appear:
where we also press Enter.
That's it, the formatting process has started, wait a while until such a message appears.

3) How to format a flash drive using the HP USB Disk Storage Format Tool
The program, unzip it and run the exe file (it does not require installation) as Administrator (right-click on the file and select Run as Administrator).
A window will appear in front of you in which you need to select the file system when formatting, and also specify the name of the flash drive. We select the formatting method - Quick (tick) or Complete cleaning (tick not), and click the Start button.

A warning window will appear, which we press the button, Yes, and the formatting process begins with the specified settings.
Depending on the selected formatting method, after a certain period of time a window with the result of formatting will appear, in which you must click the OK button.

Now you know how to quickly format a flash drive and deprive yourself of the problems associated with removable media.
And I have everything, bye bye!
List of popular free programs for various types of formatting hard drives (HDD, SSD, RAID) and removable media (USB, Firewire, SD). In this article, you will learn how to properly format a hard drive, learn about various types HDD formatting - including low-level. We will also choose a good program for partitioning a hard drive.
HDD formatting methods - from simple to complex
Formatting is a simple operation that can be performed by inexperienced users. Next, I will tell you how to format the HDD yourself - from simple to complex, depending on your skills and PC proficiency.
Using standard Windows tools for formatting
The Windows XP-10 operating system has built-in tools to perform this operation. Formatting a hard drive is done like this:
- Open "Explorer" (or another file manager),
- Go to the "My Computer" section
- Click on the desired disk
- Select "Format"
- Next, click on the “Start” button
This is the easiest way to format your computer without additional tools. For all its simplicity, however, all steps must be performed consciously, clearly understanding why you are doing this. Before giving your consent to formatting, carefully check whether the correct disk is selected.
Perhaps the video tutorial shows more clearly how to format the disk.
Alternative formatting method in Windows 7 / 8 / 10
- IN various systems the path to Disk Management is different - the easiest way is to open the search for programs and enter "management". When the system gives you a search result, find "Computer Management" and open it
- In the menu on the left, go to "Disk Management"
- Right-click on the desired partition and select Format. Since the process takes place inside a running OS, the "Format" menu item will be inactive on the system partition
- Next, select a label for the new partition, the type of the future file system and the required cluster size (if you don’t know what size you need, leave “default”)
- For high-level formatting, you can leave the "Quick Format" checkbox active. If deep cleaning of the contents of the section is required, then uncheck this box.
- After pressing the "OK" button, the system will ask for confirmation - click "OK" again
Formatting a hard drive through the Windows command line
To start formatting, on the computer command line (console). To do this, use the key combination WIN + R, in the Run window that appears, enter the CMD command, press ENTER.
Note. To format a drive through the command line, you will need administrator rights (). Start - CMD - open the context menu by clicking on the application icon "Command Prompt" - Run as administrator. If you try to format the drive without administrator rights, you will fail: access will be denied. In general, watch the video where I show how to format as an administrator.
For formatting through the console, use the following commands:
Format drive letter
Press Enter. We carefully read what is written in the console, perform further actions with the hard disk according to the situation.
Full HDD Format via HDD Low Level Format Tool
Low-level formatting will optimize the HDD structure. This is useful in preparation for reinstalling the operating system. At the same time, you can solve problems with bad sectors of the hard drive.
HDD Low Level Format Tool is suitable for low-level formatting. The utility will help you format your computer hard drive, external HDD, tablet SD card and other storage devices.
In addition to the basic functions, HDD Low Level Format Tool can be used to read SMART scores, check for read errors, disk usage time, and more.
How fully format hard drive:
- After installation, run the program HDD Low Level Format
- In the Drive selection window, select the hard drive (if several HDDs are connected to the PC). The easiest way to distinguish one hard drive from another is by volume. Click Continue
- Go to the LOW-LEVEL Format tab
- For quick formatting (deleting partitions and MBR records), select the Perform quick wipe option.
- To completely format the hard drive, the above option must be ignored.
- Before completely formatting a hard drive, check that the correct drive is selected. Only after that press the Format this device button.
AOMEI Partition Assistant
AOMEI Partition AssistantThe program offers a number of useful features, including low-level formatting of hard drives and most types of removable media. The interface resembles standard Windows tools, so it will not be difficult to figure it out:
- The main window automatically displays the disk with the installed OS. If you need to format another device, select it by clicking the "Disk" item in the top menu
- In the lower block of the left menu, select "Erase Hard Drive"
- When you click this button, you will be prompted for the number of passes of the operation. If in the future it is planned to restore destroyed data, then select a value from 1 to 7. If you specify a parameter of 8 or more, it will be almost impossible to restore information from the device
- Confirm your choice by clicking "Yes"
- It will require a system reboot to start formatting - there is no turning back after clicking the Reboot Now button, so make sure you select the correct drive and the desired operation settings
After restarting the computer, the program will perform all the specified actions and you will have a clean hard drive at your disposal.
DiskWipe
DiskWipe is a great solution for situations where the data on the media needs to be destroyed beyond recovery. The program uses several proven algorithms (Dod 5220-22.M, US Army, Peter Guttman), and advanced settings allow you to choose the depth of formatting. According to the developers, the program does not contain hidden viruses, etc., and does not transfer user data.
DiskWipe
Formatting the desired device using DiskWipe is extremely simple:
- Run the program. In the block on the left you will see all devices available for formatting
- Select the desired device and click "Wipe Disk" in the top menu
- The advanced settings will open with predefined default values. For full and irreversible formatting, you can check all available fields with checkmarks, and in the right block, specify "Highest"
- After selecting the settings and clicking "OK", the formatting of the selected device will start
Paragon Partition Manager
A test period of 30 days allows you to evaluate the capabilities of the program and format the necessary devices in various modes. Since Paragon Partition Manager has several options for working with partitions (partitioning, restoring, and others), it is distributed shareware.
Paragon Partition Manager
The formatting process is intuitive:
- In the main window, click "Partition Manager" in the menu on the left, then select "Launch Partition Manager"
- From the proposed list of devices, select the one you need, open the context menu with the right mouse button, and click "Format Partition"
- Specify the type of future file system and volume name, then click "Format"
- The procedure will be queued - to apply the changes, you must click on the green checkmark in the top menu
- After confirming the operation (the “Yes” button), it will no longer be possible to stop its execution
Separately, it is worth noting the fact that Paragon Partition Manager not only formats the device, but also creates a new partition with the specified file system, so after the system boots, the disk can be used without additional steps.
reference Information
What is formatting?
Formatting a disk is the process of marking a storage device such as a hard disk drive (HDD), memory card, CD/DVD, or other storage medium. The formatting operation is equally useful for new and worn-out HDDs.
A disk that has no partitioning is absolutely useless. In addition to the fact that you apply markup to the disk, formatting almost permanently deletes all data (although there are many programs for recovering after formatting). Therefore, you need to be careful and prepare in advance for formatting the hard drive.
Over the years of operation of the operating system (Windows, Mac OS, Linux), the hard drive turns into a "garbage dump", since many programs leave their files on the disk, and after uninstallation, their "roots" still remain on the HDD. As a result, the system is slow and unstable. There are various freezes, slowdowns, the disk clicks, makes noise - it behaves inappropriately. After reformatting, the hard drive is optimized and starts working better. Many devices last a long time without this procedure. I advise you to insure and format your hard drive at least once a year.
Sooner or later formatting the drive is inevitable. However, before doing this, it is very important to update or reinstall operating system on the computer. Along with the removal of unnecessary files, you get a completely clean environment without defects, harmful viruses, unused programs, data that lead to conflicts. Thus, before reformatting the hard drive, we reinstall the OS.
Before formatting, back up any important data to another drive. As already mentioned, during the execution of this procedure, various service information, labels are written to the disk, which allow further information to be written to the HDD without hindrance.
Steps to Format a Hard Drive
low level– at this stage, the base markup is applied to the disk at a low level. Typically, this is done by the hardware developer. In this case, special tracks, service data, are applied to the disk. This information remains on the hard drive almost forever - it can only be overwritten using proprietary utilities. These programs can only replace service data. By the way, if you perform a low-level formatting of the hard drive, then you will not be able to recover data later, unfortunately or fortunately. Therefore, if you aim to destroy information, then you can use this format. Read about low-level formatting
Section breakdown. It is clear that storing data on a disk without partitions is quite inconvenient. For some logical organization, the HDD is divided into special zones, disks - drive C:, drive D: and so on. For these purposes, both utility utilities built into the OS and external programs for formatting a hard drive, which I have written about more than once, can be used.
high level. In the process of this type of reformatting, boot sectors, file tables are created.
Types of disk formatting
You may know that the standard system tools provide 2 methods by which you can format a hard drive - external or internal:
quick format: takes less time, allows you to carry out the procedure as is. The bottom line is that with this type of computer formatting, the files in the file table are overwritten with zeros, while the data is stored as if nothing had happened, you can later restore it. Also, with this method, you do not optimize the file structure, and if there were defects on the hard disk, you will not fix them when fast method
regular formatting: Longer and deeper hard disk formatting. Data on an internal or external drive is completely destroyed, the file system is checked for possible errors, damage. bad sectors, bad blocks. Thus, at the usual way reformatting, you kill two birds with one stone, although you lose a little more time.


