Friends, hello! Today I decided to talk about baking conditions in electric ovens in the context of working with bread. Despite the fact that almost every recipe has general recommendations for baking conditions ( temperature regime, moistening at the beginning, etc.), in fact, everything is not so simple when it comes to baking in electric ovens. Everything is different there. A good half of the kitchens are now equipped with them and you can bake whatever you like in them, they are reliable, familiar, stable and have a lot of functions, especially convection is appreciated. But, paradoxically, it is not very suitable for bread, and in order to get perfect bread, you have to constantly fight with it.

Bread in an electric oven, which was baked under a hood
How does an electric oven work, features and cons.
Modern electric ovens usually have top and bottom heats and one or two "windows" in the back wall of the oven where fans are located to create convection. Convection contributes to the uniform distribution of hot air and stable heating throughout the oven, the heaters provide high-quality heating from above and below. It seems that everything is there to create ideal conditions for baking anything, but not bread. Almost all electric ovens sin with one thing: the bottom of the baking turns out to be pale, and sometimes it doesn’t bake at all, while the top can be very ruddy. For bread, it is very important that the hottest thing is just from below, this contributes to the formation of the correct pores and the overall shape of the loaf, for ciabatta this is generally critical, because the hot hearth plays a decisive role in the formation of large pores in wet dough. For this, in fact, we bake on a stone, and heat it for an hour and a half at the maximum temperature. And here is such an ambush: a cool expensive electric oven, a million functions, and bread is baked incorrectly!

Bread baked in convection mode without a stone, the bottom did not brown at all

Bread on a stone and under a hood in an electric oven
Another point is convection. On the one hand, it's great that it exists, because it is very important to have a uniform temperature in all corners of the oven, but convection is useless for bread. It is she who leads to uneven effects of temperatures during baking, due to which the bread crust can be undermined in completely unexpected places (from the side or from below, depending on where the fan is located). In addition, with constant blowing, the crust is formed incorrectly in principle: the fan blows off all the steam that the bread needs, especially in the first half of baking, the processes of caramelization of sugars cannot properly pass in the crust, it begins to darken and coarsen early. For the same reason, the incisions do not open, but simply harden, and the volume of bread is less than it could be - all due to the fact that the crust is formed too early, loses moisture and, accordingly, elasticity.

crust formed under conditions of sufficient moisture and temperature

Crust formed in convection mode
This is also reflected in the taste and aroma: as you know, properly baked bread has not only a beautiful, thin golden crust, but it also smells amazing! But the “wrong” crust has a not very pleasant burnt smell, it is not appetizing and insulting, especially if you have been fiddling with the dough all day on your only day off.
The same problem is inherent in all professional combi steamers (multi-level ovens in which there is both convection and humidification). It would seem that there is more to wish for: they are able to create high temperature inside the chamber, they have automatic steam supply, and even the intensity of evaporation can be adjusted, however, the problems in them are the same as in conventional electric ovens. Steam can be turned on, given 100%, but the crust will still turn out to be “wrong” due to constant blowing: convection will disperse all the steam, and the bread crust will harden and start to burn.


baking in a combi oven under a hood and simply with moistening

The difference is immediately noticeable, it's the same bread, just baked in different conditions
The recommended temperature of 240-250 degrees for such ovens and ovens is simply unrealistic, because even ten minutes will not pass before the crust turns brown, but the bread itself remains raw inside. I don’t know, maybe there are some other tricks, but in such ovens or ovens I start baking at a maximum of 220 and after 10-15 minutes I reduce it to 180, while the total baking time increases significantly. If in gas bread weighing 500-600 gr. 20-25 minutes are enough, then in a combi steamer or electric oven it bakes for about 40 minutes.
What to do?
- Turn off convection if possible. You can heat the oven with it, moreover, raise the temperature to 240-250-265, but when planting bread, it is better to turn off the airflow completely or make it minimal if it is not possible to turn it off.
- Be sure to use a stone, and not necessarily very thick, a thickness of 1.2-1.5 cm will be enough, and warm it well, at least 30-40 minutes.
- Bake under the hood. I know that I have seven troubles - one answer, but it's true, bake bread under a hood, and preferably under a ceramic one, because under it you can bake bread completely without removing it after 15-20 minutes of baking. A high-quality thick-walled cap, for example, such as the one produced by the French, is good not only because it locks moisture around the bread, when heated, it creates special conditions that are most suitable for bread: it evenly heats that small enclosed space limited by its walls, due to which and the bread crust is formed perfectly, and the bread itself is baked much faster. Cast iron is similar in effect, but it is more difficult to work with, it is very heavy, and it cools faster than ceramics. Even in the highest quality ovens in its different parts, the temperature can be different simply from the fact that they themselves are quite large and cannot really warm up evenly.

This is especially true for ovens that do not turn off convection. Even if you hold the bread under the hood for 15 minutes and then remove it, a strong hot blow will still cause the crust to form incorrectly, the cuts will not open as fully as they could in more suitable conditions, and the bread will turn out to be smaller. Ceramics, due to its special porous structure, allows you to bake bread completely under the bell, without leading to an excess of steam, blurring of cuts and a glossy crust.
What to look for when choosing an electric oven
I will not advise companies and manufacturers, I don’t understand them at all, so I’ll just list what you should pay attention to.
- It is desirable that the oven has two tenons (upper and lower) and modes that allow you to use them alternately (for each ten according to the mode, for example) or all together. If there is a function to control the heating temperature of each of the heaters - great, take it :)
- It is desirable that it be possible to turn off convection. This is probably the most important function for bread.
- It is desirable that the door has 2-3 glasses, this will allow you to better hold the dough in the oven and heat it more evenly.
What ovens did I bake in and what oven do I bake in
I have baked bread in a wide variety of domestic electric ovens, in deadly gas ovens, in conventional combi steamers, and in complex programmable super-combi steamers that cost the size of a three-room apartment in Kharkiv. Baked in electric ovens for pizza, in professional wood stoves, in Russian ovens, in domed wood-burning pizza ovens and in many other places she baked. I won’t even talk about firewood now - that’s for sure new level for bread and real magic, I’ll tell you what I usually bake in.
I have a gas oven and I love it dearly, it is almost perfect: the bread crust in it is beautifully blushed, and the bottom does not burn, while I always use a stone and a cap. When I first baked in it, I could not believe that this was actually happening, the bread in it was perfect! I was so used to burnt crusts and pale tops, to the fact that the top had to be grilled and baked for 40 instead of 20 minutes, that for a long time, taking out another rosy loaf, I danced with joy. I have a far from new German Kaiser stove, it heats up to a maximum of 240 degrees (therefore, it is almost perfect, but this is not enough for wet dough), and I bought it more than two years ago, used, for a penny, on rented apartment instead of the Soviet electa, which leaked gas and, it seems, was generally life-threatening. Since then, we have had many interesting experiments, adventures and relocations, there were proposals to change it to a more modern electric one, but it seems that we found each other, and I refuse offers. This is how we live :) I wish you to find your own oven or make good friends with the one that is, inspiration and delicious bread!
P.S. Many thanks to Irina Tereshkina, Vera Anisimova and Elena Kosova for photo support!
Bread in the oven is the standard of fresh home baking, which is many times superior in taste to any purchase option. Since ancient times, its preparation has been considered a special ritual, with which many traditions and beliefs are associated to this day. Despite the absence of a Russian oven, making delicious, fluffy and fragrant bread at home is not so difficult. At the same time, such a culinary feat will immediately add a few points in favor of any hostess.

All types of flour are used to make bread in the oven.: wheat, oatmeal, rye, whole grains, etc. In order for the pastry to rise well, yeast or various starter cultures are added to it. Yeast can be fresh or dry. As for starter cultures, there are more than a hundred of their varieties. They are cooked on kefir, barley, hops, raisins, wheat, etc. Some sourdough starters turn out to be quite “fast”, while others have to be prepared for several days. The use of sourdough allows you to keep it in bread beneficial features and extend the shelf life up to several weeks.
Bread cooked in the oven contains vitamins, organic acids, enzymes, pectins, fiber and many minerals. It is recommended to eat it for everyone from young to old. However, it is better not to overindulge in pastries, as the calorie content homemade bread quite high.
Secrets of making perfect bread in the oven
Bread in the oven always turns out much more magnificent and tastier than purchased. It is enough just to try any of the recipes once, and homemade pastries will quickly enter the mandatory list of dishes for every day. It is not so easy for novice cooks to figure it out the first time, how to bake bread in the oven, so it is better to turn to professionals for secrets:
 Secret number 1. Before baking bread, it is recommended to let the dough rest in a baking dish for 40-50 minutes.
 Secret number 2. After cooking, you need to sprinkle the bread with water, cover with a towel and let it brew for a while.
 Secret number 3. The bread dough should be elastic and not stick to your hands at all. Otherwise, you need to add more flour, more than the specified amount.
 Secret number 4. In order for the bread to bake evenly, before cooking, preheat not only the oven, but also the baking dish.
 Secret number 5. For a crispy crust, leave the bread in the oven after switching off for another 15 minutes directly on the wire rack.

This recipe is quite simple and not as long as many of its "colleagues". Bread will quickly fill the house with the aroma of freshly baked bread, which will create a very warm and cozy atmosphere. After cooking, the flour from the bread must be swept away with a brush, and the loaf itself must be cooled.
Ingredients:
- 4 cups flour;
- 2 tsp dry yeast;
- 4 tsp Sahara;
- 2 tsp salt;
- 2 glasses of water.
Cooking method:
- Heat water, dissolve sugar and dry yeast in it.
- After 10 minutes, add salt and sifted flour.
- Knead a sticky and thick dough.
- Preheat the oven to 35 degrees and put the dough there, covered with a lid.
- When the dough has tripled in size, transfer it to a greased baking dish.
- Flatten the dough, lightly sprinkle with flour and let rise again.
- Cook bread for 15 minutes at 220 degrees, then reduce the temperature to 180 degrees.
- Bake another 30 minutes, then let the bread cool.
Interesting from the network

Garlic rye bread will be a great addition to any first or second course. Yeast is better to take fast-acting, so as not to delay the already long baking process. The baking sheet should be greased only lightly, using no more than 1 tablespoon of vegetable oil.
Ingredients:
- 300 g rye flour;
- 400 g wheat flour;
- 400 ml of water;
- 2 tsp salt;
- 5 tsp Sahara;
- 5 cloves of garlic;
- 2 tsp dry yeast;
- 3 art. l. vegetable oil.
Cooking method:
- Dissolve yeast in 200 ml of water and dissolve sugar.
- Remove the resulting mixture in heat for 25 minutes.
- When the yeast rises, pour the remaining water and vegetable oil into the dough.
- Mix the salt with the sifted rye flour and gradually pour in the yeast.
- Sift wheat flour and gradually add to the dough.
- Chop the garlic and add to the total mass.
- Knead the dough, cover and leave it in a warm place for an hour and a half.
- Knead the dough well again and transfer to a greased baking dish.
- Bake bread for 50 minutes in a well-heated oven at 220 degrees.

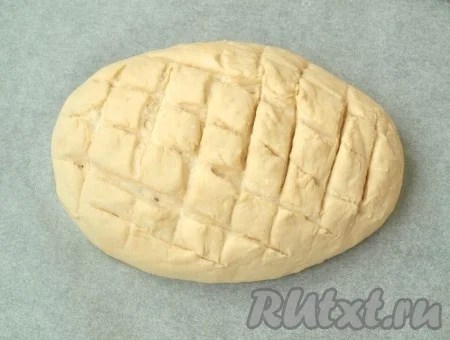
Despite the absence of yeast, the bread according to this recipe turns out to be very lush and rises well. Before cooking, you can make 3-4 cuts along the loaf. This will allow it to bake better and give it a more presentable look.
Ingredients:
- 500 g wheat flour;
- 150 ml of kefir;
- 200 ml of water;
- 1 tsp salt.
Cooking method:
- Pour kefir into a bowl and add 75 g of flour to it, mix.
- Cover the bowl with cling film and leave overnight.
- Sift the rest of the flour into a deep container, add the resulting sourdough.
- Add salt and gradually pour in water, kneading the dough with your hands.
- Line a baking sheet with parchment paper and sprinkle with flour.
- Shape the dough into a loaf and place in a mold.
- Cover the top of the loaf with another sheet of parchment and a towel.
- Put the mold in the turned off oven for 2.5 hours, then knead the dough with your hands and shape the loaf again.
- Leave the dough under the parchment for another 30 minutes.
- Preheat the oven to 250 degrees and bake the bread for 15 minutes under a closed lid or foil.
- Remove the lid (or foil), continue baking for another 20 minutes.

Sourdough bread has always been considered more beneficial to the body than yeast-based baking options. Moreover, for harvesting you only need water and wheat flour. Sourdough for one preparation will need about 70 grams. The rest can be stored in the refrigerator.
Ingredients:
- 300 ml of water;
- 500 g wheat flour;
- 130 g whole grain flour;
- 1 tsp salt;
- 1 tsp Sahara;
- 1 st. l. vegetable oil.
Cooking method:
- Heat 50 ml of water a little and pour into a deep bowl.
- Pour 100 g of flour into the same bowl, knead the dough.
- Transfer the starter to a plastic container and cover with cling film.
- Leave the container for 3 days in a warm place.
- After three days, remove the film from the container and discard the top half of the resulting mass.
- In the remaining dough, add another 50 ml of warm water and 100 g of flour.
- Knead the dough, cover again with foil and leave for 12 hours.
- Remove the top part of the dough.
- In 70 g of finished sourdough, add 100 g of flour and 100 ml of water, also slightly warmed up.
- Mix the dough a little and leave for 1 hour.
- Add the remaining water and vegetable oil, add salt and sugar.
- Gradually introduce the rest of the flour (both wheat and whole grain).
- Leave the dough again for 1 hour.
- Divide the dough into two parts and form long loaves (like a loaf or a baguette).
- Put the prepared dough on a baking sheet, previously covering it with paper.
- Make several transverse deep cuts on each loaf.
- Bake for 15 minutes at 200 degrees, then 35 minutes at 160 degrees.
Now you know how to cook bread in the oven according to the recipe with a photo. Bon Appetit!
No store-bought bread will ever replace homemade baked bread. with my own hands. We put our energy and all the love for our household into homemade bread. I really love baking bread and, even having acquired a bread machine, I still make bread, kneading with my hands, and bake it in the oven. Being a busy person, I try to look for recipes for bread that is prepared in a relatively short period of time. This time I'm giving you the recipe. quick homemade bread, which I tried quite recently, but already managed to bake three times. The bread is very soft and airy - feel free to recommend it to you!
Ingredients
To make quick homemade bread, we need:
warm water - 210 ml;
dry yeast - 1 tsp;
wheat flour - 320 g;
sunflower oil - 30 ml;
sugar - 1 tsp;
salt - 0.5 tsp
Cooking steps
Mix dry ingredients: sift flour, add salt, sugar and yeast.

Knead a soft and pleasant dough. Since flour comes in different densities, its amount may be slightly larger. I got 20 grams more than in the recipe. Lubricate the bowl with oil and place the dough in it for 30 minutes, covered with a lid or film.


Homemade bread is prepared quite quickly, but it turns out very soft with an ideal crumb structure.
 Bon Appetit!
Store-bought bread will never be tastier than homemade - it is not so fragrant, soft, and a day after purchase it becomes completely stale so that it can be safely thrown away.
But most women do not know how to bake loaves at home, although there is, in fact, nothing difficult in this. In addition, you can always add spices, cheese or sausage to bread cooked in your own oven to give it a special taste.
This article presents the available simple recipes bread in the oven at home and some tips to help you bake a delicious loaf the first time. A novice hostess can bake not only wheat loaves, but also:
In addition, there is a cooking method without the use of yeast, which will also be discussed below.
Step by step recipes for delicious homemade bread in the oven
In the beginning, it should be noted that for the preparation of this kind of baking, it is always necessary to purchase high-quality flour. In addition, the yeast used should always be as fresh as possible. If these two points are observed, you can get soft and tasty bread.
Simple by leaps and bounds
The first recipe is dedicated to a simple bread, but very soft and airy. The aroma from its baking will pleasantly spread throughout the kitchen. This recipe can be called a "template" for baking simple homemade bread.
The consistency of the dough should ideally resemble heavy cream. 1.5 kg should give just such a result, but if this is not enough, then there is nothing wrong with adding a little more.
- Flour - 1.5 kg;
- Salt - 2 tsp. spoons;
- Yeast - 1 table. a spoon;
- Water - 1 l.
Sift flour, then add butter and salt. It will be most convenient to take a large bowl for this procedure.
Yeast is preliminarily placed in heated water, and when it becomes liquid enough, it must be poured into a bowl of flour. Now all the ingredients are thoroughly mixed for a quarter of an hour.
After an hour and a half, the kneading procedure is repeated, then the dough needs to be given a few more hours (ideally - 180 minutes) in order for it to infuse. During kneading, the mass must be pressed down and carbon dioxide will come out of it.
The dough is distributed into bread pans, if there are none, then neat loaves can be manually formed.
For another hour, the mass should be infused in the form, and after that it is time to bake - the bread forms are placed in the oven preheated to 180 degrees for an hour.
This is a recipe for the most ordinary, but really tasty bread, in which you can add cheese if you wish. To do this, the easiest way is to rub it on a still warm loaf.
We offer you to watch the video so that you can see all the stages of making such simple bread at home:
Useful rye
Rye bread is considered more dietary. To cook it at home in the oven you need:
- Flour (rye and wheat) - 1 kg each;
- Yeast (it is better to use dry) - 1 table. a spoon;
- Water - 1.5 l;
- Sugar - half a table. spoons;
- Salt - 2 tsp. spoons;
- Sunflower oil. - 1 table. a spoon.
Baking rye bread at home in the oven is practically no different from the first recipe.
Water must be heated to room temperature, then pour it with yeast, previously mixed in one container with sugar.
After let it brew for a quarter of an hour.
Sift both types of flour and place in a suitable bowl.
Add a little oil (vegetable) and a couple of pinches of salt.
Gradually start pouring in water with yeast, while stirring.
Knead the mass and let it brew for 1 hour in a warm and dry place, while covering the container with a towel (can be placed in a plastic bag).
Lubricate the form for future loaves with oil, place the dough there and leave for 30-40 minutes, covering with a special film for baking.
At this time, let the oven heat up.
Bake bread at 200 degrees for 40-50 minutes.
For a spicy taste, one head of garlic is sometimes added to rye products.
Without yeast on kefir
This is a budget recipe for making loaves with a crispy crust and amazing flavor. For him you will need:
- 300 grams of flour (wheat);
- 1 teaspoon a spoonful of soda;
- 200 milliliters of kefir (you can measure with a glass);
- 1 teaspoon a spoonful of salt.
The consistency of the dough should be about the same as in the manufacture of pancakes. First you need to mix together all the dry ingredients of the recipe, that is, flour, salt and soda. After that, kefir is already added.
What happened, stir with a spoon, and then carefully knead with your hands for ten to fifteen minutes. The mass sticks strongly to the hands, but you can’t add flour during the cooking process, but you can grease it with oil.
Heat the oven to a temperature of 200 degrees, place the dough in a baking dish, pre-lubricated it too. Such bread is baked on average from 40 to 50 minutes. The best way to check readiness is with a thin wooden stick.
Borodinsky
Borodino loaves are very healthy and have a piquant taste. Cooking such bread at home in the oven requires the use of the following products:
- Rye flour - 3.5 cups;
- Wheat flour - 2 cups;
- Yeast - 2.5 tsp. spoons (better take dry ones);
- Sugar - 3 table. spoons;
- Sunflower oil - 1 table. a spoon;
- Salt - 2 tsp. spoons;
- Ground coriander - 1 table. a spoon;
- Natural cocoa - 3 table. spoons;
- Water.
The consistency of the dough should be liquid, like sour cream. To achieve this, rye flour (1.5 cups) must be mixed with water at room temperature.
Then add yeast (half a teaspoon) and sugar (1.5 tablespoons) to the resulting mass. Since Borodino bread requires sourdough, after completing these steps, the bowl of dough should be placed in a dry and warm place for 2-3 days.
Wheat flour must be sifted and mixed with the remnants of rye in a deep bowl. Then gradually add boiled water.
Add the remaining sugar, yeast, cocoa, a pinch of salt, coriander, butter and a tablespoon of pre-prepared sourdough. Whisk all ingredients thoroughly for 10 minutes.
Put in a mold, cover it with a clean towel and wait about two hours, allowing the future loaf to brew. At 180 degrees in the oven, Borodino bread is baked for half an hour.
Dark bread is served with all soups, it will be especially tasty with borscht and cabbage soup.
By the way, each housewife prepares Borodino bread in her own way and it is very difficult to find the same standard recipe for its preparation. You can only choose the most suitable for yourself.
Therefore, we suggest watching another video recipe. Perhaps you will like it more.
Baking bread in an electric oven at home
For an electric oven, you can use any of the recipes that were listed above. Several important rules must be followed:
- To prevent the bread from burning from below, it must be placed on a baking sheet, previously sprinkled with coarse salt. Dampened paper or special foil will help protect the loaf from burning the top;
- The classic baking temperature in electric oven products of this type are considered 180-200 degrees. This rule applies to the intermediate level;
- If you splash boiling water on the bottom of the oven, the dough will rise correctly. For this purpose, you can still use a bowl of boiling water set before baking.
Having learned how to bake bread, you can safely take up the preparation of various pastries: pies, pies, cakes and any other. Start with pies! French Quiche: open pie recipes. All the neighbors will come running to you to find out what smells so delicious!
Sometimes it happens that you want something tasty, but you are too lazy to go to the store. Then we start improvising. Surely the recipe for sweet baked apples in the oven, described here, appeared that way.
Love mushrooms? Yes, it's rare to find people who don't like them. There are many ways to cook them. For example, mushroom sauce. Various recipes are described here. All gourmets are delighted with them!
So, as a result, we can take a few really useful tips which are especially useful for novice housewives:
- The easiest way to check the readiness of bread is with a wooden stick. As an alternative solution, you can use a regular match. If, after piercing the loaf, there is no dough left on the stick, then the pastry is ready;
- You can add various ingredients on your own, having previously tested the initial recipe and achieved the correct result. Otherwise, it may not come out very tasty;
- During kneading, the dough needs to be pressed down a little, so carbon dioxide comes out of it;
- You can replace yeast with ordinary kefir - cheap and tasty;
- It is important to use only high-quality and fresh ingredients, especially flour. If you neglect the freshness of products for making bread, then it will not turn out to be the most successful;
- In order for the yeast to rise faster, the dough must be placed in a warm place. You can even additionally cover the container with the dough with a warm towel or any other thing suitable for this.
If you follow all these rules, then you can cook really tasty and lush bread in the oven at home.
11Culinary Etude 24.01.2018

Homemade bread - the sound of these words is magical! It seems that a magical aroma penetrates your nose, and you feel how a hand squeezes an elastic loaf and brings it to your face. Such bread was not cut, but must be broken into pieces.
The familiar word "hunk" comes from the word "break". The hands of the baker put a soul into the bread that cannot be hurt with a knife. Everyone can make bread at home. Even in an ordinary, antediluvian, Soviet-style oven without numerous functions, you can bake a real masterpiece with a crispy crust. Let's check?
Dear readers of Irina's blog, I have been baking homemade bread for many years. In summer - in a small stove that lives in the yard, and in winter - in the oven. Do you think that baking good bread at home is very difficult? Now I will give you recipes with photos that will convince you otherwise!

In the early nineties, I worked in a bakery for my husband's uncle. It was a small bakery built back in the thirties by my uncle's father. Two hundred kilograms of bread came out of the vaulted oven every day.
Uncle Vasya kneaded the dough with his hands, and I molded the bread. It was very hard work. I once joked that they would invent such bread that does not need to be kneaded at all. Many years have passed, and such bread appeared! It is called "bread without kneading".

How to bake rye bread in the oven at home. Recipe with step by step photos
We will bake this loaf from a mixture of rye and wheat flour. Beginners in baking should not immediately start baking bread at home from 100% rye flour - it's really difficult.
Purely rye homemade bread, like the pre-war Borodino bread, should be baked only on sourdough. I recommend that you first master simple recipes, and then take on more complex ones.
For beginners, I advise you to start learning baking with bread without kneading. It was invented by American baker Jim Lahey. A few years later, the recipe made a splash.
The New York Times gastronomy columnist Mark Bittman, under the name "The Great Bread", introduced the amazing bread to the pages of a respectable and authoritative publication after attending a baking master class.
Bittman, who had seen quite a few gastronomic miracles in his lifetime, was struck by the fact that with the help of ordinary household kitchen utensils, without special equipment and equipment, spending a meager amount physical strength you can get a fantastic quality bread with a thin crispy crust and a great crumb.
The secret lies in the fact that with a long proofing and a sufficiently high humidity, gluten develops perfectly, on which the test conditions depend. And the conditions under the lid of the cast-iron pan, in which baking is usually done, provide optimal conditions for obtaining the famous crust. That's all!
The most famous bread recipe in the oven
I am pleased to present you the most famous recipe for bread in the oven.
We will start the dough with dry yeast, but you can also use ordinary “wet” yeast. In the text, the word "pulish" denotes a thick dough.
Poolish Ingredients
- 180 g peeled rye flour;
- 180 ml water (25°C);
- One gram (0.25 teaspoon) dry yeast.
Dough Ingredients
- the whole poolish;
- 420 g wheat flour;
- 250 ml of water (18-20°C);
- Four tablespoons of fermented rye malt;
- Five tablespoons of boiling water (malt is brewed with it);
- 15 g of sugar;
- 14-16 g of salt.
First you need to make a thick dough. Pour hot water into a mug, add yeast.
Pour the water with yeast into the sifted rye flour, placed in a bowl with a capacity of about half a liter, mix well with a fork, put in a plastic bag for 180 minutes to rise. Ready pullish in the photo.

Sift wheat flour (I use a plastic container with a capacity of three liters), put in it all the dough, brewed malt, salt, sugar, pour in water.
Stir, grind as it should with your fingers until a mass of uniform color is obtained.
The dough will turn out sticky and watery - that's right. Do not add any flour!
After half an hour, use a spatula to fold the dough into an envelope.

Close the container with a lid. Fermentation will take place for twelve hours at a temperature of 22-23°C.
After twelve hours, the dough will almost reach the “ceiling”, it will become “bubbly”. Now you need to dump it on the table, thickly sprinkled with rye bran, wheat or rye flour.
Fold into an envelope with a spatula.
Load into a wicker basket or any suitable container (after placing a clean cloth in it, on which flour or bran is generously sprinkled).
The seam should look up. In other recipes, the opposite recommendation is found. Try this and that. Choose whichever is more convenient for you.
To be sure, pour a little flour on top, wrap the edges of the towel. Allow proofing at 22-23°C for ninety minutes. Pictured is the risen dough.

Turn on the oven, heat up to 200°C. Twenty minutes before sending the bread for baking, place a container with a lid in the oven. Best of all - a massive cast iron pan. My business does not have this luxury. I took advantage of a battered enameled leaky "pensioner".
After twenty minutes, remove the dishes from the oven, open the lid, dump out the risen dough.
Replace the lid, return the mold to the oven.
Bake fifty minutes. Recalling that each oven has its own character, which you need to adapt to. You may need more time to bake the loaf.
We take out the finished product from the oven, wrap it in a towel, let it cool completely. You can eat homemade rye bread in three to four hours, otherwise it will seem damp. In the photo - the product in the context.

Wheat bread at home. Simple, tried and tested recipe
This is a recipe for wheat bread without kneading. I offer exactly it, as the simplest, tested many times. See what a cute homemade bread in the photo.
You always want to return to it, it captivates with its ease of implementation, a minimum amount of yeast, a delicate, porous crumb and excellent taste. I’ll keep silent about the aroma - a lot of epithets in superlatives you add yourself!
Dough Ingredients
- 250 g wheat flour;
- 90 ml warm (30°C) water;
- 60 ml yeast water;
- 4 g salt.
Yeast Water Ingredients
- 200 ml warm (30°C) water;
- 1/4 teaspoon dry yeast.
Dough Ingredients
- All dough;
- 250 g flour;
- 180 ml of water;
- 1/4 teaspoon dry yeast;
- 4 g sugar;
- 4 g salt.

How to bake in the oven
Let's make yeast water. To do this, dissolve a quarter teaspoon of yeast in water. We pour out the 60 ml we need from the resulting liquid. This can be done with a beaker or a regular disposable syringe. We don't need the rest of the water.
Mix all the components of the dough in a bowl with a capacity of about one and a half liters. We will send in a plastic bag for twelve hours. Temperature environment- 22-23°С.
Sift the flour into a deep container, add salt, sugar, yeast, water, all the dough, mix with your hands, eliminating lumps. I put the container in a plastic bag.
After fifty minutes, fold the dough into an envelope using a conventional plastic paint spatula, leave to ferment for another 1 hour and 20 minutes.
Cover the table generously with flour through a sieve, tip the liquid dough into it, shape the bread, put it on a sprinkled linen towel put in a bowl with a diameter of about 24-26 cm, sprinkle with flour on top, cover. Let proof in heat for 90 minutes.
Bake just like rye bread in the oven, only 40 minutes. Take out from oven, wrap in a towel, cool by placing on a wire rack.
Here you can clearly see the process of preparing a similar product. The video is in English, but everything is clear.
Recipe for yeast-free bread at home
Sometimes homemade sourdough bread is called "yeast-free". This is not entirely correct, since sourdough, in addition to lactic acid bacteria, also contains yeast. Only you brought them out yourself, and did not buy them in the store.
I want to introduce you to yeast-free bread - we will bake it on soda. Soda country bread is very popular in Ireland. For beginners in baking - a real find!
Yeast-free homemade bread turns out fragrant, somehow very homely, rustic. From him emanates comfort and warmth of his native home. It stays fresh for no more than a day. Then it is better to make toast or toast with an egg from it. But usually he does not live up to the second day of his life.
I am giving you a simple Irish bread recipe without yeast in an almost authentic version. Cooking it at home is not at all difficult. I'll be glad if you like it!
Ingredients
- 385 g of premium wheat flour;
- 135 g whole wheat;
- 320 ml of buttermilk, whey or kefir;
- One teaspoon of soda.
How to bake
Mix the sifted flour with salt, soda. Make a “well”, gradually pour liquid into it, knead a pliable, sticky dough, dump it on a table dusted with flour.
Knead, without fanaticism, roll into a ball. At the top, make cuts "crosswise", 1-2 centimeters deep.
Bake in the oven at 200 ° C for half an hour - forty minutes. Readiness to check with a toothpick - it should come out of the thickest part of the loaf dry.
Wrap the finished homemade bread in a clean cloth, cool.

Yeast-free bread at home on hop sourdough
I have already said that any homemade sourdough bread is only conditionally “yeast-free”. Any sourdough contains yeast grown by you. But there are no "store" in it - it's true.
Ingredients
- 420 g flour;
- 280 ml of water;
- Two teaspoons of liquid honey;
- 5 tablespoons of hop starter;
- One heaping teaspoon of salt;
- Vegetable oil.
How to bake
Pour 120 ml of lukewarm (30 ° C) water into a bowl, put sourdough, honey, a couple of tablespoons of flour into it, stir. It will turn out a mass of sour cream density - “fed” sourdough or dough. It should “come to life”, “bubble” after about 120 minutes of being warm.
Add the remaining sifted flour, warm (30 ° C) water, knead a soft, moist dough. The mass will be quite lumpy at first - that's okay.
Moisten your hands with vegetable oil, knead until smooth, cover the bowl with a film, leave to ferment at a temperature of 22-23 ° C for 14-16 hours.
We form a loaf and bake in the same way as homemade rye and wheat bread without kneading. In time, the baking process in the oven takes approximately 50-60 minutes. Hop bread is placed for proofing not only in a round, but also in an oblong shape. In this case, it is convenient to bake it in a cast iron goose.
Sourdough for homemade hop bread
Ingredients
- 500 ml of water;
- A glass (250 ml) of dry hop cones;
- 1 dessert spoon of honey or sugar;
- 60 g flour.
How to cook
Pour a glass of hops into boiling water (cones are well tamped in a glass). Cook over low heat until the water is reduced by half. Strain, squeeze out the hops. Leave in a warm place overnight or for 8 hours.
Put honey or sugar, flour, stir, leave for 36-48 hours in a warm place. When the volume of the starter doubles, it “bubbles” properly and begins to fall off, then we can talk about its readiness. We put the ripened homemade sourdough in the refrigerator for storage.
Here is a video where you can see how to make homemade sourdough bread from fresh hop cones.
Borodino bread at home according to a 1940 recipe
To bake delicious homemade Borodino bread in the oven, you need to prepare a sourdough for rye bread and perform a number of technological operations that are quite complicated for a beginner. The proposed video shows in great detail and accurately how to bake real Borodino hearth bread at home according to the 1940 recipe.
Dear readers of Irina's blog! I hope that my simple recipes for homemade bread will instill in you the desire to bake a fragrant loaf for the joy of all households. If you have any questions - write them in the comments to this article - I will definitely answer everyone.
See you soon!
With sincere wishes for good health and good luck.
Irina Rybchanskaya, blog author Essay of a culinary amateur
Dear friends, January 27 marks the Day of the complete lifting of the blockade of Leningrad. The happiest period of my life - student life - is connected with the great CITY. The romance about Leningrad performed by the brilliant Andrei Mironov, I hope, will evoke in you the same feelings as in me - pure tears of love and admiration for courage and fortitude.
see also


