Methods for cutting a ceiling plinth for joining in internal and external corners using a miter box, a template, or a wall marking method. Tool selection rules and useful tips.
The content of the article:
One of the most difficult steps in the installation of ceiling plinths is their correct cutting. Only by correctly joining individual elements on outer and inner corners, you will get the desired result. Fillets will look aesthetically pleasing and neat if they are cut at the right angle and the gaps are sealed. To perform this task, a special tool (miter box) is used. And if not, then other devices will help.
Selection of tools for cutting ceiling plinths

To correctly and accurately cut the ceiling plinth, you need to use a tool suitable for cutting. It is chosen depending on the material from which the fillets are made:
- Styrofoam. It has low strength and is relatively inexpensive, and therefore foam models are becoming more and more popular. Their strength does not significantly affect performance characteristics, since usually the ceiling plinth is not subjected to mechanical stress. For cutting, a regular clerical knife is suitable.
- Extruded polystyrene foam. cheap material, whose density is several times higher than that of polystyrene. Because of this, cutting it is a little more difficult, and therefore a sharp and thin knife is used for this purpose.
- Wood. Such skirting boards are more difficult to process, although they have many advantages (environmental friendliness, durability). They cost more
especially if they are made of hardwood. Before cutting the ceiling plinth from wood, stock up on a hacksaw.
It can be purchased at a hardware store or made by hand according to the following instructions:
- Three boards 50 * 15 cm are knocked together with a long edge into the shape of a three-sided, rectangular box. Please note that a 90 degree angle must be observed between the side bars and the transverse plank.
- Using a protractor, mark an angle of 45 degrees on the bars. Instead of a protractor, you can use a school square. In it, one angle is 90 degrees, and the other two are 45 degrees.
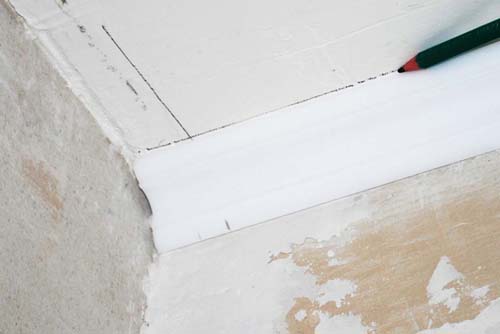
- Before cutting corners, mark the vertical direction with a simple pencil.
To work with this home-made device was convenient and safe, the boards must be well sanded before fastening.
Technology for cutting ceiling skirting boards
For prompt and high-quality work, you need to choose a tool in accordance with the material of the plinth and choose a cutting method. If you have a miter box, then there will be no particular difficulties in the process. If it is not there, then two options are possible: cut according to the template and measurements on the ceiling, or make this tool yourself.
Features of cutting ceiling plinths in a miter box

It is necessary to work with this device extremely carefully so as not to dull the tool and not to leave gashes in unnecessary places. In the process, we adhere to the following instructions:
- We fix the baguette in the miter box in the way it is planned to place it on the wall. The side that will be pressed against the ceiling on the miter box should be adjacent to the sidewall.
- We insert a cutting tool (hacksaw or knife) into the desired gap and cut the fillet.
- We process the junction of the ceiling plinth and apply it to the wall to check the correctness. Foam molding can be corrected sharp knife if the unevenness of the end is about 2 mm. Wooden plinth you can just sand it down with sandpaper. For ease of use, it can be glued to a wooden block.
When cutting and trimming foam and polyurethane products, remember that these materials crumble and push through, so the tools must be sharp enough, and a strong mechanical impact on them is undesirable.
Technique for cutting ceiling plinths according to a template

This method can be used if your corners are even and you want to cut the baguette exactly 45 degrees. To do this, before cutting the ceiling plinth in the corners, you need to draw a miter box on thick paper. We draw two parallel lines and mark the angles at the desired degrees using a protractor.
We place the fillet in this case in the same way as on a traditional miter box. Please note that you need to cut the plinth while holding the tool in a strictly vertical position.
Rules for cutting ceiling plinths by marking

This method is used to cut the plinth in cases where there is neither a miter box nor parts from which it can be made.
To do this, you need to make markings on the wall in this order:
- We apply the baguette in the corner to the place of fasteners.
- On its one edge, we draw a base line for the mounting level on the ceiling.
- We apply the fillet in the same way to the perpendicular line drawn on the ceiling and again draw a straight line along one side. We should get two segments that intersect at one point.
- We again apply two skirting boards in turn and mark this point on them.
- We repeat the same procedure now on the wall to mark the place of cutting from below on the products.
- We connect two points with a line. It can run at an angle of 38-45 degrees, since the walls and corners in living rooms often uneven.
- Cut off the baguette along the drawn line.
When cutting in this way, it is important to accurately draw all the lines and mark the points. An error of even a few millimeters will cause a gap to form. This method is suitable for cutting and joining both the inner and outer corner of the ceiling plinth.
Method for cutting a ceiling plinth without a miter box

To neatly dock in the inner corners of the fillet, you can do without a miter box.
We perform the work in the following order:
- We apply the end part of the baguette to a sheet of paper and trace the contour of the convex side. It is more convenient to use a small piece of plinth (if any).
- Cut out the resulting template.
- We transfer the contour to the surface of the baguette with a simple pencil.
- Cut along the drawn curve.
- To try on, we apply one skirting board tightly with its end part to the wall, and then the second.
- If there are small gaps, then they can be processed with a clerical knife or subsequently sealed with sealant.

When working with a miter box, you need to consider two points:
- The inner corner of the ceiling plinth is formed from two elements: the first is inserted from the right into the miter box and cut from right to left, the second is wound from the left and cut from left to right.
- We start the first part of the outer corner on the left and cut it from right to left, we start the second part on the right and cut it off from left to right.
- Before you start cutting a baguette with a miter box, try cutting off a trial plank to avoid mistakes.
- Correct measurements can be made by measuring the length of the inner corners of the plank along inside, and external - from the point of the inner corner to the width of the fillet deep into the room.
- If the baguette is installed under stretch ceiling, then attach it only to the wall. In no case should the adhesive composition get on the vinyl sheet.
- The final fastening of the plinth should be carried out only after the precise fitting of the plank.
- If the corners and walls in the room are even, then fitting can be done on the floor.
- When installing baguettes, it may be necessary to adjust them several times, so stock up on tools and patience.
- Instead of a template and miter box, you can cut in the corner between the wall and the floor, or by moving a table against the wall. In this case, on the wall, ceiling and baguette, the angle of cutting off the end should be noted.
- If you are interested in the question of how to cut a ceiling plinth without a miter box, and you do not have time to use templates, then you can purchase special corner inserts in advance. They will hide the gaps, but will protrude and stand out on the coating.
- If you have a plinth made of precious woods, then you need to cut and install it very carefully, since a large amount of putty for sealing joints will be too noticeable, and painting over a baguette is an inappropriate solution, because this way you will hide the natural texture of the array.
- Styrofoam products do not have to be adjusted to each other end-to-end due to the softness of the texture, but wooden and plastic models must be well matched.
- If trapezoidal niches on the wall need to be bypassed from above with a plinth, then we join the piers at an angle other than a straight one.
In this case, we cut the plinth at an angle equal to half the joint. For example, if the walls are joined at an angle of 120 degrees, then we cut the fillet at an angle of 60 degrees.
The miter box usually looks like a tray with vertical holes for a hacksaw. It can be made from wood, metal or plastic. This instrument represents the most ancient and the simplest tool carpenter intended for circumcision wooden parts at an angle of 90° and 45°. There are types of such a device for professional work, with swivel mechanism, in them the cutting tool can be rotated and fixed in any position.
 How to cut the ceiling plinth
 Ceiling corners are divided into internal and external, the method of docking on them is slightly different.
If necessary, you can make a miter box with your own hands. To do this, you need three trimmings from plywood or boards. the same size. First, they are applied in the form of an inverted letter “P” and the corners are marked. Then, according to the marking, cut out slots for a hacksaw almost to the very bottom, and the boards are twisted.
Inner corner
- We take correct measurements.
- We install the plinth bar into the miter box so that this position exactly coincides with the placement on the ceiling.
- The plinth should be firmly pressed against the opposite wall of the miter box. Hold and press with your free hand.
- We put a hacksaw at an angle of 45 ° in a special hole and cut off the part.

- The adjacent part must be cut in the same way, only in a mirror image, as shown in the photo.

When cutting soft materials (PVC, polystyrene foam), use a hacksaw for metal or an ordinary construction knife. Then the work will be neat and with smooth edges.
outside corner

- Measure the length of the plinth from the nearest wall to the outer corner, leave a line on the wrong side with a pencil, indicating the desired length. It should be noted that the edge (its upper part) should go out a little.
- The plinth is moved to the miter box and cut off.
- The adjacent bar also needs to be measured with a margin and cut off in a mirror image to the first part.
We try on the ceiling plinth: the joining of the parts must be perfectly even. If the result is not achieved and there are irregularities at the joints, you can trim the edges with an ordinary knife to a perfect fit.
 Checking for an even fit
 The video describes all the nuances well:
Method two - without additional tools
For the inner corner, you can use the easiest way to perfectly join - by marking on the ceiling. Another example of how to cut a corner nice and even.
- Apply a fillet to the ceiling, tightly pressing its smooth edge into a corner.
- Draw a line along the long side of the skirting board on the ceiling.

- The same action is done with an adjacent part on the other side.
- Mark the point of intersection of the lines.

As a result, you will get an even angle of 45 ° if you draw a line from the intersection point to the edge of the part. Note that the above marking method only works for perfectly even corners.
other methods
With a good eye and the accuracy of the action of the hands, you can use a home-made template that resembles an imitation of a miter box. To do this, take a thin board or thick plywood and draw a layout in the form of a horizontal rectangle. Use a protractor to mark 45° on the right and left side of the rectangle. Draw lines connecting opposite edges. 
You can now cut the ceiling plinth using this layout. The actions are simple and similar to the description above in the first option. Only the ceiling parts should not be inserted, but superimposed on the drawing and combine the hacksaw with the layout layout.
 Special accessories for docking
 By installing ceiling plinths, you can get around the question of how to cut a corner with a side. In a situation where you don’t want to cut anything, if you are a woman and love beauty, and not carpentry, you can go the other way. We advise you to choose a plinth for your finish, to which in the store you will find a part that matches the drawing, covering the junction. This way will save time and effort.
Today it is impossible to imagine the interior of a residential building or apartment without ceiling plinths. Skirting covers irregularities false ceiling or wallpaper, gaps and imperfections of the walls, gives the interior completeness. But how to make the skirting board fit perfectly in the most important place - in the corner? There are several ways.
Miter box use
Correctly cut the plinth for installation in the corner will help the miter box - a special device, which is a tray for cutting boards, plastic, etc. at different angles. The miter box can be bought at the store or made by yourself. Usually a saw is attached to the miter box sold in stores, but you can use your own tool.
The miter box has a recess for a board or plinth to be cut off and saw slots at an angle of 45 and 90 degrees. You will need to cut the baseboard at a 45 degree angle.
To cut a skirting board with this tool, follow these steps:
- We apply the plinth to the future attachment point.
- Mark where we will cut.
- We put the plinth in the chute of the miter box so that the lower part is pressed against the surface of the fixture, and the part that will be smeared with glue “looks” up.
- Cut off the section by inserting the saw into one of the 45-degree holes.
- We correct the cuts with a knife or the same saw (remove irregularities).

After that, the plinth can be glued into place.
How to make a miter box yourself?
If desired, the miter box can be made at home. It can be made from wood or iron. The dimensions of the workpiece do not play a special role, but the wider it is, the more accurate your cuts will be. However, if the width is greater than the length of the hacksaw with which you will cut the baseboards or boards, then sawing will be extremely inconvenient, so you do not need to take a workpiece that is too wide.
First, a transverse straight line is marked in the center of the workpiece. Then, at a distance of 1/2 the width of the workpiece from the intersection of the straight line with the edges of the workpiece, marks are made. Then these marks are connected crosswise, as shown in the figure.

Next, the process of marking the side walls of the miter box begins. Attach them to the already marked base and make marks, focusing on the marking of the base. Then draw straight lines from these marks across the entire wall.

After that, the installation process of the miter box begins. The walls must be attached to the base with self-tapping screws if the fixture is made of wood or chipboard or corners with bolts if it is made of steel. Only after installation in the miter box, cut through the slots for the saw.
After making slits, the miter box is ready. If you have a large amount of work or want to do repairs on a regular basis (on professional basis), this simple device can speed up the process of cutting skirting boards by 5-10 times.
How to cut a plinth without a miter box?
The easiest way is to draw a future cut line on paper (cardboard, wallpaper), and then, attaching a plinth blank to it, cut it off.
To do this, you must first attach the baseboard blank to the paper and draw two parallel lines that will indicate the sides of the baseboard. Then, using a protractor, you will have to measure 45 degrees and draw a line for the future cut. Then the drawing is used in the same way as the miter box: a workpiece is placed on it and the excess is sawn off along the line.

The disadvantage of this method is that the saw will have to be kept on weight, focusing on the drawing, and not inserted into a pre-prepared slot.
If the angle is not right
Unfortunately, in some cases, the angle between the walls in the room is not straight, but sharp, or, conversely, obtuse. This is due to structural defects that arose through the fault of non-professional builders, the architect's idea, or the result of subsidence of the soil some time after the construction of the building. This is especially common in village houses and cottages.
No miter box or a drawing that replaces it will help in this case, and you will have to do the markup in place.
- Attach the workpiece to one of the walls so that it rests against the other wall with its end.
- Draw a line on the ceiling along the workpiece.
- Perform the same operation on the other wall.
- At the intersection of the two lines, mark the workpiece itself.
- Draw a line from the mark to the corner of the workpiece and cut along it.
- Do the same with the blank, which you will attach to the other wall.
- Glue both blanks; they fit tightly.
External corners
It happens that the room has not only internal, but also external corners, which also need to be pasted over with a plinth (see photo). How to do it? There are also several ways here. The easiest way, as in the case of internal corners, is to cut them with a miter box. The outer joints must be cut so that the side that will be glued to the ceiling is on the surface of the miter box, and the side pressed against the wall is facing the wall of the fixture.
As in the case of internal corners, you can also use the markup "in place", that is, draw lines on the ceiling. Here the technology exactly repeats the one used for internal corners.
You can use wall markings by attaching a blank and drawing a line along its bottom edge (see photo).
If the outer corner is too rounded, you can finish the joint with a knife.

To the point where they converge, a line is drawn straight along the future part of the connection. From the point on the ceiling to the second. The resulting markup will be the line along which you need to saw off or cut off the connecting parts. Using these techniques, you can no longer wonder how to cut the corners of the ceiling plinth.
What tools can be used?
The expediency of using certain tools is related to the materials from which the plinth will be made.
Tab. 1. Varieties of materials and features of their use.
| Variety of material | Material properties, requirements | Tool |
|---|---|---|
| Polyvinyl chloride (PVC) | PVC skirting boards are distinguished by the fact that they are easily damaged when pressed and no longer restore their former appearance, as they are devoid of elasticity. Therefore, such skirting boards cannot be pressed when cutting. | Cut with a construction knife or a hacksaw for metal. A blade or a sharpened kitchen knife is also suitable. |
| Styrofoam | The foam plinth is also not very durable, but it is better than PVC analogues. Crumbles easily. | You can use the same tools as for PVC |
| Wood | Stronger and more aesthetically pleasing than their polymer counterparts, but expensive. | Wood is best cut with a hacksaw, you can use metal, although this way you risk clogging the teeth of the blade with sawdust. A fine-toothed wood saw works best. |
Using factory corners - an alternative to cutting and sawing
Instead of cutting skirting boards, you can use ready-made corners, which are sold in the same hardware stores. In this case, the main plinth can simply be measured and cut off. in the usual way, at a right angle, and then attach end-to-end with the corner element.

The disadvantage of corner elements is that they are actually and visually larger than the baseboard, which will make the corner noticeable. This can ruin the look of the room. It is also inconvenient to use the corners where the walls do not meet strictly at an angle of ninety degrees. But most of the time they look great.
Conclusion
Thus, cutting corners when gluing skirting boards is one of the most complex and responsible procedures for which it is advisable to use a special device - a miter box - which allows you to cut the skirting board at an angle of 45 degrees. If the angle between the walls is not straight, you have to use manual markings. Cutting tools depend on the material from which the baseboard is made.
Video - How to properly dock skirting boards


