Reading time ≈ 3 minutes
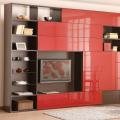
Installation of skirting boards along the perimeter of the floor allows you to carefully hide the wallpaper, fix flooring. High-quality installation of floor skirting boards will help in the future to carry out hidden cabling, remove unsightly communications and make the interior of the room beautiful and stylish. When selecting skirting boards, special attention will need to be paid to their design and quality. Carefully selected products will last for many years and will give the room an original look.
Required Materials
For work, you will need to prepare a double plinth with a compartment for cable routing. The product has soft edges that will make the transition smooth and neat. The advantage of this type is the ease of subsequent removal during repairs. For example, if the owner needs to stick new wallpaper, it will be enough for him to remove the upper part of the prefabricated plinth and finish the walls. After the installation of a plastic plinth (its upper part) is carried out, and at this stage the repair will be completed.


Additionally, for the installation of skirting boards, you will need to purchase accessories. It is selected according to the shape of the room (the number of corners, transitions). The contractor will need to buy corner adapters and limit switches installed on the plinth near the doorways, connectors for the slats.

To fix the products to the wall, you will need to purchase dowels 6X40 mm, and the contractor will also need a drill, with which he will prepare holes for wall mounts.
Step-by-step instructions for installing the skirting board on the floor
Before starting the installation, it is recommended to study the attached video and photo materials: they will help you see the overall picture of the work. Also, the owner will need to study the features of the assembly and connection of individual slats. Implemented self-installation floor plinth according to the following instructions:
1. A corner joint is assembled, applied to the installation site, places are selected for making holes for dowels.

2. The upper part of the skirting boards is removed, and holes are drilled in the lower part and dowels are installed. Then the screws are screwed on. The approximate distance between the fasteners is 30 cm. Also, do not forget to remove the dust with a vacuum cleaner.


3. Next, the plinth is removed along the wall. At the junction of the two strips, it is necessary to fix the adapter. To do this, transition fittings are attached to the already fixed product (to the upper part). After that, the installation of the adjacent plinth and the installation of its upper part are carried out.


4. When installing corner joints, it is necessary to use end caps (for internal or external corner). They are installed in the same way.


5. Upon completion of the installation of skirting boards around the perimeter of the room, you can proceed to the installation of end caps near the doorways. At this stage, the work will be completed in full and the contractor will only have to evaluate its quality.
It is recommended to select high quality skirting boards that are soft enough: they are easier to drill. All adapters must be identical in color and pattern to the main elements, otherwise the transition will be inharmonious and ugly. And in order to understand how to fix the skirting board to the floor without any problems, you need to carefully re-read the attached instructions and screw them according to the described rules.
An important point will be the assessment of the convenience of installing a PVC skirting board: there should be no communications or pipes under the places where the dowels will be located. Any obstacles must be "bypassed". For example, a plinth can be screwed near the pipe and its protrusions can be closed with end caps. Then the transition will look neat, and the plinth will be able to stylishly frame almost the entire perimeter of the room.
Do-it-yourself plinth installation video
You can proceed to the final stages, which include the installation of lighting equipment and the installation of ceiling and floor plinths. Laying a skirting board is a completely simple process that anyone can perform without resorting to the help of professionals. If you follow the instructions below, then any home master will be able to install both plastic and wooden plinth.
The installation of a floor plinth made of plastic or wood has some differences during the installation process, so before starting work, you need to decide which plinth will be in the apartment.
Plastic skirting boards are light, inexpensive and go well with modern linoleum or laminate floors. But if the apartment has parquet floors made of expensive types of wood, a plastic plinth will look undignified, and a wooden plinth needs to be laid.
Installation of plastic skirting boards
We do it quickly and efficiently with our own hands. First of all, you need to purchase everything you need and prepare the tool. You should be aware that the installation of plastic skirting boards is impossible without additional docking elements, which are also made of plastic and must be the same color as the skirting board. Connecting elements include:
- outside corner
- Inner corner
- Line connector
- End caps (left and right)
The standard skirting board length is 2.50 meters. Based on this, it is necessary to measure the walls in all rooms where plastic skirting boards will be installed, add one standard skirting board for possible errors, calculate how many internal and external corner joints will be needed, as well as the number of end caps and linear elements. End caps are installed where the skirting board fits into the doorway, while the linear elements allow the joining of skirting boards that run along long walls.
To perform the work you will need the following tool:
- Perforator or drill
- Dowels and screws
- Hammer
- Crosshead screwdriver
- Roulette, but better oilcloth centimeter
- Pencil
- Awl
- miter box
- Hacksaw with fine teeth (slotting)
Video instruction. How to lay a plastic baseboard on the floor
A miter box is a “P” shaped device that has slots at angles of 30, 45, 60 and 90 degrees and allows you to cut wooden bars at certain angles with high accuracy with a special hacksaw.
When installing plastic skirting boards, the miter box can only be used for even cutting straight sections of the skirting board, since the corners are formed with the help of auxiliary elements.

Do-it-yourself installation of skirting boards begins with the longest wall. It should be remembered that the quality of work is directly proportional to the accuracy and thoroughness of all measurements.
The long wall can start from door jamb and end with a transition, at a right angle, to the next wall. The plastic plinth consists of two parts: a supporting and fixing base and a removable strip.
First you need to fix the "inner corner" element on the plinth and press this element to the beginning of the perpendicular wall. Then, moving towards the door, measure the total length of the skirting board to the doorway. Cut the required length of the skirting board, taking into account the in-line connection and the end cap.
Remove the removable bar, and fix the measured plinth with adhesive tape at several points. Using an awl and a hammer, through the base of the plinth, leave marks on the wall, given that the first mark from the corner element is placed at 4-6 cm, and all subsequent marks are placed at 35-45 cm.
Separate the plinth from the wall and with a puncher, if the walls are brick or concrete, fill the holes for the dowels along all the marks. Then hammer in the dowels and use the self-tapping screws to fix the plinth in place. The next measurement is made from the installed corner element. And just consistently bypass the entire perimeter of the room.
The most important thing is accurate measurements. If the experience in such work is small, then it is always better to cut off a slightly smaller piece of the plinth. Fitting it in length is not too difficult, but a short piece can be thrown away.
The advantages of plastic skirting boards are:
- low price
- Absolute moisture resistance
- Not susceptible to decay
The disadvantages include fragility and fragility
Installation of wooden skirting boards
Do-it-yourself installation is a little more difficult than plastic skirting boards. Unlike plastic skirting boards, wooden skirting boards are made of solid wood and do not have a removable part and auxiliary connecting elements.

When installing wooden skirting boards with your own hands, the miter box becomes the main tool, since only with this device you can cut the skirting board at an angle of 450. You should not expect that the angle of the walls, especially in old buildings, is made strictly at 90º, so you should stock up on putty in advance, which will have to hide construction defects.
Video on how to join a floor plinth. How to use the stool. How to cut correctly
Do-it-yourself installation of the skirting board can be started by measuring the perimeter of the room in advance and using a miter box, cut and mark all the wooden elements.
Installation of a plinth wooden is carried out also with the help of self-tapping screws. Usually they are screwed at regular intervals into the baseboard until a point appears on the other side. Then the plinth is pressed tightly against the wall, the points from the self-tapping screws are marked with a pencil and then, using a drill or a puncher, depending on the type of wall, holes are prepared for the dowels.
To prevent possible cracks in the plinth, holes are first passed with a thin drill and then self-tapping screws are screwed into them. The installation of a floor plinth made of wood ends with a thorough filling of places where the wall is not quite even, as well as all possible construction defects.

Solid wood skirting boards have undeniable advantages:
- Wood is an environmentally friendly material
- Products are strong and durable
There are also disadvantages:
- The possibility of mold, wood pests
- Wooden skirting boards are not moisture resistant
- High price
When the repair of ceilings, walls and floors is completed, it is the turn to install the floor plinth. If rarely anyone looks up, then the floor plinth is always in sight. Therefore, it must be installed perfectly and firmly fixed to the wall, as it will be subjected to constant impacts from the vacuum cleaner brush, accidental kicking or when carrying furniture and things. The outer corners must be especially secure.
Mostly used plinth made of wood, plastic, MDF, metal, stone and ceramics. A wooden skirting board is rarely installed, since to create a beautiful appearance it requires perfect evenness of the walls, a complex paintwork and expensive (like metal ones). Plinth made of MDF is very fragile. Stone and ceramic skirting boards are only suitable for floors made of ceramic tiles, tile or stone.
Therefore, today the most popular plastic plinth. It is great for laminate flooring, wood, linoleum, carpets. Cheap and waterproof, easy to install, has a cable channel for wiring, the market is represented by a large assortment of colors.
Calculation of the required number of plinth rails
The floor plinth is usually produced in a length of 2.5 m. Before starting the installation of the plinth, it is necessary to calculate the required number of rails. The calculation is performed according to the formula, as for ceiling plinth. It is necessary to divide the perimeter of the room by the length of one rail. A specialized online calculator will help you with this.
To exclude additional joints, you should buy one rail more, since in addition to the appearance there will be additional costs for connecting elements, the price for which heels can reach the cost of one rail.
Choice of skirting board color
Perhaps the most important thing when buying a skirting board is choosing its color. When choosing a color in a store, due to differences in the color temperature of light sources, it seemed that the color of the skirting board that matches the floor and walls may not be the right shade. Therefore, when choosing a color, you should take a piece of wallpaper with you to the store and floor covering By attaching them to the skirting board, it will be much easier to make a choice. If the walls or floor are painted with paint, then when painting them, you need to paint a small piece of thick paper or plywood, for a sample, especially for choosing the color of the baseboard.
Fittings for docking rails
The plastic plinth is also good because it has special fittings, thanks to which high precision is not required when sawing. Therefore, the installation of the plinth is possible home master even without experience in this field. Nice appearance The result of the work is provided by the plinth design.
The set of accessories for the plastic plinth includes five elements: the right and left plugs, the docking element of the plinth rails, the inner and outer corners. They exactly match the skirting board in color and texture and are sold separately.

In the photo, the external and internal view of the right plug. The left plug is exactly the same, but made in a mirror image. Therefore, when calculating the amount of fittings, this fact must be taken into account. On the plug there is a foot with a hole for fixing it with a self-tapping screw on the wall. This element of fittings is usually installed on the end of the plinth rail at the door trim.

The connecting element is used to close the gap between the skirting boards when the wall length exceeds the length of one skirting board strip, usually equal to 2.5 m.

The photo shows a docking element installed on the rails; on the near rail, the decorative plug of the cable channel has not yet been inserted.

In this photo you can see the inner corner. It is held without self-tapping screws, due to pressing the plinth with slats. When installing the plinth, it is necessary to ensure the same clamping of the corner, otherwise it may be installed crookedly and look careless.

And so the outer corner is arranged from the inside. It has two legs for attaching to the wall. The outer corners rarely have to be used, but I was “lucky”. It was necessary to install eight such corners when installing the plinth.
Workplace organization
The installation of skirting boards requires a constant change of place of work, therefore, in order to have everything you need at hand, it is advisable to place the fittings, fasteners and tools in a box and move it along with you.

The photo shows a cash box, in the branches of which accessories, dowels, self-tapping screws and small tools are laid out.
Skirting board installation
The installation of a floor plinth is the final stage in the repair of a room in an apartment and is performed when the ceiling and walls are repaired, the floors are laid.
Cutting the plinth
They begin to install the skirting board from the inner or outer corner or from the door. To do this, install the two necessary fittings in the required places, insert the end of the plinth rail into one of them and make a mark on the plinth near the second element, taking into account the fact that the plinth rail should go inside the corner or plug by 5 mm.

First, it is advisable to install the skirting board strips, which will not need to be cut. In this case, it is desirable to provide that the docking elements are in places that will later be covered by furniture.

If the plinth rail cannot be applied at the installation site due to its greater length, then the distance between the fittings is measured with a ruler and 10 mm is added to the result. Then, on the rail of the plinth, a mark is applied for sawing. When marking with a ruler, it is better to add a couple of millimeters of length than to make the baseboard shorter. The excess can always be cut off.
Sawing plinth
Sawing plastic skirting is much easier than fillets, as there is no need to withstand sharp corners. All ends have a right angle. But nevertheless, if the end of the rail is crooked, then the internal corners, since they are not fixed, can be set skewed. Therefore, it is still necessary to ensure a right angle of the plinth end when sawing.

More precisely, it is more convenient and fastest to cut the plinth with a hacksaw, in a device called a miter box. If the miter box is not available, then I advise you to buy it. You can make a miter box yourself from improvised material in a couple of hours, it will be even better than cheap purchased plastic ones.

Sawing in a miter box guarantees not only the right angles of the plinth rails, but also makes it possible to saw off pieces as short as one millimeter.

After fitting the rails in place, you need to remove the burrs formed during sawing with a knife from the ends.
Drilling fixing holes in the walls for installing skirting boards
Perhaps the most important operation when installing a floor plinth is drilling holes for mounting it on the wall. The final result of the work depends on the accuracy of the height of the drilled holes.


At smooth walls holes are drilled at a distance of 50 cm from each other. From the floor level at a height equal to the distance from the floor level to the middle of the cable channel of the installed plinth. Since no greater force is required to securely hold the plinth, it is enough to use a dowel with an outer diameter of 6 mm, a length of 30 mm and a self-tapping screw 3.5 × 25.
After drilling the holes, be sure to remove all the dirt that has appeared. A vacuum cleaner is handy for this. But you can just sweep the dirt with a brush on the scoop.
Plasterboard wall installation
If the walls in the room are made of plasterboard fixed to metal frame from profiles, then the line of fastening of the plinth can fall on the profile, which usually has a width of 30 to 50 mm. In this case, the plinth is fastened without the use of dowels by directly screwing the self-tapping screw into the profile wall.
It is enough to pre-drill a hole in the profile with a metal drill with a diameter a couple of millimeters smaller than the outer diameter of the self-tapping screw. Here it is highly desirable to use the jig mentioned above, since the drill can easily go away from the drilling site. You can do without drilling, if you use special screws with a drill at the end. To check the possibility of attaching to the profile, it is enough to pierce the drywall with an awl at the level of fixing the plinth. If the awl rested against the metal, then dowels are not needed.

One of the walls in my hallway was plasterboard on a frame. But I was not lucky, because for the linoleum flooring, the floor was leveled with plywood and its level rose several centimeters. Therefore, the plinth attachment line turned out to be higher than the frame profile. I had to use dowels specially designed for mounting on drywall walls, called "Butterfly".
For your information, one dowel "Butterfly", installed in a drywall wall, can withstand a load of up to 10 kilograms. Therefore, with its help, you can securely fix not only skirting boards on the wall, but also a TV, shelves, paintings, mirrors and other household items.

To install the Butterfly dowel into a drywall wall, you must first drill a hole in it to ensure a snug fit of the dowel in the wall. You can drill with any drill using a jig. Next, you need to press the protruding parts of the dowel rod to each other, so it is easily inserted into the hole in the wall. It remains to apply a few light blows to the dowel head with a hammer and you can proceed to fixing the baseboard.
It should be noted that the diameter of the self-tapping screw should be slightly less than the diameter of the hole in the dowel head, the length of the self-tapping screw must be at least the length of the compressed dowel, since the self-tapping screw is not screwed into the head of the dowel, but into its movable end.
Attaching the skirting board to the wall
Some craftsmen suggest first drilling holes in the plinth slats and then drilling the wall along them, using dowels with hats. But this method cannot guarantee the accuracy of the installation of the plinth, and in any case, even with diligence, gaps will turn out in some places.
If necessary, for example, when laying a cable behind a plinth or replacing linoleum, dismantling a plinth fixed in this way will be very difficult. In addition, dust and crumbs from drilling will remain behind the baseboard, which I consider unacceptable. Therefore, as you already understood, I use a different method of fastening, which guarantees a high quality of work.

Holes for self-tapping screws in the plinth are best not drilled, but pierced with an awl. As an awl, I use an old screwdriver, the blade of which is sharpened on a triangular point. When rotating, the edges of the awl push the material apart, which makes the edges of the hole more dense. In Soviet times, the tool was made of tool steel, which had high hardness and at the same time was not brittle. Therefore, an awl from a screwdriver serves me for many years, does not blunt and does not break. And due to the presence of edges, a hole with such an awl can be made without a drill even in plywood.

To obtain a hole in the desired location of the plinth, you need to attach it to the wall at the installation site. Make a mark in the center of the cable channel, move the plinth slightly away from the wall so that the dowel is visible, and pierce the hole along the mark strictly along the line where the dowel is located. Now it remains only to wrap the self-tapping screw, threaded through the hole made into the dowel, and the plinth will be securely and accurately fixed to the wall.
Installing the outer corners of the skirting board
The outer corners of the plinth are often in the area of heavy traffic of people and the probability of catching them is high. Therefore, the fastening of the outer corners must be approached with full responsibility. Since the corners are attached to the wall only two centimeters from the corner, drilling a hole for the dowel can chip the corner. Therefore, even at the repair stage, when leveling the outer corners of the walls, it is necessary to provide for the possibility of securely fixing the outer corners of the plinth. If the profile is not used when leveling the corners of the walls, then only a segment of at least 20 cm long can be laid from the floor in the area of \u200b\u200bthe future attachment of the skirting corner.

If the perforated corner profile is laid in advance, then it remains only to pierce the plinth and profile sheet with an awl and screw in a short self-tapping screw with a thread reaching the cap itself. To securely hold the corner, it is advisable to place a washer under the self-tapping screw. A self-tapping screw is easier to tighten if you hold it with tweezers with bent ends.
The fastening of the outer corners of the plinth to the walls of drywall is carried out using the same technology, since usually sheets of drywall are attached to a metal profile, and, as a rule, self-tapping screws can be screwed into it.

It remains only to install decorative plugs for the cable channel. To do this, the plug is bent, its ends are wound behind the fittings, after which it is straightened and tucked into the cable channel.
All photos from the article
wood finish deservedly considered a classic, not subject to any newfangled trends. On the modern market now there are many good floor borders, but natural wood, like a hundred years ago, is valued higher. In this article we will talk about the advantages and disadvantages of this material, and also tell you how to correctly select and install a plinth made of wood with your own hands.
What you need to know about wooden skirting boards
Tip: when choosing such products, you should remember that today high-quality wood cannot be cheap.
These borders belong to the upper or maximum, middle price category.
Even if you decide to make wooden skirting boards with your own hands, they will cost more than budget plastic.
Product types
At the moment, the market offers two types of natural wood products: this is a curb carved from solid wood and a veneered version.

- Solid wood skirting board is a classic. The cost of such planks depends, first of all, on the type of wood, as well as on the complexity of the profile, grade and level of processing. Such borders can be found both among elite goods and in the middle price niche;
- The basis of the veneered border is a natural array of inexpensive conifers, as a rule, it is pine or spruce. In some models, glued laminated timber is taken as the basis. After the formation of the facial profile, on the bar industrial way veneer is pasted over. As a result, at the output we have a product that is absolutely identical to the elite natural array, but the price of this skirting board is an order of magnitude lower than the original.

Important: in part, planks made of pressed MDF and covered with natural veneer can be attributed to wooden products.
Most often they are used for arrangement.
Product shape
Gone are the days when the entire range of such goods was limited to a few models with a triangular cut. And these plinths differed only in the presence or absence of a chamfer. The modern woodworking market is constantly improving technologies and equipment.

Now wooden laths are practically not inferior to polyurethane products or plaster moldings in terms of the complexity of the ornament. The patterns that CNC programmable machines are capable of applying can only be compared with hand-carved wood.

Each manufacturer is now trying to stand out with its unique models. Of course, there is a standard classic line of products in which the size of the bar base ranges from 10 to 25 mm. As for the height, there are no restrictions here, it starts from 40 mm and in some models can reach up to 300 mm.

Important: when choosing a size, they often start from the height of the ceiling.
For a city apartment with a standard ceiling in the region of 2.7 m, the height of the bar should not exceed 70 mm.
For ceilings up to 3 m, planks of 70 - 90 mm are suitable, for higher ceilings a plinth of at least 50 mm is taken, there is no upper limit here.
What wood is the plinth made from?
It has always been believed that the skirting board should be selected, starting from the material from which the floor is made.
But modern design trends allow you to successfully combine different breeds and bypass old dogmas.
- Among conifers, of course, pine is considered the most popular. It is a pleasure to work with this material. The soft array is well cut and processed. Texture and color allow you to use a variety of tinting compositions, achieving the original design solution. Spruce is less commonly used in production, as this array is considered less elastic;

- A separate niche is occupied by larch borders. The price of such an array is quite high, but larch is not afraid of moisture, and most importantly, it is not subject to decay. These skirting boards are great for spaces like the kitchen or shower room;
- Oak is traditionally considered an elite massif. It has unique strength and durability. But it is valued not only for this, the aesthetic qualities of oak are deservedly considered one of the highest. Skirting boards made of stained, bleached or artificially aged oak emphasize the solidity of the interior;
- Beech also belongs to the elite varieties; in terms of its characteristics, it is practically not inferior to oak. But in its pure form it has an original pink tint and a smooth texture;

- Walnut borders have a noble brown color. These strips have good elasticity and are often used for the production of bent profiles. The high content of iodine gives the nut healing qualities and makes it resistant to decay;
- Ash has a beautiful light olive color. Like walnut, it bends well, its texture is vaguely reminiscent of oak, but with a clearer drawing of the fibers;

- Alder is quite pliable in processing, but the planks practically do not bend. In addition, this array is afraid of any moisture, even light, temporary dampness can lead to rotting and damage to the curb;
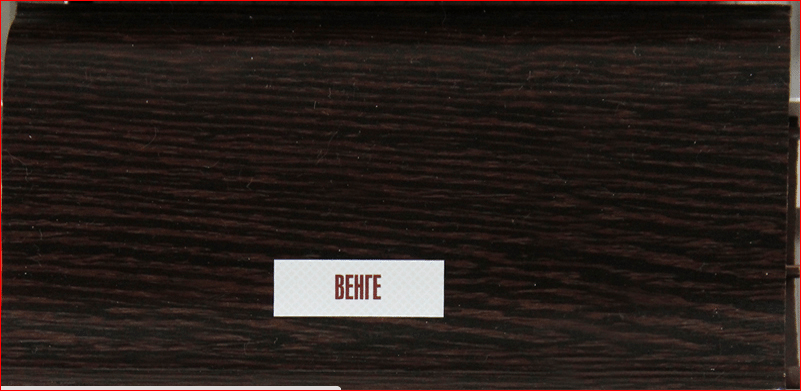
- Exotic wenge and mahogany people choose because of the original colors and textures. The array itself is quite durable and lightweight, but not everyone can afford such a plinth;
- Aspen and linden are quite resistant to moisture, flexible and well processed. They are relatively inexpensive, so baths and other similar premises are often trimmed with these rocks;
- Cherry is also quite popular. It is certainly not as strong as oak, but it is more elastic and resistant to decay. When choosing such a plinth, one should take into account the fact that cherry changes color over time.

Tip: when you buy an unvarnished, clean border, be aware that after varnishing it will seriously change the shade.
In order to find out what awaits you at the finish line, you need to wipe the bar with a wet sponge.
But this only works for colorless varnishes.
Installation subtleties
Although wooden planks are much stiffer compared to their plastic counterparts, the instructions for self-assembly even an elite plinth, as a rule, does not cause difficulties for people who are well acquainted with a hacksaw, screwdriver and drill. Moreover, some masters make borders with their own hands.
Can you make your own border?
The question of how to make a plinth with your own hands from wood is asked by many. But here it should be remembered that independent production curbs is not always cost effective.
First, you need to choose the right board. The moisture level of the forest should not exceed 16%.
Raw wood cannot be sanded well, plus it is poorly milled. Knots, rot, chips and other defects are also undesirable. Ideally, you need a clean, dry, planed board.
Plinth is traditionally the final element in the design of flooring. But it not only gives it final neatness, but is also sometimes capable of performing a number of functional tasks. Wood has been and remains the traditional material from which skirting boards have been made since ancient times. It is ideal for framing any floor covering and is sometimes the only option that can harmoniously combine wall and floor finishes.
Installation of a wooden plinth can be carried out in different ways, depending on its shape and additional functions that it is intended to perform. So, this design element is designed not only to give an aesthetic appearance to the room, but also to protect the junction of the wall and floor, as well as the edge of the floor covering from free penetration of water, accumulation of dust and small debris. In addition, very often the skirting board is an excellent device for masking laid cables.
How to choose the right wooden skirting board?
Evaluation of the material, type, dimensions and other features of the skirting board.
When the floor covering is chosen, it does not matter whether it is natural board, laminate, linoleum, parquet or carpet, it is necessary to choose a skirting board according to its shade, configuration, width and, if necessary, the presence of channels for laying cables. If it is decided to install a wooden baseboard, then, in addition to the above selection criteria, it is necessary to pay attention to other points related to the manufacturing technology of the product, as well as the quality of the wood.

- In hardware stores, there are two types of wooden skirting boards - made from solid wood and a veneered version.

The main types of wood for a massive plinth are ash, oak and cherry, which have a beautiful textured pattern and soft shades. In addition, such wood is distinguished by good durability and products will last a long time.

The veneered plinth is made from an inexpensive pine or spruce massif, after which its outer side is pasted over with veneer made from valuable wood species. Therefore, it is difficult to distinguish it from the massive version in appearance - the difference can often be noticed only by looking at the end section of the product.
Massive and veneered skirting boards differ in price. It is clear that the first will cost significantly more than the second.
- It is important to choose products made from quality wood. This criterion is primarily taken into account when choosing a massive plinth, since the veneered version a priori undergoes special processing and drying before decorating. Wet wood is difficult to sand, so the product from it looks sloppy - this is the first reason that such a purchase should be abandoned. In addition, skirting boards made from insufficiently dried wood may subsequently deform, resulting in cracking.
- If it is necessary that the plinth is resistant to moisture, then you should choose products made from moisture-resistant wood species - these are yew, oak, larch, alder or fir. They do not actively absorb water, are easy to process and easy to install. You should not buy products from soft hardwoods, for example, from linden, as it deforms and cracks when it dries naturally.
- If a plinth is selected from an array for subsequent painting, then the beauty of the textured wood pattern is of no fundamental importance. However, in this case, it is necessary to carefully examine each product purchased for the presence of large or through knots, since during installation they can easily turn into through holes that will weaken the strength of the baseboard, and it may simply break. In the best case, the resulting holes will have to be sealed with putty. Therefore, it is necessary to look so that there are no knots at all, or they are of a small size, light color and located on the inside of the product.
When buying a veneered version, the problem of knots, as a rule, does not arise, since these products are produced in industrial conditions, where strict selection and processing of raw materials for their manufacture is carried out.
Prices for wooden plinth
wooden plinth

- Skirting boards are on sale, which, during installation, are either pressed against the wall with the entire rear plane, or mounted at an angle to it. Choosing the first option, it is necessary to determine in advance the required number of channels equipped on the back wall of the plinth for the passage of cables, if necessary.

- Another point worth considering is the height of the plinth, which directly affects the presentability of the flooring frame. For example, a high plinth can ennoble even a not very attractive floor pattern. In addition, it will close the lower part of the wall and protect its finish from possible mechanical influences, which is often damaged in this area.

- If you plan to run communication cables under the plinth, then you must immediately foresee how many of them there will be, and, depending on their number, choose products with the desired number of channels with reverse side products. The choice of the height of the framing elements often also depends on this factor.

- It is also important to choose the desired color of the plinth. But with this, most likely, no problems are foreseen, since the stores offer products made in various shades. If you plan to bring the interior design to the subtleties, then you should take into account the color of the flooring and wall decoration, since the plinth should be in harmony with both surfaces. The color may differ from the main finish by two or three tones, or, conversely, contrast with it.
Find out the methods of fastening and the procedure for performing work from our new article on our portal.
How to calculate the required number of products?

- To determine the total length, the length of each of the walls in the room in which it will be installed is measured.
- If the walls in the house are thick enough, then it is necessary to take into account the required length of the plinth to frame the doorway.
- Next, you need to summarize the results.
- The width of the doorway is subtracted from the amount found (one or more, depending on the characteristics of the room).
- The resulting value must be divided by the standard skirting board length, which is most often 2500 mm, and then rounded up. This way you can find out how many pieces you need to purchase.
- Experienced craftsmen advise increasing the amount of material by 15%, that is, buying a plinth with a margin. This is in case one of the products is accidentally damaged, or an error is made during cutting and fitting.
Well, when buying, of course, all selected skirting boards need to be carefully examined
Do-it-yourself installation of wooden skirting boards
Preparing to install the plinth
In order for the installation to be successful, the frame to turn out to be aesthetic and to be operated without problems for as long as possible, it is necessary to carry out a number of preparatory measures and follow some recommendations.
- After the wooden plinth is delivered to the room of its future installation, it must be left for a day to adapt in the mode of the humidity and temperature in which it will be mounted and subsequently operated.

- If the plinth has a large height, for example, 150 ÷ 220 mm, and the decision to purchase it was made even before the walls were lined with decorative material, then the lower part of the wall covered by the frame may not be finished. This makes it possible to save some money, for example, on expensive wallpaper or decorative plaster.
- Before choosing a skirting board, it is necessary to run all the cables that will pass behind it. This will make it possible to determine the form and method of installation - the plinth will be attached to the wall with the entire rear plane or at an angle.

- Solid wood plinth, which does not have processing and decorative coating, may well have natural defects - knots or sapwood, as well as a difference in color shades. Sometimes even one plank can be made of wood with a textured pattern and shade that differs in different parts. Therefore, skirting boards must be carefully examined, sorted and a place for each of them determined along the perimeter of the room. For example, those that may not have the most presentable appearance can be fixed along the walls where furniture will be installed. And for open space, choose the most beautiful and high-quality trims.
- If all products have flaws, then they are best, if necessary, puttied, primed and painted. All these works can be carried out both before fixing the skirting board to the wall, and after fixing it, depending on the quality of the products. However, in order not to spoil the flooring and wall finishes with varnish, it is best to carry out this process before installation. The places where the screws are screwed in can be completely masked with putty and tinted after installation.

- If you want to frame the flooring with a plinth made of precious wood, but in the absence of the material possibility to purchase it due to the high cost, you can even turn an inexpensive pine into a “valuable and expensive oak”. For such an imitation, it is necessary to use wood stain and special varnishes.

- If the plinth will be attached to the wall with self-tapping screws through through holes, then it is recommended to drill them in advance. In addition, countersinking of holes is carried out in such a way that the caps of the fasteners are deepened into the thickness of the wood.
Prices for plastic plinth
plastic plinth

To hide the presence of hats, after installing the plinth, the holes are masked with wood putty or a self-made mixture of epoxy composition with the addition of small sawdust to it. The “under the sweat” hole can be made with a special cone cutter or, in extreme cases, with two different drills of different diameters.

In the latter case, first drill through hole, and then it expands with outside along the diameter of the screw head, to a depth of 3 ÷ 4 mm.
- In order to increase heat and noise insulation, in some cases strips of insulating material of small thickness are glued to the bottom of the plinth. The strips should be about 50 mm long and glued at a small distance of 15 ÷ 18 mm from each other so that there are gaps between them. Their function is to separate the baseboard from the floor. As such a gasket, pieces of linoleum or strips of foamed polyethylene can be used.
For installation work it is necessary to prepare some tools - these are with different nozzle bits, a construction square, a tape measure, a miter box, a hacksaw, a pencil, as well as fasteners with which it is planned to fix the frame to the wall - dowels, nails or self-tapping screws, and sometimes special clamps - brackets for a specific skirting board model. In addition, in some cases it is necessary to use putty, that is, elementary tools are also needed to work with it.
Puttying plinth from solid wood
Puttying a wooden plinth before its installation is carried out in cases where the products are of poor quality and require a kind of cosmetic repair. Such skirting boards, as a rule, are prepared for painting.

Before starting work, the plinth must be well cleaned of dust and oily stains. Dry dirt is removed with a damp cloth or sponge. Absorbed dirt will have to be treated with a solvent.
If the products are being prepared for painting, then the shade of the putty mixture does not matter. When planning to cover the baseboard with a translucent varnish, the color of the material, of course, matches the shade of the wood.
As a rule, putty acquires a lighter shade when dried, and this must be taken into account when selecting it. In order not to redo the work, it is recommended to check its color in advance by applying it to small plot plinth and waiting for the complete drying of the repair composition.
If the puttying of wood is carried out for the subsequent application of varnish, then the putty is applied in two, and sometimes in three layers, in order to finally even out the surface and in color, and with the elimination of all identified flaws.
The first layer closes deep dents, cracks, as well as depressions left from fallen knots. If the damage is quite deep, putty is applied to them in several stages, waiting for each layer to dry. When the top layer of putty dries, the embedded recesses are polished with fine-grained sandpaper.
Then the putty is applied in a thin layer on the entire surface of the plinth, dried and also polished.
The result of the work should be a perfectly smooth surface of the product.
The veneered skirting board does not require puttying, as it always has a smooth front surface.
Lacquering or painting of wooden plinth.
If painting is planned after fixing the plinth on the wall and fixing the fasteners, then masking tape must be glued along its upper and lower lines, which will protect the decorated surfaces from paint or varnish.
Before applying varnish or paint to the putty baseboard, wipe it with a slightly damp cloth and wait until it dries completely.
The varnish is usually applied in two or sometimes three coats with a soft brush. If putty is covered only separate sections surface, it is recommended to use them before painting. After such treatment, the surface absorbs varnish and paint less, which makes it possible to achieve normal consumption, as well as to obtain an evenly painted surface. The applied primer should dry well, forming a kind of film on the wood, due to which the staining process will be easier.
The first layer of varnish is applied in an even thin layer and left to dry completely. At this time, windows should not be opened in the room and drafts should not be allowed, otherwise dust may get on the wet varnish, or air bubbles may form in its layer, which will reduce the quality of the varnish.
If paint is used for decoration, then after applying it, the surface must be carefully inspected. It should not form unpainted areas or, conversely, accumulations of paint. If such shortcomings are found, they must be carefully corrected - you can collect excess paint with a sponge, and eliminate unpainted places with a brush.

If the plinth is decorated with a carved relief, then it is necessary to paint over it to the full depth - this process is done with the edge of the brush, as shown in Figure No. 7, or with a sponge with paint applied to it. The sponge is applied to the relief and lightly pressed on it. The paint squeezed out when pressed will fill all the recesses of the three-dimensional pattern. The entire relief is processed in the same way.
The paint is usually applied in two layers.
How to cut and join the plinth?
In order for the plinth to look aesthetically pleasing, it is equally important to cut and join it correctly. If the manufacturer provides for special docking and corner elements for the installation of a plastic plinth, then they are not used when installing wooden products, which somewhat complicates the work - you have to achieve everything on your own.
It is impossible to saw off the edge of the skirting board at a certain angle, and most often it is 45 degrees, without a special tool. Therefore, the master should have a miter box at his disposal.
Prices for popular models of screwdrivers

- So that the miter box does not slip and the cut is neat, two holes are provided in the frame of the device through which it is rigidly fixed to the base - this can be a stool, old table or a construction goat.
- Then, on the frame of the miter box, the plinth is laid and pressed against one of the walls. In professional miter boxes, special clamps are provided that hold the sawn product in the required position. IN simple fixtures the plinth is firmly held by hand or pressed with a spacer board or timber (wedge). If the plinth moves, the cut will be uneven, and when joining between the two parts, a wide, ugly gap may form.

- The cut is made with a conventional hacksaw for wood or a back saw, which is most preferable, since when using it, the cut is neat, without tucks.
- The cutting tool is installed in the guide slots on both sides of the miter box, provided for cutting at the desired angle. After that, the product is cut. By the way, if you need just a perpendicular cut, then a special position is also provided on the miter box for this.
- Next, the trimmed edges are tried on, with which the two skirting boards will be joined together. Between two joined skirting boards, there should be practically no gap. If the products do not fit well, one edge or even both need to be finalized. Perhaps it will be enough to carry out the processing with sandpaper, in the worst case, you will have to make a cut, so to speak, by eye, which is quite difficult to do. Unfortunately, such a problem is encountered quite often, since the joints of the walls of rooms in apartments and houses often differ from a perfectly right angle. Therefore, it is often necessary to work hard to perfectly match the plinth in the corner.

- If the ideal docking still did not work out, then the gaps after the installation work are masked with putty, matched to the shade of the wood.

- If you have to install two or three pieces of plinth along one wall, then they also have to be joined together. If there is a relief pattern on the products, it is not easy to combine two skirting boards even on a straight section. To make the joint strong and minimally noticeable, the cuts are also made at an angle of 45 degrees, but in this case, the edges of the two skirting boards are cut in the same direction. You can make a joint with a direct cut, but it will look less aesthetically pleasing.
The joint will be of high quality only if the two joined segments have the same thickness, and, of course, without knots at the junction. This must be observed especially when marking parts before cutting.
Performing installation work
Fixing a wooden skirting board to the wall with self-tapping screws is a rather complicated process, but also reliable. It is easier to fix the flooring frame with glue, and "liquid nails" are most often used for this purpose.

The preparation of the plinth when planting it on the glue is carried out in the same way as when fixing it on self-tapping screws. However, in order for the wood to adhere well to the wall surface, it will have to be primed. In addition, it will be necessary to prepare the wall itself - it should be carefully leveled, and then also impregnated with a primer. Only in this case it is possible to achieve good adhesion of two materials with different structure.
A clear disadvantage of mounting on glue is that considerable difficulties will arise if it suddenly becomes necessary to dismantle the floor frame. With mounting on self-tapping screws, no difficulties of this order arise.
| Illustration | Brief description of the operation to be performed |
|---|---|
 | Prepared baseboards must be marked for the holes through which they will be fixed to the wall. In order for the fastening to be uniform, they try to maintain the same distance between the fasteners. Usually, a step of 500 ÷ 800 mm is enough for this, and in height from the floor, the holes are located in the middle of the plinth width. They try to make the markup as accurately as possible along a horizontal line. Otherwise, the screws (if they are not masked) will look ugly. Having completed the markup, holes for fasteners are drilled at the designated points, followed by countersinking, as mentioned above. |
 | Next, the plinth is attached and pressed against the wall, exactly as it will be fixed. Through the holes, using a sharp narrow object (nail, awl, drill), marks are made on the wall. Holes for dowels will be drilled at these points. |
 | Next, using a perforator, holes are made for the dowels. In order to have less dust in the room, it is recommended to lay the pipe of the switched-on vacuum cleaner next to the drilled hole, which will immediately draw in the resulting building dust. At the same time, the channel for the dowel itself will be cleaned. |
 | IN drilled holes dowel plugs are carefully driven in, which should enter the wall flush with its surface. |
 | Further, in the holes drilled in the plinth, it is necessary to bait self-tapping screws, so that their ends come out on the other side by 5 ÷ 7 mm. After that, the plinth is installed in its place against the wall, while the protruding ends of the self-tapping screws must enter the holes of the dowel plugs. Now each of the screws is sequentially screwed into the wall until it stops. At the same time, the hat should “drown” in the nest previously made by the countersink. |
 | The next step on the plinth is to close up holes with recessed heads of self-tapping screws. For this, a hard putty can be used, which is kneaded with fingers, or a composition made in the form of a paste - it is applied with a narrow spatula. In any case, the putty should ideally match the main color of the baseboard, if it is not planned to be painted. After the putty dries, it must be carefully cleaned with fine-grained sandpaper. Then the cleaned places of masking fasteners are varnished with a narrow brush. |
On sale today you can find wooden skirting boards equipped with a special rail insert, which is removed before mounting on self-tapping screws. This opens a groove that runs along the entire length of the product, through which the plinth is fixed to the wall.

After installation is completed, the insert is glued to its permanent place. Thus, there is no need for countersinking, puttying, stripping and additional varnishing of the plinth sections. However, the cost of such a product is much higher than a conventional wooden model.
Installation of veneered plinth
This type of wooden skirting, as mentioned above, is made from prepared wood, so it remains stable when the temperature changes. This quality of products allows you to mount them in three ways:
- Fixing the plinth with self-tapping screws, completely similar to the installation discussed above.
- Gluing the frame of the flooring to the wall with “liquid nails”, which allows you to completely abandon the drilling of walls and screwing with self-tapping screws.
- Installing the skirting board on special fasteners-clips. Skirting boards in such systems have a special configuration of the rear wall. This feature consists in special cuts along their entire length, with the help of which they are fixed on clips. Due to the fact that the clips themselves different manufacturers can have their own design, they always come with skirting boards.
I must say that this method of installation, as well as the method of gluing, requires the perfect evenness of the wall. Therefore, before installing the skirting boards, you will have to work hard on its surface. The advantage of this installation method is the ability to easily remove the plinth from the clips, for example, in order to lay or replace cable communications.
Work on the installation of veneered skirting boards on clips is carried out approximately in the following order:
| Illustration | Brief description of the operations performed |
|---|---|
 | The first step on the leveled wall is marking the fixing points of the clips. The distance between them varies from 200 to 500 mm. For example, if the clips are mounted in the area where two skirting boards join, they are installed at a distance of 200 mm, so that the connection is in the center of this gap. The clips are applied to the floor surface (in accordance with the instructions), and points were marked on the wall through the mounting holes in them. |
 | Further, according to the marks made in the wall, holes for dowel plugs are drilled. In principle, the operation does not differ from what was considered in the previous table. |
 | Dowel plugs are inserted into the holes made and hammered. |
 | After that, clips are attached to the attachment points and screwed to the wall with self-tapping screws. |
 | The next step is laying and fixing the cable in the clips, if it is supposed to be masked with a plinth. On many clips, special clamps, latches or grooves are provided for this. |
 | After laying the cable, skirting boards are put on the clips. The fixation system may be different - it depends on the model. But in any case, this no longer requires any tool - it is enough to apply the effort of the hands. As you can see in this illustration, sometimes the docking of two skirting boards is done on one wide clip, on which a double fastening is provided. This reduces the likelihood that a gap may form at the docking site over time. |
* * * * * * *
So, above, various options for mounting a wooden plinth to the wall were considered. The most difficult stage in the installation process is cutting and fitting parts to the desired angle. If this was done successfully, then the rest of the operations will not create any special problems, of course, in the presence of all necessary tools. If gaps nevertheless formed at the joints, then in last resort the position can be corrected by puttying and subsequent fine stripping.
And one more important rule: never, under any circumstances, skirting boards are attached to the floor surface!
In conclusion, we offer to see the mater class of one very a good specialist finisher. He shares his secrets to installing wood veneered skirting boards.
Video: Installation of Tarkett wood veneered skirting boards