The effect of endless reflections is achieved by using a mirror, mirrored translucent glass and a light source between them. Most often, such lamps are used for decorative purposes, they increase the volume very well.
I designed a chandelier with a similar effect, but with the function of the main light in the room. I ordered glass and a mirror at the Glass Cutter store. A translucent mirror made from an ordinary stele and a mirror car film
materials
- Mirror 500×500 and glass 500×500 with the necessary holes (ordered at the Stelorez store) ~ 950 rubles
- Mirror film (purchased at the car market) 1 × 3m ~ 150 rubles
- Aluminum corner 40mm 4m ~ 350 rubles
- 40 pcs ~ 600 rubles
- Power supply 12V 10A with voltage regulation ~ 450 rubles
- Studs, nuts and other materials ~ 200 rubles
Specifications
- Dimensions: 500 x 500 x 90
- Number of LEDs 32 x warm white 3W, 8 x cool white 3W
- Power consumption 14V * 600mA *10 = 84W
- Number of sections - 3 (16, 16 and 8 diodes)
- Control: three channels RF315MHz, soft start, dimming is possible (did not implement it), LED overheating control
Manufacturing
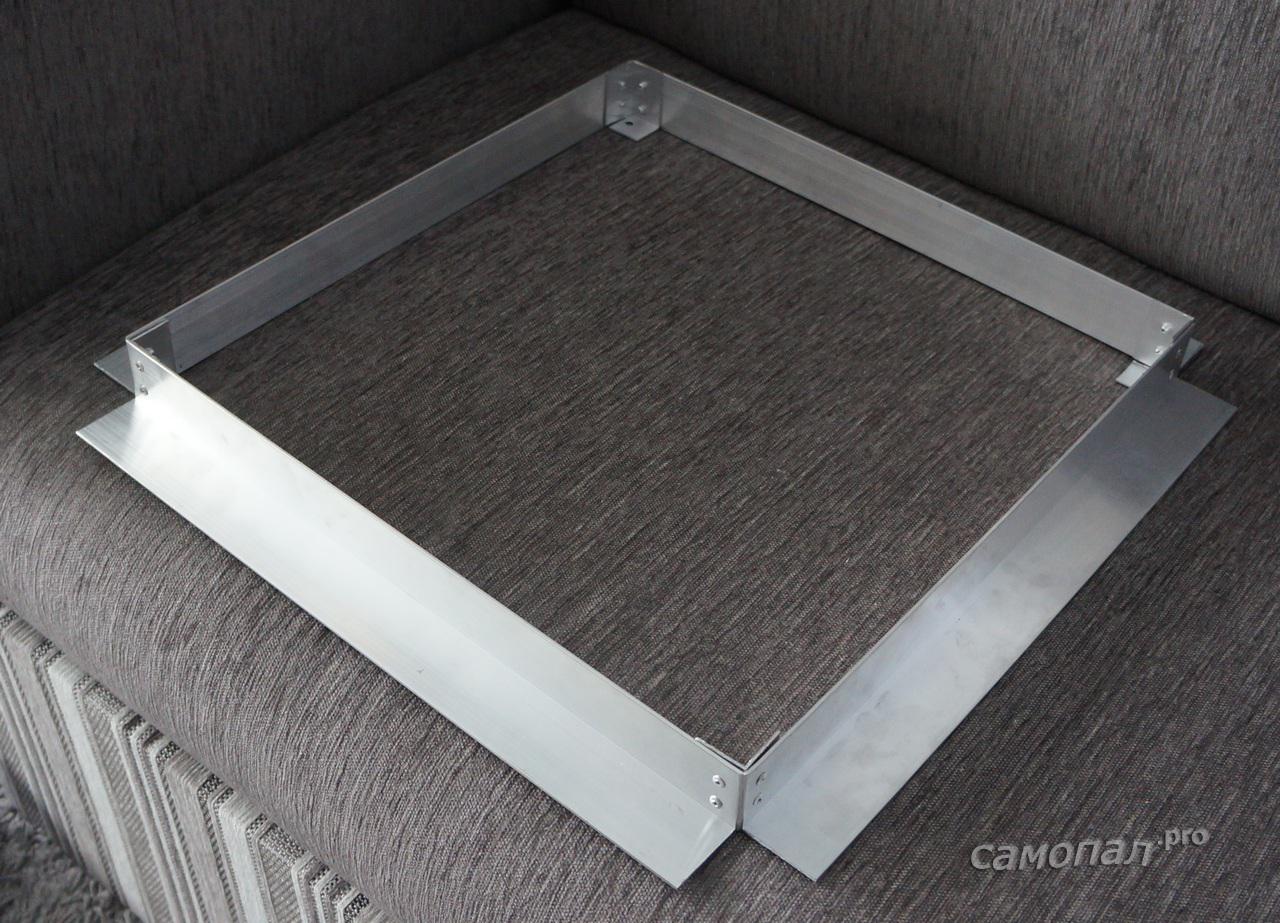
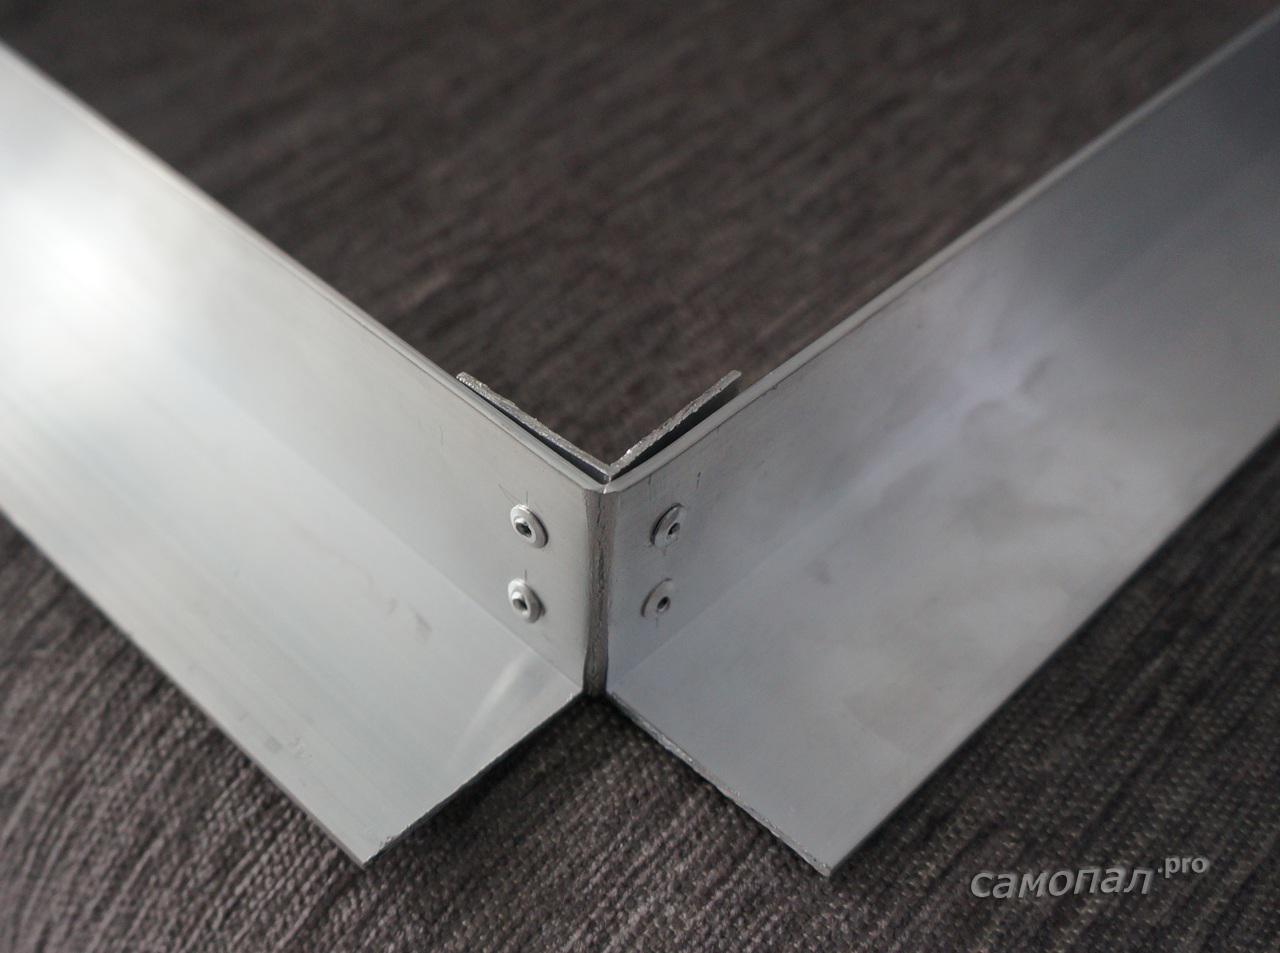
The frame is made of aluminum corner and fastened by riveting

We connect all LEDs in groups of 4 in series. We put a 1 Ohm 4W resistor on each group, then we adjust the voltage to the power supplies so that the current in each group of diodes is ~ 600 mA. What for?
Firstly, I had such a power supply (I bought a $ 15 coupon on ebay)
Secondly, this solution allows you to control the brightness / power of the LEDs using PWM
The disadvantage is about 5 watts of extra power, which is dissipated by resistors.


We assemble the second (upper) frame.
Attach LEDs to it.
We assemble the whole sandwich: bottom glass, bottom frame, mirror, top frame using 5mm studs and nuts.
We push all the wires into the holes in the mirror up
We mount all the electrics and the control controller.

We hang on the ceiling, connect


We fix the wires with construction tape so that they do not an eyesore from below

Result


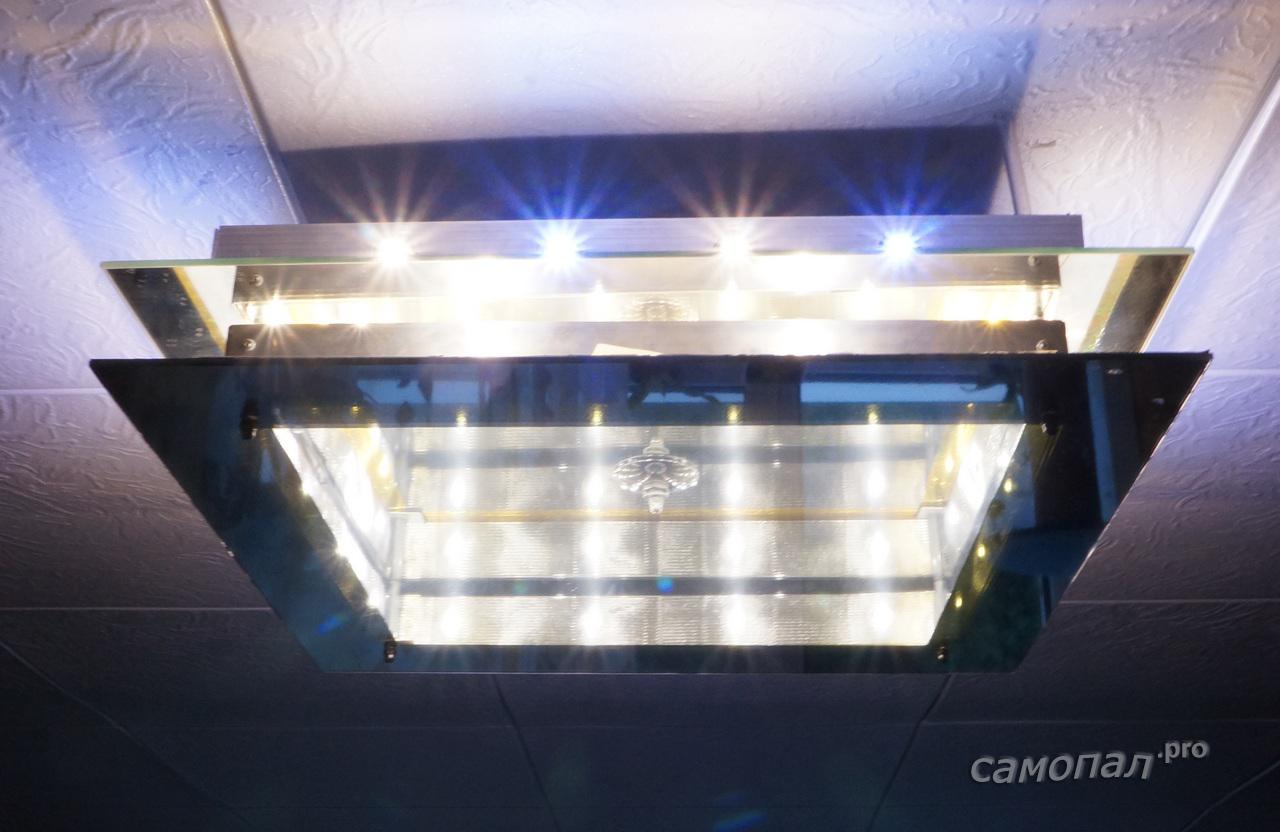

Lots of light in the room. Only under the chandelier itself is dark due to the low light transmission of the tint film
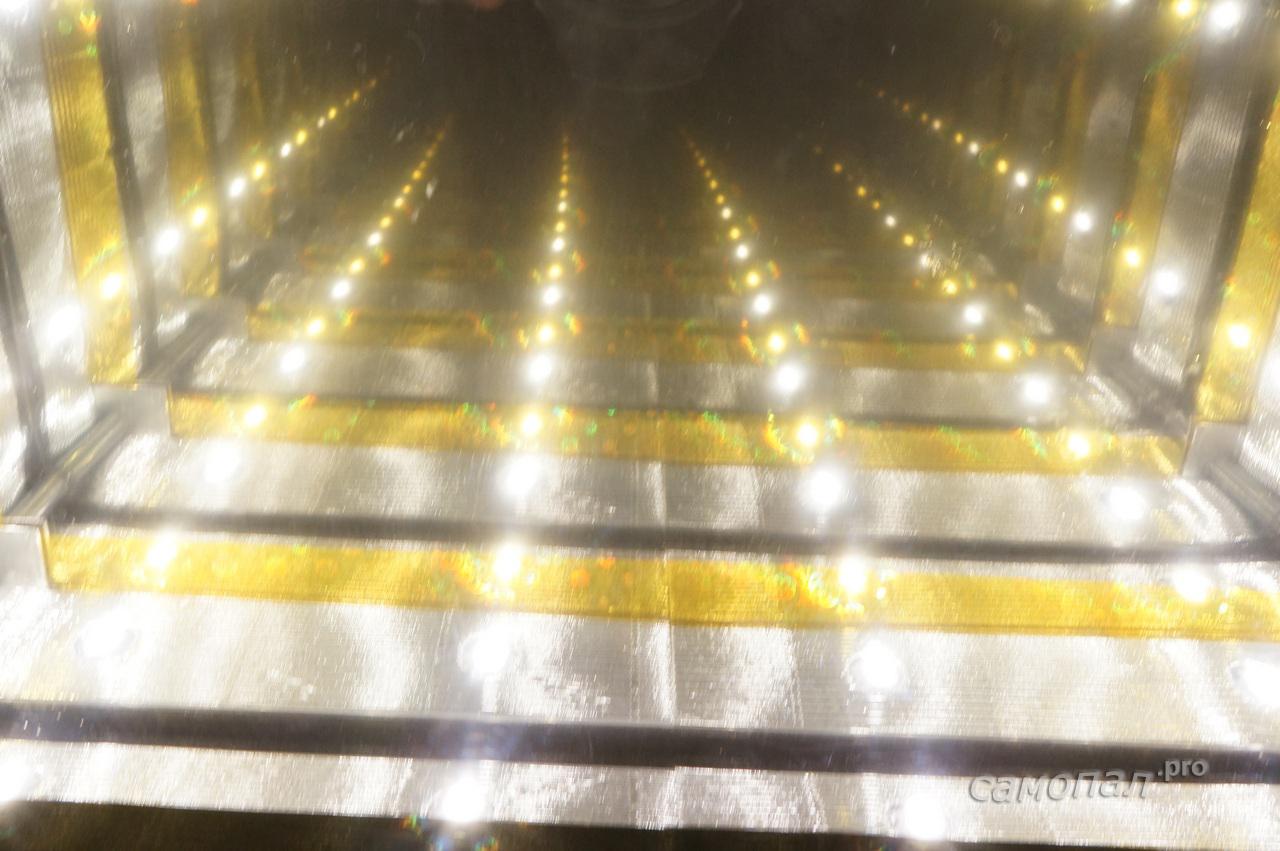
The effect of infinity has been achieved. Guests look from the bottom up for a long time entering a trance 🙂
Testing
The thermal imager showed a fairly uniform heating of the LEDs with a maximum crystal heating of 58C
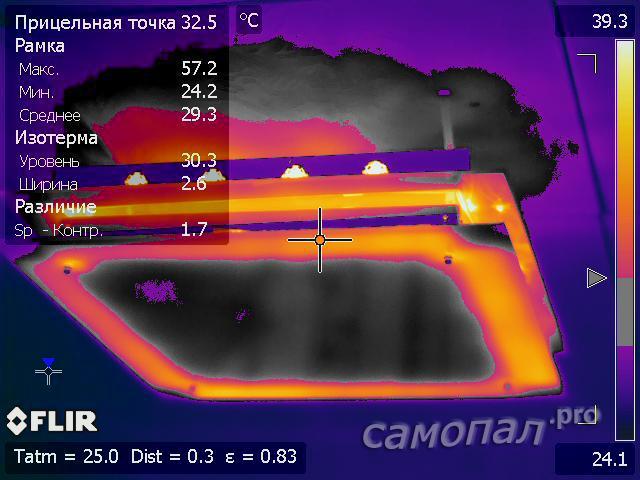
The glass is heated up to 35C, it should not crack.
The cat is perplexed how much time for a good sleep wasted 😉

Each owner wants to bring a touch of originality to his interior. And everyone has their own methods for this. Some come up original design rooms, thanks to the different shapes of the ceiling and walls, others make a choice in favor of One of these interior items that will catch the admiring glances of your guests will be a table with an infinity effect.
What is the secret
The effect of infinity is achieved through the use of LED technology. It is they who are able to decorate your home, and in some cases even change it beyond recognition. The infinity effect table, the photo of which is presented in this article, is a modern, innovative piece of furniture that can change the idea of \u200b\u200bdesign even the most notorious skeptic.
The secret of visual infinity is hidden in the use of LED backlighting, and color solutions there may be a huge number. It is she who is built into the space between reflective surfaces. As a rule, the upper mirror is taken translucent, so that the radiation from the LEDs can be seen by others.
To control the backlight, a special remote control is used or, if a table with an infinity effect was made with your own hands, an on-off button.

Where can the table be used?
The use of tapes with absolutely safe for human health and environment, so the infinity effect table can be placed anywhere. In addition, these lamps are famous for their durability and efficiency. A product with a tunnel effect will serve you for quite a long time, thanks to its reliability and ease of use. Such a table can be seen in:
- modern apartment;
- country house;
- night club, bar or restaurant;
- hotel;
- office.
How to make your own infinity table
The price of such a piece of furniture is not encouraging, and the purchase is not always affordable for an ordinary resident of the country. However, you can get an unusual little thing if you know how to handle tools. Just make a backlit table by yourself.
To do this, you will need the following materials and tools:
- boards for the table;
- mirror and glass (the latter can be replaced with a translucent mirror);
- LED Strip Light;
- self-tapping screws;
- screwdriver
All wires are mounted in the legs of the table.
First of all, you need to develop a drawing, taking into account all the dimensions of the future piece of furniture. From MDF (or wooden planks), mirrors need to be made blanks, according to your calculations. wooden templates with an inner hole there should be 3 pieces, one of which has a larger inner diameter of approximately 1 cm. This is where the LED strip will be located. The resulting blanks must be glued, not forgetting to insert one mirror between the two lower templates. Then you need to carefully smooth all sides and corners.
Next you need to attach the cover. Better if it is removable. This will provide access to electricity. This cover for the future table can be designed for your interior. You can paint it or decorate it in any other way.
In the opening of the table top, it is necessary to drill holes that are necessary for mounting the LEDs. Now you can insert the tape into this opening and fix it in a way convenient for you. The best option would be to use glue, the effectiveness of which you will be 100% sure of.

Now you should cover all this with a second mirror, translucent.
All wires are led out through the legs of the table. To do this, they must be with a wide cross section and through holes.
As a conclusion
To enhance the effect or give more originality, absolutely any object can be placed between two mirrors. This is done so that the infinity effect table fits perfectly into the overall concept of your room.

In addition, you can safely combine LEDs of various shades. Connecting pieces of tape is not difficult even for an inexperienced craftsman.
A similar effect can be used not only to make a table, but also to decorate doors or any other surfaces. And a table with the effect of infinity, made with your own hands, can only be the beginning.
Hello everyone!
I myself have been here recently, so, finally, I decided to register and this is my first post, so I apologize if something is wrong.
In this post I will show you how to do mirror with infinity effect at home, I want to note right away that not from wooden frame or some other rubbish, but an adequate, presentable mirror that will look and be made at home.
At the end, I will write down how much all the materials cost and what is the cost of such a mirror.
What is required for the manufacture
To begin with, we need two glasses measuring 50 x 50 cm and 4 mm thick, if you bought glasses without edge processing, then sharp edges and corners can be processed with ordinary sandpaper. We also need architectural mirror film up to 15% light transmission, in my case there was a film of 8% light transmission.Manufacturing
We paste over one glass with a film on one side as shown in the photo, this will be the front glass of the mirror.
We cover the second glass with a film on both sides, but on the one hand we retreat 1.3 cm from the edge and cut off the film along the glass contour along the ruler as in the photo, this will be the rear glass of the mirror.

This indentation is useful to us for attaching the aluminum profile, but before that, the profile must be cut into equal 4 parts of 47 cm each, I bought a 2-meter profile measuring 2 x 1.5 cm and cut it into 4 parts.

It is also necessary to process the sharp corners of the profile with a file.

Then we process (wipe) the edges of the glass and the profile with white spirit and let it dry.

Next, we need a two-component adhesive for glass and metal.

Lubricate them with one stack of each profile as in the photo.

And we glue the profile to the rear glass of our mirror on the previously freed part of the glass from the film in such a way that the hollow part of the profile looks outward as in the photo:

Next, we make a hole for the passage led strip.

I prepared an LED strip with a controller in advance, I won’t dwell on this in detail, since the post turned out to be too long, and you can buy a ready-made strip with a controller and don’t solder anything.

We insert and glue the tape along the inside of the frame of our mirror.

Next, we need a special double-sided tape for fastening mirrors and glasses, sold at a hardware store.

We glue it on the upper part of the profile and press the front glass.

I prefer the tape because in the event of some kind of malfunction of the diodes, it would be possible to crawl with a clerical knife between the top cover of the mirror and the profile, cut off the tape and eliminate all the faults, which cannot be done in the case of glue.
The mirror is almost ready, it remains to mount it to the wall, this is done with the help of fasteners for mirrors, also sold in a hardware store. We cut the film along the contour of the fasteners from the rear wall of the mirror and process the glass with white spirit
Fasteners, with reverse side it has a strong adhesive area.

Processing the area.

We press the fasteners on the mirror.
By
Ideal pocket light for applying makeup
Illuminated mirror for everyday skincare and makeup application
A small pocket mirror with bright LED light will help you tidy up your makeup even in pitch darkness. The lower mirror is magnifying. Illuminated pocket mirror is an indispensable accessory for facial care while traveling.
BUY FOR 212 - 217 RUBLES with free delivery by Russian Post
BUY FOR 213 - 219 RUBLES with free delivery by Russian Post
By
DIY Illuminated Mirror In this project, I'll show you how to make an elegant, real bathroom mirror with hidden LED lighting. Firstly, it looks very beautiful, and secondly, it is an excellent decor element for the bathroom. Pretty simple to make and with the presence of hands should not cause any particular difficulties. So, let's begin!
First, I purchased an ordinary finished mirror, with a polished edge, measuring 91.4 x 76.2 cm.
Then picked up essential tool: Reinforced tape, electrical tape, knife, polyethylene packaging film, metal ruler 1m long, respirator and goggles. Please note that the knife must be hard and very sharp, it is best to use a utility knife with a thick blade and a metal blade holder. You will also need a small sandblaster and an air compressor.
For a sandblaster, it is best to use dry, white quartz sand. But, since I didn’t have it, I used the usual yellow, after sifting it through a fine metal mesh to remove debris and large fractions.
Then, turning the mirror upside down, using reinforced tape, I made a preliminary beating of the strip, which will later be highlighted with front side. Inner part the square on the mirror is covered with a cloth or any other suitable material. So that it does not fly away anywhere, I glued it with adhesive tape. To prevent getting non-glued areas, I also glued the middle of the broken strip with adhesive tape.
Having fixed the metal ruler with the help of clamps, I cut through the reinforced tape, according to the markings that I made earlier. I advise you to firmly fix the ruler, otherwise, it may move and the knife blade will go to the side. Also, to make a perfectly even cut, I recommend using an additional bar with which you will hold the knife blade on the other side of the ruler. Be very careful at this stage, as any unnecessary scratch will then be clearly visible from the front of the mirror, and this will no longer be corrected!
Then remove the adhesive tape on the cut areas. You should get a flat strip around the entire perimeter. Make sure that the rest of the plane is securely sealed, as this strip will be sandblasted further.
Using a sandblaster, remove the backing from the mirror around the entire perimeter within the cut strip. I had the mirror covered with two coats, blue paint and a reflective silver finish. Therefore, in order not to damage the glass, I removed both coatings in two steps. When working with a sandblaster, be sure to use a respirator, goggles and gloves, because you will even have sand in your ears!
After finishing the mirror processing, you should get something like this:
Next, empirically select the internal distance around the perimeter from the transparent strip, where it is best for you to place the LED strip. By changing the distance, you can optimally select the brightness of the backlight.
Then I made the back frame from red oak blocks. You can use the size of the bars at your discretion, the main thing is that they be higher than the inner sheet of MDF (it will be discussed later). Using a cutter, I made grooves on the bars in advance for a tight installation of the back cover and opened them with black paint and varnish from the end and back outer side. The size of the back frame is determined based on the size of your mirror, my frame, for example, is 3 cm smaller than the mirror itself around the entire perimeter.
Cut the back cover to fit your back frame. In order for the lid to fit snugly into the frame, at the last stage, you specially made grooves in the bars, i.e. the lid is flush with the frame. I used an old piece of plastic for the lid, but any will do another strong material that can support the weight of the mirror.
Then, to mount the LEDs, I cut a rectangular piece out of 1/2" thick MDF. The size of this piece depends on the internal distance from the transparent strip where you decide to mount the LEDs. In my case, the rectangle turned out to be 1.5 cm smaller from the perimeter of the transparent strip. I carefully glued the cut piece of MDF in the center of the mirror, observing the same indents on each side, using mastic (you can use suitable glue or epoxy resin). Then I glued the outer back frame in the same way.
From the inside, on the end of the outer and inner frame, I glued LED strips with a warm white glow. The transformer for powering the LEDs was taken out of the mirror, although if you tried, you could place it inside. The wire from the LEDs led out through the back wall, so that it was not visible.
Then I installed a homemade mount on the wall and back cover. Fastening on the back cover, fastened with short self-tapping screws that reach the MDF, but do not reach the mirror. I drowned the transformer in a niche where there is an outlet, since I specifically installed such an outlet. As a result, after connecting the transformer and connecting to the outlet, I got such a unique mirror!
V Lately jewelry became very popular modern interiors"endless mirrors". The design is based on an LED strip, which is often used by interior designers to translate their most daring and creative ideas into reality.
In this article, we will reveal all the nuances of making such an unusual lighting design for a room as an endless light well. You will learn what it is and how to make such a mirror yourself.
From the article you will learn how many mirror surfaces are needed to create a light tunnel with luminous dots, as well as what materials are needed and how to make a lamp with the effect of the eternal with your own hands.
What is a mirror tunnel with 3D illumination in reflection?
An infinite mirror is a reflective surface in which we see multiple reflections that do not actually exist.
Such an effect can be obtained by resorting to the bright light of third-party sources, and their repeated reflection in 2 mirrors, which are installed parallel to each other.
Theoretical basis of the infinity effect
 More our ancestors used the illusory effect of an infinite mirror(during fortune-telling at Christmas time, the girls put a burning candle between two mirrors). Infinity in the reflection from the mirror surface arose due to the multiple reflection of the light source from the real and imaginary mirrors.
If you are interested in how a real and imaginary reflective surface have the same optical properties, a textbook on the study of quantum physics will help you.
How to do it yourself?
Your task is to create a flat reflective surface, looking at which there will be an optical illusion of an infinite mirror. To make you will need:
- Mirrors (2 pcs).
- light source.
Naturally, you can always resort to the old methods of our grandmothers and build an open-type mirror system in which the focus of the gaze of the looking person will be parallel to the mirror planes. In this case, the height level of the luminaire will be equal to the width of the reflective surface, which a priori will not be very convenient.
Our goal is a mirror plane that will not reduce the height of the room. To create it, you need an optical system of a closed type, in which a person’s gaze will be directed perpendicular to the mirror surfaces.
One of the mirrors should skip a portion of photon channels from the light source, if you do not follow this point, you will not be able to make and see an infinite mirror.
For self-manufacturing you will need a light well:

Realization of 3D design
You can build a structure with the effect of the optical illusion of an “infinite mirror” different ways, depending on the kind, quantity and quality of the materials you have. Further in the article you will learn one of the most simple ways to create a light tunnel.
Mirror surface
To get started, get a classic mirror(you can cut to the required size already existing). Then, the question arises - where to get the second reflective surface with a partial mirror effect?
The answer is quite simple - you will need glass, the density of which is 3-4 mm, a translucent reflective surface can be obtained by pasting it with a car window tinting film. Perfect option- a film that transmits 50% of the light.
frame
To make a base that will hold the mirror system, purchase wooden blocks with a side of 2-3 cm. In order to securely and securely attach such a frame to the mirror surface, use a silicone-based sealant, ideally if it is colorless.
Before starting work, it is necessary to make a hole in the frame of wooden blocks with a drill, which will be parallel with respect to the mirror plane. Through the hole you need to pass the power supplies of the diode wire.
Do not rush to fasten all the rails at the same time, glue them one by one, aligning the bars in parallel along the outer edges of the mirror surface.
A source
 After the assembly process is completed, the cavity of the system with an optical illusion will become airtight and as tight as possible.
In the role of a light source in such a system, only one that does not emit heat can act. by the most suitable option for this design is a tape with LEDs, ideally RGB - it will allow you to make various optical effects in the tunnel.
Also pay attention to the operating voltage rating of the LED strip, it should be equal to 24 volts. Such tapes are one of the brightest, which will allow them to break through such an obstacle as a tint film as much as possible.
Assembly
Let's take a look at the process of assembling the light tunnel. You are required to be extremely careful, attentive, and have all of the following materials at hand.
- armed silicone sealant, glue the slats of the frame to the mirror one by one (on the side of the reflective surface).
- Take the RGB LED strip, and carefully attach to the surface of the frame from the inside, pass the power cord through the hole in the rail, which must be done before assembling the frame.
- Cut out a piece of tint film corresponding to the width of the frame structure.
- Apply a silicone-based sealant to the wooden frame, then place the glass pasted over with a film on top so that it lies inside the mirror side.
And finally, the final stage of the assembly of the structure. In it, you will learn what to do with the ends that were left open, and what is needed in order to close the wooden frame.
- If the wooden bars were processed with high quality and the work was done carefully, they can simply be painted over by choosing the appropriate shade.
- If your interior is made in the Hi-Tech style, you can stylishly and beautifully decorate the light tunnel using a conventional aluminum profile.
- Also ends wooden frame can be covered with a plastic cable duct after removing the cover.
For fixing all of the above materials, a silicone-based sealant is ideal.
Tape design options
 The simplest option for the location of the LED strip is to run it along the entire perimeter of the wooden frame. The visual effect with this arrangement will look like many identical rows of light standing next to each other.
If you want to make a more interesting and spectacular light tunnel, attach several geometric or any other shapes to the mirror surface using a sealant, you need to make them from the same wooden slats.
Attach LED strip around the perimeter of your inserts. Be sure to make sure that its length is a multiple of the distance between all the mounting points, along which it will be possible to cut in the right place.
Using a diamond-coated drill, you need to make a hole in the mirror, and pass the power wire of the light source through it.
Connecting the LED strip
When connecting the RGB LED strip to the power supply directly, it will emit white light. When connected using a controller, you can make a variety of color effects. Such control device works in tandem with the remote control. But if you want to see color music, you need to choose models that are compatible with a computer.
Useful video
We offer you to watch a video on how to make a mirror with an infinity effect with your own hands:


