Probably one of the many enjoyable activities is watching the water. It doesn't matter if it's a stream, pond, sea or ocean.
The works of many artists try to convey in them all the power, beauty and romance at the same time, to capture certain moment time. It is this moment that remains in our memory and makes us remember many, many times.
For this reason, the diorama allows you to create a composition that will delight you for a long time. In addition to composition and artistry, a diorama's realism plays an important role. In this article, we will show you how you can imitate water for your dioramas in poster modeling.
Materials and methods
All simulation methods can be divided into 2 groups:
- voluminous;
- superficial.
Imitation of the thickness (volume) of water
This technique is used when it is necessary to convey "actions" inside the water, to show transparency. For such purposes, as a rule, polyurethane and epoxy resins are used.
 - a yellow-brown or transparent substance that hardens with a hardener.
Advantages:
- 2-3 hours after mixing the components, the resin changes its characteristics and it is convenient to apply it to the surface and give it a wave shape.
Disadvantages:
- thorough mixing and exact observance of the proportions of the components is necessary. If this is neglected, then bubbles may appear.
- serious shrinkage after drying;
- toxicity, odor.
 is a modern replacement epoxy resin. Unlike epoxy, it has better fluidity and transparency. For this reason, it is better suited for simulating objects submerged in water. Shrinkage is present, but not significant. The time to complete drying can be up to 48 hours.
Disadvantages:
- highly toxic;
- high price.
If you need to create a large water surface and do not need water transparency, the “old-fashioned way” - gypsum is suitable.
 Gypsum - inexpensive material odorless, has a significant hardness. The mixture should not be very liquid, but at the same time - not thick. After drying (1-2 hours) - the surface can be painted. For these purposes, both the most inexpensive paints - gouache, and more expensive water-soluble acrylic paints are quite suitable.
Simulation of the surface of the water
Sometimes it happens that only surface effects are enough in a diorama, for example: puddles, ponds, other small reservoirs. Although there are exceptions - the sea surface. Here are the main ways.
 Silicone sealant (transparent)- this is the most common sealant, which is packaged in tubes. Ideal for rough water simulation. Dries out from moisture in the air. Following the application, it is desirable to immerse the work under the cap.
Disadvantages:
- toxic while drying, has a strong smell of vinegar;
- peeling is possible under mechanical action;
- fast drying (about 30 minutes).
 Liquid nails (transparent)- also familiar to us glue. It is a white, odorless, non-toxic substance. It has a transparent base that can be tinted acrylic paints. The transparency of the layer appears only after complete drying. A thick layer dries for a very long time, so it is recommended to pour glue no more than 5-6 mm thick. and make the wavelength up to 1 cm.
Disadvantages:
- long time drying.
Conclusion
As you can see, there are quite enough ways to simulate water in modeling, besides, we have not described everything here - but only the main ones. One universal method does not exist, each modeler must choose one or another method that is suitable in a given situation.
We hope this article has helped you. Good luck with your modeling!
>> >> Imitation of water in modeling
Good afternoon!
I have been trying to find materials and methods for creating a water surface for a long time, while trying to look for publicly available materials
(including not expensive ones) and simple technologies available to any level modeller. Over the past six months, I conducted a small experiment and this is what happened.
Many modellers used to use, and many still use, epoxy resins as an imitation of the water surface, including EAF (Dzerzhinsk) and similar analogues. They may be suitable for swampy or river water, but not for transparent sea or flowing river water, the thing is that these resins turn yellow and darken over time.
To imitate the surface of the sea or ocean, Vallejo produces colored and transparent gels, they are applied with a brush. The price of these jars is approximately 500-600 rubles. Even buying one jar in Barcelona (Spain), the price turned out to be the same as in Yekaterinburg. 
Here is an example result of using them. Base - EDP epoxy resin, coating with Vallejo gels. As we can see, the resin began to darken after 3 months, although it was transparent at the curing stage. 

And I wanted to find material for clear water. It seems my dream has come true - "Andrea miniatures" releases a set "Artificial Water"  - the same resin, but transparent, although in a year it slightly gave a yellowish tint,
  but it's not that critical.
The price is for 250 gr. it cost me 1,500 rubles - I think it's a little expensive for our brother modeler.
So I continued my search and came across such resins as optical epoxy glue - compounds for jewelry brand PEO-510 KE -20/0. There are several varieties of them, but I took this brand and Czech-made resin Epoxy 520 from the company. Both are two-component (resin and hardener), transparent and are sold in any container from 250 gr. up to 200 kg. The price is around 1000-1300 rubles per 1 kg. 
Having examined samples of products made from these resins at the company, I was convinced that they do not darken or turn yellow. On sale there is also molded plastic,
including transparent, but it is very thick in consistency and, according to company managers, it will be problematic to etch bubbles without a vacuum chamber. For figures it may work, but for the water surface I think not.
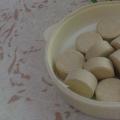
Arriving home, I began to make a model of the water surface. Took cell phone packaging and used it as a bath. I laid out small sea pebbles, several stones at the bottom and sprinkled all this with fine sea sand. I put some dried grass under the stones, which was supposed to imitate algae. Warming up the resin to 40-50 degrees in a water bath began to add a hardener and a little oil art paint to give the appropriate shade sea water. After the thin first layer of "colored resin" began to harden, the already transparent resin without additives was poured to the edges of the bath. Here's what happened: 

More than three months have passed, but the resin remains transparent. I think this version of the experiment is suitable for stagnant water.
Next, I wanted to try to reproduce light waves on the surface, for this purpose I purchased two types of transparent gels in the art salon, one Idea Midium made in Italy, the other Kristall Gel made in Germany. Both gels are in the same basket at the price of 350 - 370 rubles. 
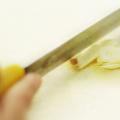
Idea Midium gel, when applied with a brush, gives a thinner layer (good for 350 and 72 scales) than Kristall Gel, which is more suitable for waves at 48 and 35 scales. Although with consistent use, I think you can come to a good result. The photo shows how the gel falls on the glass. 
So first I cover the surface with Idea Midium gel to get light sea ripples: 
After 24 hours, we see this picture: 


After I cover with a thick layer of Kristall Gel, due to the fact that the layer turned out to be really large, the gel dried out within three days. In this case, I also wanted to see how the gel behaves if we try to imitate splashes from a wave running on a stone: 
Touching up white
ALL HEALTH!
What are special tools and how to "fight" with them?
Vallejo Water effects an acrylic product designed to form the foundation of rivers, lakes, bays and oceans. Vallejo still water being a dense gel, ideal for simulating the surface of water on colored base created with the help water effects and can also be used to create waterfalls, waves, ripples and ice.
For water simulation on the prepared surface with a brush, scraper, sponge or any other tool, a small layer is applied water effects and left to dry completely.

Its drying time depends on the thickness of the applied layer, the humidity of the atmosphere in the room, and can vary from one to several hours.

After the surface has completely dried, it is applied on it with an old wide brush. still water to create water sheen, ripples and transparency effects.
The advantages of this product are its ease of use, non-toxicity and the ability to mix with acrylic paints to create different shades. However, there are two significant drawbacks such as a long drying time up to 24 hours and a large shrinkage after drying. Therefore, if you want to make fairly deep water, then apply still water follows in several layers.
Vallejo Still water is simple but not ideal and if you pay great importance water on the diorama, it's not the best choice. But if you use water in limited quantities and as a secondary object, this is the product for you.

In about a day still water dries up and water on the diorama becomes transparent and shiny.

In my opinion, this method is suitable for replacing the stand-holder of the model in a small area, as in the photo below.

For an alternative to the above, I will lay out the procedure for manufacturing such a kind of stand from a Polish modeler under the "nickname" ARBAL
Let's admire together, and I just comment on each photo ( moreover, an almost literal translation from Polish was made by Alexshow) :
We prepare the stand by simulating the shape of sea waves using the Milliput mass. (Epoxy clay for modeling - milliput)


Coloring the simulated waves. I (author - ARBAL ) mixed paint, various shades of turquoise and gray. Waves, draw in compliance with all the rules of miniature painting, or pay attention to shadows and light. Color transitions don't have to be done perfectly. In the end, deepen the effect achieved by applying a weak gray tint.

When the paint dry I covered the whole surface transparent water effect ( transparent water effect).
(Above, we considered ready-made blue mixtures - Alexshow)
Keep in mind not to apply too thick a coat because it can dry out in a few days! I put in a 3.4mm layer. It's winter at the moment so I put the stand on the heater to speed up the drying process.

After 8 hours, the effect is completely dry.

I applied another layer of clear water in the same way as in the third photo. (before that, with a dry brush, he applied white paint to problematic places in his opinion - Alexshow)

When the second layer is dry:

I made a mixture of white paint with transparent water effect.
The prepared mixture is held in places where water should produce foam. And left to dry.

Painted the sides of the stand black to produce a natural contrast. Work is done.

- Diorama - simulate water with Vallejo Water effects and Vallejo Still water (part 3)

One of the most non-trivial tasks in modeling railway models is simulating various bodies of water: lakes, rivers, streams, waterfalls, sea coast, etc.


A variety of methods are used to create realistic water. Unfortunately, many of them give very mediocre results. Perhaps there is nothing worse than using a simple piece of corrugated glass in the layout. In most cases, this will not be an imitation of water, but only its designation.
Many firms produce special materials to simulate water, such as a liquid to create artificial reservoirs brand NOCH. However, the lion's share of such special materials does more harm than good.


Many of them do not dry completely after being applied to the surface, and remain sticky even after several days. As a result, your artificial rivers and streams collect on their surface all the flies that have come to admire the layout.
The situation is no better with materials that require heating to go into a liquid state. You can imagine what they will turn into when hot summer days come. In this case, to save the layout, you will need a well-conditioned room with protection from direct sunlight. Not every modeler can provide such conditions, and is it worth it to fuss because of unsuccessful materials?
Another common problem is that dust quickly accumulates on the surface of miniature reservoirs, the original gloss fades and the characteristic gloss of the water surface is lost. If "water" is made of solid material, you can just clean it from time to time with a small brush or brush with soft bristles. But, from time to time, you still have to update the glossy finish to make the water look “wet”.
As you know, the natural color of water is light blue. She borrows it from the sky, which is reflected in her. However, her appearance on the layout largely depends on the type of local soils and various reflections. For example, many rivers are not at all blue, but rather exotic. A traditional example is the Huang He, the yellow river. An equally striking example is the Platte River, which is located on the territory of the US states of Colorado and Nabraska. Locals say it is too dirty to drink and too shallow for navigation. The water in it has a characteristic green-brown hue.


It is not uncommon for the main part of the river to be relatively clear, but in some places, such as the wastewater discharge of a factory or the confluence with another river, the water changes its color and various color effects take place.


All these nuances should be taken into account when designing a layout and planning to decorate it with realistic water bodies typical of the chosen area.
A number of effective techniques can be used to model such reservoirs, which give a very realistic result and avoid many of the problems that were mentioned above.
real water
Most modellers feel that real water is not well suited to scale ponds, and in most cases it's hard to disagree with them. However, there are rare exceptions to this rule. A striking example of the successful use of real water is the famous model of the German railway Rügensche Kleinbahn in scale 009, which received a lot of awards at various exhibitions.

This diorama includes a railway ferry crossing, which is carried out on real water. The whole layout looks quite realistic, and the water only adds to its attractiveness, not to mention functionality.
The main nuances that have to be taken into account when working with real water are the correct coloring of the river bottom, as well as the tightness of the entire structure, which does not allow water to leak. If everything is organized correctly, a very interesting layout can turn out. The main thing is to foresee the drain system in advance. In the same layout of the Rügensche Kleinbahn, the bottom of the reservoir is equipped with a small rubber plug. At the end of each exhibition, the water is drained through it into a special container.
Still water
When starting to create a reservoir with stagnant water, you should first prepare its bottom by randomly painting the surface with brown and green shades. Next, the shores are modeled. Various aquatic plants are suitable for this, for example, coastal thickets of reeds and Various types mosses. As mentioned above, we do not recommend using special materials to simulate water. They usually take a lot of time to fully harden, and most often remain soft and sticky.


It is much better to use a transparent two-component epoxy resin for this purpose, which has a curing period of about an hour. Epoxy resin is often found in aircraft modeling kits and is a very reliable and durable material. A good alternative to epoxy resin is epoxy varnish. It is easy to find in hardware stores. For example, TIKKURILA epoxy varnish hardens a little longer than resin, but looks no worse.

First of all, pour the main volume of epoxy into the reservoir. Until the "water" has hardened, it must be well distributed and smoothed out with the help of improvised tools, bringing it to the desired banks. It is necessary that the surface is smooth, even, does not contain visible curvatures.
Next, we will need additional layers of epoxy to give the pond a sense of depth. In the process of applying layers, care must be taken that bubbles do not form in the epoxy resin. It is desirable that each new layer be no more than 1 mm thick.
To demonstrate this method in practice, let's apply it to the simulation of an old sea pier.
wharf modeling

The wharf wall was modeled using materials from Wills Kits designed to create half-timbered houses. The brickwork of the dock is badly worn, as it was constantly used to unload coal. The top edge of the wall is at the level of the rail head. On the surface brickwork tide line should be drawn. However, seaweed and mussel shells should only be applied after the timber beams have been installed.
If you want to make the beams look really old and darkened from time to time, you can use a special enzyme ligninase for this purpose - it removes lignin, which forms the basis of wood, and contributes to its rapid decay. After thoroughly treating the wooden parts with the enzyme, rinse them thoroughly in water. After a while, they will acquire the desired look of an old, half-rotten tree. If you are using balsa as a material, we strongly recommend using the cellulase enzyme, which actively breaks down cellulose. Both of these enzymes are available from specialized chemical reagent stores.

To increase realism, we recommend that you first make large cracks in the processed wooden parts. You can also wire brush the surface to roughen the surface and achieve the characteristic worn effect.

After enzyme treatment wooden details painted with matte black paint, and then processed with dry pigments of suitable shades. The wood should be painted mainly in brown shades, except for those fragments that have been influenced by wood creosote.
After the structure is assembled, wood paneling nail holes are made using a dental hook. Then traces of rust are applied to the surface of the beams. On our mock-up, one strip of sheathing broke, and the nails remained in the vertical pile.
Further, seaweed is superimposed on the surface of the pier. Here you can use a thin strip of green ulva that runs along the border between water and land, coastal fucus algae (Fucus vesiculosus), as well as red algae (Chondrus Crispus), which stick a little lower in level. To make the algae look realistic on the pier wall, you need to place the brown algae just above the water level.
First, apply a thin strip of PVA for green seaweed. To make the strip even, you can attach a brush with glue to a piece of wood of the appropriate height and navigate when applied to the edge of the pier. You don't need a greasy layer of glue - a few good strokes are enough. Next, lay the base on its side and apply a mixture to simulate turf (blended turf) from Woodland Scenics on it. In our case, this is the most suitable shade.


As soon as the previous layer dries, we cover arbitrary fragments of the wall with a thin layer of PVA. We apply a finely porous gray foam on it. We return the base to a horizontal position and carefully level the mix of PVA and gray foam with a soft, damp brush. At the same time, unprocessed fragments should also remain on the wall, so as not to disturb the realism.
After complete drying, the excess of the top layers can be removed with a dental hook, and then the surface is treated in detail with a red-brown paint. In some places, you can use different shades of gray. Also, brown color is suitable for painting the "seabed".
If you want to imitate mussel shells, we recommend using a small round grain, partially painted in matte black and glued in the right places.
In green and gray tones, the "seabed" can be painted even before the previous layer dries. If you plan to use a transparent coating for water, you should take into account that the water depth in this place is very small, and the ships constantly rub their bottom against the bottom, leaving deep marks. Some of them may be clearly visible, representing a keel print or a rudder mark. Where the keel touched the bottom along its entire length, darker lines should be applied.
We imitate water itself using a two-component epoxy resin. It cures to a solid state in just two hours and serves as an excellent base for the following layers. You can smooth it out by applying some epoxy to the algae to simulate moisture. On top of the base, we recommend putting three more layers (each 1 mm thick). You can also imitate sea ripples by working the top layer with a brush until the resin begins to set.
fast rivers
We will look at modeling rapid currents using the example of a small English river, East Lyn.

East Lin is a very fast river, especially during the rainy season. During the spring flood, the riverbed is filled with tree trunks and large boulders. In some places, the shores bear traces of destruction. Pebbles accumulate on the bends of the channel.

First, the riverbed is covered with a layer of PVA. On top of it we pour a layer of rubble from the Woodland Scenics set. We lay the rubble directly into the riverbed, pressing the pebbles into the glue.

Next, we paint the channel in authentic colors (shades of brown with small splashes of green are recommended) and let it dry. Then comes the first layer of "water". For this we use a transparent two-component epoxy resin. Banks and pebbles should be applied while the epoxy is still wet.

The banks are modeled with putty (we recommend using Polyfilla putty), and the vertical surfaces are sprinkled with crushed stone and sea moss, which imitates the roots of trees and shrubs well.
Once all the components are in place and colored, the top layer of the river can be given various bumps to give the impression of a fast flow.

There are a number of different "water effects" in the Woodland Scenics sets, but in our opinion, most of them do not provide a realistic gloss. Therefore, our last layer will also consist of a two-component epoxy resin. As soon as it starts to harden, the surface can be processed with a dental hook, adding a white gloss here that imitates foam and movement. Alternatively, transparent silicone sealant, which is easily molded according to your preferences.

A fast flow can be simulated using a mixture of PVA and a small amount of liquid white paint. With its help, you can imitate foam in those places where water stumbles on boulders.
waterfalls

The Woodland Scenics sets have their own waterfalls. You can see how they look in the following video:
However, we will try to make a realistic waterfall on our own.
To do this, take a transparent silicone sealant and mix it with a small amount of liquid white paint. Then we stretch a small piece of cling film on a smooth, even surface, apply a colored sealant to it and begin to smooth it in length. Next, we form the resulting strip of sealant to achieve the desired effect. You can experiment without fear, as this material is very cheap. You can even prepare several options. After that, let the sealant dry thoroughly (this will take about 12 hours).
Now carefully peel off the cured sealant from the cling film and attach it to the desired surface with a few drops of liquid sealant. As soon as the waterfall is in the right place, cover its upper part with a thin layer of liquid transparent sealant with the addition of a whitish sealant. Next comes the artistic processing stage, during which we simulate realistic splashes and foam at the bottom of the waterfall.

Once all this is dry, you can apply an additional layer of two-component epoxy over the entire surface of the river. In this case, you can use epoxy varnish, applying it in an even layer from the beginning of the river - through the waterfall - to its very end.
Sea or waves on the lake
The sea is not very often present on railway models, and its imitation is associated with some difficulties.

For modeling the seashore, a textured coating for walls and ceilings (for example, Teraflex) is best suited. This material is usually used to create decorative coatings of any texture, including those with various patterns. Dozens of articles on construction topics are devoted to texture coatings. Therefore, we will not describe the methods of working with them here.


The texture coating is applied to the layout with a spatula and then molded to achieve a surf effect. After the base has hardened, it can be painted to your liking, and then coated with a glossy varnish.
So, we have seen that water modeling is a very interesting problem, which is easy to solve, guided by simple methods. We hope this article was helpful to you.
Good luck with your practice, and see you soon!
Simulation of water and liquids in crafts May 7th, 2011
source: http://women-on-line.ru/publ/kukolnaja_miniatjura/imitacija_vody_v_kukolnykh_miniatjurakh/59-1-0-514
Imitation of water in puppet miniatures
Typically, miniaturists use epoxy to simulate water and other liquids. If you have seen various drinks, brilliant sauces on food, raw eggs, soups or other liquids in doll miniatures, and have also seen beautiful water effects in railway or landscape scenes, you may have looked at epoxy resin products.
When you prepare such a mixture, it will harden, become shiny and durable. It can be poured in several layers to create the effect of deep water.
Only a layer of 3 or 6 mm of material can be cast at a time. You will not be able to pour one thick layer of this material. For example, deep water can only be made in a few layers.
What is a two part clear epoxy resin?
A two part clear epoxy is a high gloss finish made from a mixture of epoxy and hardener. You can buy it in hardware stores and building supermarkets. The main use of the material is a long-lasting and strong gloss after it hardens. Two-component epoxy is sold in a set (two jars: one with hardener, and the other with epoxy). When these two components are mixed in equal amounts, the mixture heats up, then becomes gel-like, and then completely hardens.
Dyes, dyes, and fillers can be added to a mixture to simulate colors and textures. Paints must be suitable for working with epoxy. Other dyes may react with the epoxy and destroy its normal properties.
Safe work
Work with epoxy resins only in a well-ventilated area. You should avoid breathing vapors (epoxy vapors are much lighter than vapors from other chemicals that are used to simulate water), and it is also advisable to wear gloves and goggles when working with epoxy to protect your hands and eyes from accidental splashes. The product is sold from available instruction for safe use.
This is not a product that children can use. Therefore, bottles with epoxy resin and hardener should be kept away from children.
Rubbing alcohol or regular alcohol can be used to clean spilled liquid resin from surfaces and tools.
Mixing
The two components must be completely mixed together in one container (which must be discarded after work). The material from which the container is made must not react with the epoxy. Good to work with miniatures small plastic cups with measured marks (for example, they are sold with cough syrup) are suitable, in which you can mix the two components of the resin. If you don’t have anything like that at hand, you can also use disposable syringes in order to measure right amount material.
Epoxy must be mixed by carefully measuring the exact amount of resin and hardener (1:1). This option is also possible: you measure the right amount of epoxy, pour it into a disposable cup, and then add hardener to the same level in another cup.
When you have two equal batches, you pour the epoxy into the hardener pot and mix the two thoroughly with a wooden stick.
Then, when the ingredients are well mixed in the container, you pour them back into the container where the epoxy was, to make sure that you used the ingredients in equal amounts, and that what was left at the bottom of the first vessel was completely used up.
Bubble removal
Mixing epoxy and hardener will cause bubbles to form. If you blow on the mixture, the bubbles will burst due to the presence of carbon dioxide in your breath. If you will be filling small bottles, jars, glasses, or jugs, allow the epoxy to vent for a few minutes before pouring it into the container in which it will solidify.
Working conditions
Most epoxy resin manufacturers list approximately 30 minutes in the instructions for the resin to gel (depending on room temperature). Most two part epoxy mixes cure in approximately 8 hours at 21°C. But they can not be used when the humidity in the room is about 50%, otherwise they may become foggy. The material has a shelf life of at least a year if stored in a tightly sealed container. Epoxy resin products will turn yellow if exposed to direct sunlight.
Liquid Simulation with Two-Part Clear Epoxy
Epoxy resin settles into a flat surface. She slowly stretches down the walls of the vessel. To simulate still water, you will need to apply a final smoothing to its surface to remove the "protruding" edges that form after the mass flows down the walls.
Plan your work carefully. You may need to glue the parts before pouring the resin into the jar. Also, you may need to add details with each layer (for example, to make a realistic environment with fish or tadpoles at different levels, jars of fruits or vegetables that do not sink to the bottom).
If you're thinking of simulating melting jelly, ice cream, or a spilled drink, allow the epoxy to gel before pouring it. In this way, you will get a thicker layer than if you poured it immediately after mixing.
To create a wet mark or puddle effect, but with the condition that you later need to remove this effect from the surface, pour resin on a bendable plastic surface. Tear off the plastic from the "puddle", and then place the "puddle" on the floor in dollhouse without pouring resin on the floor.
There are other products that are better suited for running water, and most of them can be combined with a hardened two part clear epoxy.
Tips & Tricks
Epoxies will not easily fall out of shape. Don't use them to make doll jelly or anything that needs to be taken out of molds.
Improper mixing will cause the epoxy to not cure. Measure well before mixing.
When filling a container with a small neck, fill it drop by drop from the tip of a pin or toothpick. Or use a disposable pipette or syringe.
Avoid working in a cold and damp environment, otherwise the resin may fog.
Use special paints for working with epoxy resin. Compatible paints are transparent or translucent, and colors can be mixed.
Some plastic parts may dissolve in epoxy. Check for resin damage to paints or bases before working with them.