Repair in the house is what the owners prepare for in advance, choosing the design, materials that will be used in the process, and allocating funds from the budget for their purchase, often very considerable. It is advisable to update the situation at least once every few years, since both wall and ceiling coverings lose their strength over time. appearance. If earlier both walls and ceilings were whitewashed, now whitewashing has been replaced by wall paint and wallpaper. It is customary to glue tiles on the ceiling, or to do stretch ceiling, which is not always convenient and less economical than tiles. Moreover, if stretch ceilings are more laborious to install and require the hands of a specialist, then in the case of tiles, it is quite possible to cope on your own - of course, if you do everything according to the recommendations.
And so, it was decided to do inexpensive cosmetic repairs with vinyl wallpaper and ceiling tiles. Wallpapers are selected, now it is worth paying attention to the choice ceiling covering. It is important to approach this moment with all possible attention, because the tile must meet the requirements of the owner both in terms of external qualities and material characteristics to make the house more comfortable, because often, when entering a room, guests first of all pay attention to the ceiling.
The advantages of ceiling tiles as a finishing material include:
- profitability, despite the quite presentable appearance;
- possibility of gluing on any surface;
- a large selection of colors and patterns - you can choose the perfect tile suitable for any room;
- possibility of laying on your own without the involvement of experts.
Types of ceiling tiles. Which is better to choose?
Despite the fact that the materials used for manufacturing are quite different - for example, metal, wood - most of them are expensive or not suitable for a standard living space. For real good options not so much. If the apartment is located in an extremely busy place and you want to get rid of unnecessary noise, use soundproofing fiberglass and starch tiles but most of the time this is not necessary. Therefore, in the first place is a tile made of expanded polystyrene. It is not only well suited to any interior due to the huge variety of imitations of other materials and a variety of colors, but also the cheapest. Someone might think that it is harmful, but it is not. If it does not contain any unnecessary impurities, it is absolutely harmless to living organisms.

Expanded polystyrene tiles can also be divided into several types. The main differences between them are the method of manufacture and the type of coating surface.
Types of tiles according to the manufacturing method
- stamped. Another name is pressed. The cheapest and most common type. Although such products are inferior in quality to their counterparts, they are still willingly bought. They are obtained by pressing and stamping, and blocks of expanded polystyrene are taken as the basis. The thickness of such products is small, up to 8 millimeters. Use these tiles with caution, they are fragile and can easily break. It is worth cutting only with sharp objects, otherwise crumbling cannot be avoided. When gluing, it is important to avoid high humidity, this type of coating may shrink and gaps will appear.. It should be noted that shrinkage is typical only for stamped tiles.
- injection. This tile is white in color and can be dyed as desired. It is the thickest of the three types, its thickness is from 9 to 14 millimeters. The drawing on it has the correct geometric shape and is quite deep. It also serves for sound insulation, and when compared, for example, with stamped, it is more durable. Also, this type is environmentally friendly and harmless, it does not burn well. The difference is that after gluing there are no seams that need to be sealed, which means that it is more convenient, but due to all this it is more expensive and therefore less common.
- extruded. This is the highest quality and most expensive ceiling tiles. It is obtained by pressing, the result of which is a polystyrene foam strip. Such tiles are completely smooth, without graininess, much stronger than stamped and injection tiles. It has different sizes, but most often found in the form of standard square products 50x50 cm. It can be either white or painted in a different color. Do not paint it yourself. Its coating repels water, due to which it can be washed if necessary, which cannot be done with other types of material. The disadvantage is that in sunlight it may turn yellow. For this reason, you should not choose a pure white finish in a room where there is a lot of sunlight.
Ceiling tile prices
ceiling tiles

Separation by type of tile surface
According to this criterion, the tile is divided into 3 more groups, consider them.
Table. Classification of finishing tiles according to the type of surface coating.
After the tile is selected, you can start gluing.
What is required for work?
In order for the work to be done with high quality, it is not enough to choose a beautiful and suitable tile, you also need a number of tools and materials for laying, the choice of which should also be taken seriously so that you do not have to redo or glue everything again. The adhesive must be suitable for any type of tile and the surface of the material to which it will be attached. Brand, price and country of origin do not always matter, please consult the seller well.
Important! IN Lately the following technique is common: stick tiles on liquid nails. In this case, it keeps better and pleases the owner longer. You do not have to wait for drying, as is the case if you use ordinary tile adhesive.
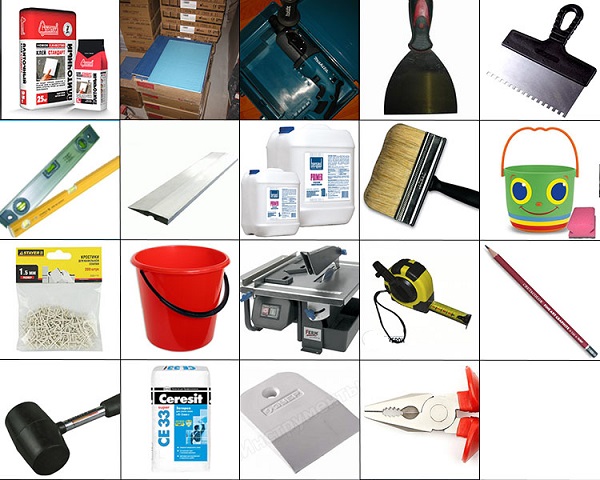
As for specific tools, you should purchase:
- knife or scissors;
- roulette;
- mounting adhesive;
- simple pencil;
- stepladder or a regular table.
Step by step instructions for gluing tiles
The procedure consists of several stages, we will get acquainted with the features of each of them.
Ceiling and tile surface preparation
If the temperature difference between the room and the street is very large, then the tile must lie down in the room for some time, because it reacts strongly to cold and heat. It is advisable to unpack it in advance, and not right before laying.
Mounting adhesive prices
mounting adhesive

Pasting the ceiling with tiles directly on top of the old coating or on freshly peeled wallpaper, of course, should not be, so the most important step will be its preliminary preparation. Carefully remove the old tile, if wallpaper was pasted instead of it, we peel them off, after which we apply a primer to the surface. A good primer will ensure that the adhesive adheres, and the tile will not lag behind. If there are any irregularities, you can putty them, but full putty is not required, because if the ceiling is even, then you can do without it.
On a concrete or water-based paint surface, the tile lays down very well without any preliminary preparation. But it will lag behind the whitewash, not having time to stick properly, so the lime whitewash will have to be completely primed or even cleaned off. After the primer and putty are completely dry, you can proceed to the next step - marking the ceiling.
primer prices
primer
Ceiling measurements and markings
Without guides, it is not easy to glue the ceiling covering perfectly even, so you do not have to rely only on your eye. Be sure to select guidelines so that the coating lies without distortions. This can be done in several ways.
- From the center- the first tile is glued exactly in the middle of the ceiling, all the rest are placed on its sides. This option gives the best results: it is simply impossible to lay the tiles unevenly when they lay down from a properly glued center slab. How to paste it correctly? To do this, we stretch two threads from the corners along the diagonal of the room, and mark the place of their intersection, which will be the center. From this point on four sides we measure a distance equal to half the tile, and according to these marks we glue the slab. Everything, now you can start pasting.
- From the chandelier- most convenient way if the chandelier is already hanging. We dock four tiles to the place where the wire exits, carefully cut the corners to them and glue them. The rest are stacked on their sides.
- From the wall opposite the entrance- the easiest way for a beginner, in which, however, it is often necessary to cut the last row of plates.

In any case, gluing the first plates is the most important stage on which the success of further work depends.
Sticking tiles from a chandelier
We take four tiles and apply them to each other so that everything is exactly at the joints. The corners connected to the chandelier are cut to fit the cap connector. Next, apply glue. It is applied to the corners and in the center more, and along the edges - in small droplets. Some tiles already have special recesses into which glue is poured. It is also recommended to apply some glue to the ceiling. If this is an instant glue, then you can not wait for it to dry, but stick it right away.
Chandelier prices
When applying tiles to the ceiling, it is worth making sure that it lies absolutely evenly, otherwise gaps cannot be avoided in the future. There is no need to press hard on the gluing points; moreover, even minor dents or cracks may remain.
After the first square is glued, the remaining 3 must be placed around the chandelier in the same way. Next, glue the rest of the tiles. It should fit snugly against each other without the formation of cracks, it is better to peel it off and stick it again than to cover up ugly seams later. Usually if the corners converge, then the tiles should fit snugly along the edges to each other. If there is a pattern on it, then you should make sure that it matches.

Often it turns out that the tile has to be cut. In this case the cutting line should be adjacent to the wall, and solid edges should be joined to other tiles, then even if an unevenness was allowed in the cut, this will cover the plinth, which will be glued after the tile at the junction of the wall and ceiling.
Covering cracks
It is not always possible to glue ceilings perfectly, especially for beginners. However, when you see small gaps between the plates, you should not be upset, you can simply cover them up. To do this, we take a sealant or Moment-installation, if the tile is white, apply it and gently rub it with your finger over the entire gap. It is almost impossible to see the latter after this, the main thing is not to stain the tile itself. For this reason, we perform this operation as carefully as possible.

Cracks between foam tiles on the ceiling
Final stage
At this stage, all the shortcomings, if any, are viewed and removed, and a circle is glued around the chandelier. It serves as a good addition and decoration. Carefully cut out a hole, make a side cut in order to put it on, and glue it over the tile. It is worth remembering that the lamp itself must be at a sufficient distance from the tile itself to prevent its melting or even fire.
Video - How to glue tiles on the ceiling correctly
If the color is not entirely satisfactory, and the tile is not water-repellent, it can easily be painted over with water-based paint of any color, it is advisable to paint over the skirting boards together with the ceiling itself. Also, tiles are often betrayed for painting, which have been on the ceiling for more than one year and are dirty, but you can’t wash them. That's it.
In order to make good repairs at home, it is not necessary to be a master, it is enough to have the desire and use the recommendations correctly. As for the ceiling tiles, it is worth paying attention to the fact that each package contains a brochure that indicates exactly how to stick this type of ceiling covering. Follow her and everything will work out.

In everyday life, foam plastic is called a tile made from expanded polystyrene one of three ways, defining the names of the types of this material:
- pressed (stamped);
- injection;
- extruded.
In addition to the properties common to expanded polystyrene, each group has individual characteristics that determine the place of application and installation methods, functionality and price. Therefore, you should choose a type of tile in accordance with your skills and the availability of installation tools.

Consider how to put different kinds this ceiling finish - an eco-friendly material, easy to use and diverse in decorative design.

Briefly about the types of foam tiles
When choosing foam tiles, you need to proceed from the requirements for it: in addition to the operating conditions, the required class of finish should also be taken into account, since the price range of the material is wide.
According to the main classification - the method of production, polystyrene foam tiles are produced in the following types:
Having decided on the appropriate type of tile, choose the method of laying it - taking into account the characteristics of the existing base.
Foundation preparation
The surface of the ceiling is freed from wallpaper, whitewash, and better - from water-based paint. The whitewash is washed off with a wet cloth, and the water-based emulsion and wallpaper are easily removed with a wide spatula after impregnation with water using paint roller. All peeling shells must also be removed, after which the base is treated with an antiseptic solution - against fungus and mold.
The ceiling surface must be leveled in a plane, otherwise the tile will repeat its relief. Small shells on the ceiling will not interfere with the foam sticker, but all the bulges after puttying are stripes, lumps must be cut off with a spatula.
After leveling the base, it is primed.
Ceiling markings
The tiles on the ceiling plane must be arranged so that the sheets of opposite extreme rows are of the same size - solid or cut to the same size. If the room has a rectangular shape with slight angle deviations from 90 °, then the tiles are laid in a direct way - seam to seam. With a different geometry of the room or curved corners, it is better to trim the ceiling diagonally - this will hide defects.
In the absence of a chandelier on the ceiling, the task is simple. Diagonals are drawn along the ceiling from corner to corner, and two lines perpendicular to each other are drawn through the point of their intersection, directed approximately to the middle of the walls.

There are two ways to get started:
- from the sticker of one tile, aligning its center with the intersection point of the diagonals, and placing the sides parallel to the walls;
- from laying four starting sheets around the geometric center - along the lined perpendiculars.

In addition to starting from the center of the ceiling, other options are also used - from a wall or corner located opposite the door to the room, so that the last cut row is not conspicuous when entering the room.
When a chandelier is provided on the ceiling, after finishing the finish, the place of its attachment should ideally be located either in the center of a separate sheet, or at one of the intersections of the tile joints. In residential buildings, where interfloor floors are mounted from hollow-core slabs, the chandelier is rarely located in the geometric center of the base - it is mounted on the channel of the slab through which the cable is laid, which complicates the layout of the tile.

In such a situation, both options for placing sheets are alternately marked from the chandelier to the walls - one row in each direction, and the best one is chosen.
If, with a successful start from the chandelier, gaps of approximately equal width remain around the perimeter of the ceiling, in most cases they can be hidden ceiling plinth suitable section.
At this stage, you can perform an accurate - piece-by-piece calculation of the need for material.
If both layout options from the chandelier do not provide an even distribution of the cut edge rows, choose the layout in which the narrowest strip will be located above the front door.
To mask the unfortunate location of the chandelier relative to the tile, polystyrene foam ceiling rosettes are often used - decorative elements different size and configurations glued to the finish at the point of connection of the device.

There are many options for the location of tiles on the ceiling, as well as possible base configurations, it is impossible to describe them all. But, knowing the basic layout methods, you can choose the most suitable one for your conditions, or optimize it - change the direction of the rows, lay tiles with an offset, combine sheets of different formats and designs.
Compositions for sticking foam tiles
Expanded polystyrene is a lightweight material, therefore, it is not required for mixtures used for tile installation. high demands in terms of tensile strength, but a prerequisite for glue is compatibility with foam, the absence of an aggressive effect on it. In addition, the compound must set quickly enough so that it is not necessary to press the tile to the ceiling for a long time, and not leave dirt on the sheets after removing the excess.
Foam tiles are laid both on adhesives and with the help of improvised means - sealants, putties.
Of the special tools, the following are popular:

In addition to the listed means for sticking ceiling tiles, transparent ones are used. silicone sealants, acrylic putties, a pasty variety of PVA glue, and even solutions of dry gypsum-based leveling mixtures.
The following compositions are not popular with professionals:
- "Titanium Wild - liquid nails" - a composition with low adhesion both in liquid form and after curing;
- "Master" - universal glue of low price category, has a sharp, odor that persists for a long time in the room, dries for a long time;
- Dragon is a compound with a pungent odor, requires application on both surfaces, the gluing procedure is inconvenient, as it requires exposure of the applied layers and prolonged pressing, or a pressing-tear-pressing cycle.
Ceiling tile sticker
The method of application of each type of adhesive is indicated on the packaging and is tied to its consistency, so the adhesive composition is selected in accordance with the characteristics of the base and tile.
For a well-leveled base, it is better to use liquid formulations - their consumption is economical. On such adhesives, you can plant both soft and hard tiles.
Thick compounds will help hide differences of up to 5 mm on the ceiling, but such a leveling finish requires skills, and the tile must be dense.

To glue the tiles you will need the following tool:
- Construction knife;
- Roulette, ruler and pencil;
- Means of applying glue (trowel, brush) - depending on the type of mixture;
- A clean rag to remove excess adhesive from the finish.
The tile intended for installation must be transferred to the room being repaired a day before laying, unpacked and laid out in one layer so that the foam has time to respond to the temperature and humidity in the room, otherwise after the sticker there is a high probability of cracks appearing at the joints of the sheets.
Pasting the ceiling with the correct marking of the starting section is not difficult, but the first elements must be oriented strictly along the lines, otherwise the geometry of the tile joints will be violated in the future.
Cutting sheets is performed on a flat table - with a sharp knife sting along the ruler.

Glue is applied to the tiles in accordance with the instructions for using the mixture, after which the sheet is applied to the design site close to the neighboring ones and pressed over the entire area, avoiding dents from the point application of efforts. The excess mixture that has come out is removed immediately after fixing the tile in place.

If fillets are not planned to be installed along the perimeter of the ceiling, then the extreme rows of finishes are glued close to the walls, but not in the thrust. But such a joint, as a rule, is not ideal, and it is often hidden by decorative ceiling plinths.
One way to stick ceiling tiles is clearly shown in the video:
Conclusion
Finishing with foam tiles is a method of decorating a ceiling, attractive with a relatively low labor intensity and the absence of significant concomitant pollution of housing. To these advantages should be added the aesthetics of such a cladding and the possibility of independent execution. A high-quality sticker of a seamless tile is clearly shown in the video:
However, the apparent simplicity of the technology is deceptive - on the ceiling, even small tile joining errors are clearly visible, so the result of a hastily done finish is sure to disappoint.
Finishing the ceiling with tiles is a budget repair method that is easy to carry out on your own. However, in most apartments, the evenness of the ceiling surface leaves much to be desired, and too large deviations on the plane create inconvenience in work, spoil the impression of the repair. If you know how to glue ceiling tiles on an uneven ceiling, you get a monolithic surface.
For the manufacture of ceiling tiles are used different materials. So, fiberglass panels will provide reliable sound insulation. Other components used in the production of decorative boards include wood, expanded polystyrene, and light metals.

Common and affordable option expanded polystyrene (polystyrene, polystyrene) is considered. Price, range of shades and surface textures are the distinctive features of such tiles.
According to the method of manufacture, it happens:
- pressed (stamped) - produced by pressing. The thickness of the segments is 6 - 8 mm;
- injection is made by sintering the components of expanded polystyrene. Product thickness - 9-14 mm;
- extruded is made from strips of polystyrene obtained by pressing. Finished tiles are painted or laminated.
According to the type of surface, the panels for finishing are divided into:
- laminated, coated protective film from the front side;
- seamless are characterized by smooth edges, after gluing the joints remain invisible;
- mirrors are made of plastic, front side segments are covered with a mirror layer.
How to solve the problem of uneven ceiling
Often, those who decide to stick ceiling tiles are faced with the problem of uneven overlap. But, if you know the technology of laying panels, the problem can be solved.

An easy way would be to install parts on an uneven ceiling. This is done with polystyrene foam, which hides minor height differences. But then you have to choose suitable size panels and drawing. For example, a large relief visually masks flaws more than a flat surface of tiles.
If the goal of finishing is to obtain not only smooth, but also durable decorative ceilings, it is better to pre-align the base base, and only then proceed to the design of the ceiling with tiles.
In this case, choose the following alignment methods:
- using putty mixture;
- installation of a frame base made of metal or foam.
How to glue ceiling tiles on an uneven ceiling: leveling with putty

Work starts with pre-cleaning surfaces from the previous finish. To do this, use a mechanical method using water and a construction spatula. If this method does not help, get special chemical compositions that corrode old finishes.
When the ceiling is cleaned, it is primed. Next, cracks are sealed on the surface, then the base is covered with a layer of putty in such a way as to remove irregularities and height differences. The layer thickness should not exceed 2 cm. The putty will hold better if a reinforcing mesh is glued to the ceiling.
After puttying, the ceiling is left to dry completely, then the plane is polished with fine-grained sandpaper. Sanding will make the surface smooth. At the end of the grouting work, the ceiling is again covered with a primer layer.
Construction of a foam frame for gluing tiles
This method is suitable for rooms with a flat ceiling plane, but with slight bulges. For example, if the ceiling is made of concrete slabs, the gaps between adjacent slabs are filled with putty, but the dried mixture protrudes from the plane. Then sticking the panels to such a base will not work.

To do this, construct a frame of foam strips:
- sheets are cut into strips, which are glued to the ceiling with a step corresponding to the width of the tile. As a result, one panel should lie on two strips;
- if the strip falls on an uneven area of \u200b\u200bthe base, a recess is cut in the foam with a knife corresponding to the width of the unevenness.
When choosing the width of the strips, take into account the dimensions of the tiles that are supposed to decorate the ceilings. Such a frame is mounted only under light foam tiles.

After leveling the surface, proceed directly to gluing the panels. But first, they mark the ceiling for the ceiling tiles, choosing the method of mounting the segments:
- parallel to the walls - a simple option, used if the walls in the room are even. To do this, first the first row is glued from the wall, and then the following rows are laid one after the other;
- diagonally. Two lines are drawn on the ceiling from corner to corner, the intersection of which will be the starting point for installation. Then more lines are drawn along the diagonals;
- rhombus, when several squares are measured from the center of the ceiling, additional diagonals are drawn from each figure. The corner of the foam tile is placed in the center of the ceiling, and the sides of the part should run along the lines.
If the ceiling could not be leveled, then it is impossible to stick the panels on special adhesives. To mask minor height differences, glue is used under sheets of drywall or putty, which is diluted to the consistency of thick sour cream. So that the putty does not have time to dry out, the ceiling is smeared first for gluing the first four tiles, then the next four, etc.

The tile is laid on a layer of glue. The panels adhere well and move easily if a segment needs to be adjusted. First, the edges of adjacent elements are combined, and then set in a single plane using a rule or a building level.
If adhesive gets on the front of the panels, the composition is immediately removed with a damp cloth. The voids between adjacent parts are filled with sealant or putty. As a handy tool for masking joints, use a rubber spatula.
Thus, the problem of gluing tiles on uneven ceilings is easily solved. The main thing is to follow the technology when finishing.
Video how to glue ceiling tiles without seams
When funds do not allow for a multi-level ceiling design or there are budget restrictions, ceiling tiles are used. This material is unique: with its simplicity, it allows you to update any interior without much effort and the involvement of repair teams.
You can make the ceiling tiling yourself: it will not take much time, and the result will look quite professional.


Peculiarities
Ceiling tiles are fragments of a predominantly square shape different size(approx. 50 x 50 cm) made of natural and synthetic material. If earlier they were exclusively white, today on store shelves you can find blue, beige, pinkish, milky tiles, as well as options with a color pattern. This material, folding into a monolithic canvas, forms different patterns that give the space of any room elegance and comfort.
Ceiling tiles and surface texture differ. It can be matte and glossy. The material is unique in that some of its varieties allow the surface to be painted. Thanks to this, there is no need to re-glue the lining if the surface is dirty. To update, it is enough to roll it with a roller with paint or spatula. So you can maintain a beautiful and fresh appearance of the ceiling for up to 10 years.


Distinctive feature material is noise insulation: ceiling tiles make the room warmer, reducing extraneous noise from neighboring apartments. It doesn't matter how thick it is. Depending on the type of material and its density, these raw materials need to be handled carefully and gently. It is necessary to glue such a tile carefully, otherwise, at the time of pasting the ceiling, a fragment can be deformed, leaving unsightly dents on its surface that are visible to the naked eye.
In working with tiles, the possibility of breakage is not ruled out so cutting should be done with a sharp tool. If there are nicks on the cutting blade at the time of cutting, the material may be chipped, which can lead to breaking off the corner. Dirty and rusty tools should not be used in the work: they can lead to contamination of the glued fragments, which is especially noticeable in the overall picture of the cladding. Even the cleanliness of the hands matters: they will constantly have to be washed, since the adhesive composition gets on them during the finishing process. It is unacceptable for it to get on the tile, this will be noticeable, since not every adhesive can be removed from the surface perfectly.


To finish the ceiling, you will have to buy material with a margin: this will eliminate the lack of panels in case of marriage or improper cutting when fitting.

Panel types
Ceiling panels are classified according to the method of production, type of surface, shape, material of manufacture and size. Thanks to these features, you can visually change the area of \u200b\u200bspace, beat surface irregularities. Today, these panels are made from synthetics (polystyrene), wood, and even metal, although it is rarely used for decoration. The disadvantage of many varieties is low resistance to combustion, although the manufacturing technology provides for the impregnation of the material with a special composition that prevents ignition.


Manufacturing Method
According to the type of production, ceiling tiles are divided into 3 varieties:
- stamped- material created by pressing foam blocks with a thickness of 6-8 mm (rather fragile material with no protective layer and instability to pollution, used due to its low cost);


- injection- a variety formed by sintering in a mold with further processing at high temperature, having a thickness of 9-14 mm (polystyrene foam category with high relief and pattern clarity, capable of imitating stone, marble, wood, tile and ceramic tiles, which has a category for painting in the assortment);


- extruded- a category, the creation process of which is associated with the pressure of an extruded polystyrene foam strip under pressure, it has high quality indicators compared to the two previous types of finishes (it is strong, reliable, durable, hygienic and able to restore its original shape if it is deformed, glue and cut it much easier).


Surface type
According to the type of surface, ceiling tiles can be:
- laminated;
- mirror;
- seamless.
Laminated material is distinguished by the presence of a special film on the surface - lamination. This feature makes the finishing panels moisture resistant, durable, resistant to fading. Due to the laminated film, this ceiling tile has a different shade. The mirror variety is a design option: it is mainly a plastic tile, on the surface of which there is a mirror layer. This option, in addition to the square shape, is rectangular. The seamless type of raw material is different in that no seams are visible during gluing, while the tile can have classic linear borders or curly lines. It is durable, thermally stable, resistant to moisture, practical and paintable.


Shape and dimensions
These criteria are especially important: it depends on the number consumable. The calculation formula is quite simple: measure the length and width of the ceiling, multiply and divide by the number square meters material, based on the number of fragments in one package. Usually a factory packed block of 50 x 50 cm consists of 8 blanks. It's basically 2 sq. m.
This parameter is the most demanded, although in addition to it, there are other standards in production, for example:
- 30 x 30 cm - for small rooms;
- 16.5 x 100 cm - for lovers of non-standard techniques.
The inconvenience of calculating a rectangular tile is the need for a symmetrical fit of the pattern, otherwise, due to an incorrectly located pattern, the ceiling may look visually skewed. In this case, pasting with a shift makes sense.

Choosing glue
Properly selected glue is the basis of successful work. Often it is he who slows down the process. Some types of adhesives are enough to attach to the ceiling, they quickly set. Others will have to be fixed by pressing the surface for a while. To date, several varieties of tile adhesive have been proposed for ceiling tiles. It can be transparent, white and beige. The structure is also different. Let's consider a few:
"Titanium"
This glue is divided into 2 types: one of them is transparent, sold in bottles, has a specific smell. Its disadvantage is the viscosity of the structure. Application is inconvenient because the adhesive stretches, forming threads, which distracts from work.


This does not stop some masters: they believe that this glue is suitable for work and does not sag if the neighbors from above have a leak or a pipe breaks.


Liquid Nails
This material is sold in the form of a tube and a bottle for a construction gun. The highest quality goods are produced by the Moment trademark. This adhesive is characterized by excellent adhesion to the surface. It will take a few seconds to stick the tiles. However, it is precisely the fact that it sets instantly that can make it difficult to work: it can be problematic to correct a fragment glued to the surface, because the material has a particularly strong grip.


If a bottle for a gun is used in the work, you will have to work quickly so that at the time of hardening the tile is already on the ceiling. Another nuance is the color of the glue: it is a dirty beige. Such a minus calls into question the use of glue when processing the ceiling with thin fragments that do not involve painting. This glue is expensive, produced in a small volume, so facing the ceiling of a room can cost a lot. It will be difficult to remove it in case of dismantling.
"Quart"
Super white adhesive for ceiling tiles of this brand is available in different volumes in plastic cans. For work, it is optimal to choose a packaging with a volume of 3 kg. The color is similar to the white color of the tile, the consistency resembles sour cream. In work, the glue has proven itself from the best side. The tile applied to the ceiling lies in place, does not move out of it, does not lag behind the surface after it has been pressed down in the places of the applied glue. This glue is convenient in that it can be used to fill the joints, if suddenly there are voids. In terms of color and type of surface, it is similar to the main matte cladding, the processed seams will not be striking, while the surface of the finish will look monolithic.


Surface preparation
Before pasting, you must first prepare the base of the ceiling, otherwise the work risks being short-lived. This is especially true of places where the ceiling was whitewashed with lime. It must be removed from the walls, because the tile will not stick to the whitewashed surface. If for some reason dirt or greasy stains have got on the ceiling, they are cleaned off.
Not only whitewash is removed: it is necessary to cope with the plastered surface.
This also applies to wallpaper, if they pasted over the ceiling. To clean the horizontal plane from them, you can use a conventional spray gun for flowers and house plants. This will reduce the amount of dust when removing the old coating. The tile fits perfectly on a concrete base, although it is often impossible to reach it when cleaning. Do not ignore the preparation process before gluing: it is possible that the whitewash or old wallpaper will move away from the ceiling and the tile may sag against the background of others.


If the ceiling is uneven, has significant cracks, they should be covered with putty or gypsum-based rotband. Then it is necessary to prepare the surface for gluing with a deep penetration primer. This mark is indicated directly on the container, thanks to which the composition will ensure reliable adhesion of the ceiling panel to the ceiling surface. You can prime with a roller and a flat brush. At the same time, the roller is used in the main space, with a brush they pass through the corners and protrusions in order to eliminate the excess consumption of liquid (if you use a roller, in the corners, when pressed down, the primer will flow along the walls). You need to process the ceiling of the room with high quality, then you should wait a day until the composition is completely dry.


Installation subtleties
Mounting the ceiling with ceiling tiles is quite exciting and fast, so many people stick with their own hands. However, the work has its own nuances. She does not tolerate hack-work and haste: a loosely connected tile can fall out of the common canvas over time. It is worth considering the features of the material used: plastic tiles (PVC) do not allow pressure to achieve the density of the web, the porous material can be compressed somewhat if necessary for alignment.
Adhesive provides different ways fixing fragments. Each of them depends on the skills of the master. Calibration must be performed before sticking the material. This is especially important if you plan to start work from the center of the room obliquely. This factor is one of the most important when buying a material and taking into account its stock: out of 50 pieces, 8 will definitely not fit in size. This is due to the packaging itself: often the fragments on the sides have smoothed and obtuse corners.

When buying, it is impossible to wrap packages with tape, squeezing them: side seams suffer from this.
The batch of goods also matters: often the blanks differ by 3-4 mm, which complicates the sticker. Taking the highest quality square (rectangle) as a basis, others are equal to it: so pasting will be flawless. Before gluing a new fragment, attach it to the previous one. This will allow you to choose the perfect joint. After fitting, the element is glued to the surface. It is important to constantly check the direction of the pattern. This will avoid marriage.


It is not necessary to apply glue to the ceiling: it is enough that it will be on the tile itself. It is applied pointwise, as the material is quite light. You can apply glue in the corners, in the center, in the center of each face. In general, 5-9 dots with a small amount of glue are sufficient. To make the tile look monolithic against the general background, and the glue does not give it bumpiness, use a rubber roller for rolling wallpaper: this way you can avoid pushing through the blocks and even out the level of the cladding, especially at the crosshairs of the fragments (if there is no large relief).
If, during the work, a fragment with a dirty area is found in the package, which is not enough for gluing in the corner, it should be used as a pattern for especially difficult places (for example, where pipes or protrusions are located). So you can save on marriage and fit the shape of the missing fragment as accurately as possible. If special coloring is planned (for example, one relief element of the pattern), this is done before gluing. In case the entire surface is to be painted, it is better to do this after the finishing cloth has dried.


Sticking schemes
You can glue the tiles beautifully in different ways.
There are several options for gluing, for example:
- parallel to the walls (along the perimeter);
- diagonally (obliquely with alternation and intersection);
- in a checkerboard pattern.
To avoid distortion of the picture, make a center mark. To do this, find the middle of each wall near the ceiling, stick the thread on the adhesive tape and form a crosshair. If you plan to work with tiles diagonally, a crosshair is formed from the corners of the room. The central lamp serves as a reference point.
If it is not located in the center, make an adjustment.


It is necessary to start gluing from the center, where there is a place for a chandelier (it is removed before work). At the same time, markings are made for the location of the lamp in one square, cutting a small hole in its center. This square will be a guideline for the main process. Symmetry will depend on how it is pasted. If it is located parallel to the wall, the gluing of the same name is performed, if the corners of the fragment are turned to the centers of the walls, then a rhombus is pasted.
Sometimes the center consists of 4 squares: in this case, for perfect alignment, they are folded together and a circle is drawn with a compass. This will allow, if it is necessary to replace the fragment, not to remove the chandelier. If the work starts from the corner (parallel method No 2), it is important to consider that there will be cut off fragments along the edges, otherwise the drawing will be skewed. It is unacceptable that there is a whole square on one side of the wall, and only half of it on the opposite side.
1 How to glue ceiling tiles
Ceiling tiles- This is a material for finishing ceilings, which is made from extruded polystyrene (polystyrene). It's popular finishing material, which is easy to install, does not require special adhesive mixtures, well hides irregularities and defects in the ceiling.
When choosing ceiling tiles in a store, you must:
Check the quality of the material. The density of polystyrene grains must be uniform over the entire area of the tile. The edges of the tile should not have chips and fragments.
Make sure that there are no defects in the pattern and relief defects.
2 Tools
3 Materials

4 Preparatory work
Before starting work on laying tiles, you need to prepare the surface on which it will be laid. Special care for this is not required, the tile belongs to unpretentious materials, and it can stay on the remnants of old whitewash. But the quality of adhesion to the ceiling will be much higher if the surface is pre-cleaned, leveled and primed with polyvinyl acetate adhesive.
Ceiling preparation
Installation from a chandelier
You can mount ceiling tiles from a chandelier both diagonally and parallel to the walls. Here you choose according to your taste. It is only important to apply the markup correctly.
Ceiling markings
 Through the point at which the chandelier is located, we draw two lines perpendicular to each other. This can be done with the help of thread marks and adhesive tape. We get four right angles.
Installation must begin on the markup from the chandelier to the edge of the ceiling.
If we drew two lines parallel to the walls, then the tile laying will be parallel.
If we divide the right angles in half and draw two diagonals through the resulting points, we get the markup for the diagonal laying method (for a square room)
 If the room is rectangular: Out of the four corners, mark two lines diagonally. The place of their intersection is marked as the center.
Through the marked center we draw two lines perpendicular to each other crosswise (parallel to the walls).
Thus, we obtain a surface divided into four equal parts.
Then we build a square with the center marked above and draw diagonals in this square (marked in green in the figure).
We begin to paste over the ceiling with tiles, the first part is glued in such a way that one of its corners is exactly in the designated center, then according to the drawing.
Corner parts will need to be cut to the required size.
Mounting
 Apply glue to the edges and center of the ceiling tiles (in turn: applied to one - glued).
According to the markup, we lay out four ceiling tiles exactly in the center. (Push to the ceiling, wait three minutes, move to the next tile)
Cut the extreme ceiling tiles with a paint knife to the size you need.
If, after the installation of the ceiling tiles, gaps have formed in the joints, you need to mask them with an acrylic sealant.
Now your ceiling will look like one piece.
Attention! Diagonal laying looks better in large rooms, and parallel - in small ones.
Mounting from base angle
Ceiling markings
 The base angle and the base wall choose the wall and the corner that are most visible from the entrance to the room. Most often, the base is determined by the long wall of a rectangular room.
Measure 51 cm perpendicularly from the base wall (tile size + 1 cm for the gap). Put at risk. Go along the base wall to the opposite corner, also measure 51 cm - put at risk.
From risks to risks, stretch the thread, fix it with adhesive tape to the ceiling.
The adhesive tape that fixes the thread on the ceiling does not give us the opportunity to start gluing the ceiling tiles from the very corner, so we start gluing by gluing the 2nd and 3rd tiles.
Let's start installing tiles.
Attention! It is necessary to use markings, since the wall may not be even and, after gluing four or five tiles, you will find that the last one crawls onto the wall or, even worse, does not reach it by five centimeters and you can’t close such a gap with anything.
Mounting
Attention! Experts advise starting the process from the second tile, so as not to disturb the layout of the ceiling.
 Apply glue to the tiles.
Attention! For the installation of ceiling tiles, universal adhesives are chosen.
Since the tile is a fairly light material, it is not necessary to apply glue to its entire surface, it is enough to process four corners and the center.
Attach the tile to the selected area.
Move to the next tile.
 Continue the installation of tiles, if necessary, trim the last row in accordance with the dimensions of the ceiling.


