Rustic home decor is gaining more and more recognition today, not only because of its extraordinary originality, but also because of the cost savings, since it does not require large expenses. Sometimes it is enough to use wallpaper with a floral print, adding wooden furniture in abundance and cozy details. The final moment will be decorative beams on the ceiling. They are never redundant, regardless of style.
Beams as a universal design element
They can be found in a very unexpected use case. They adorn both modern high-tech and majestic classics. As for the ethnic interior, the main stylistic feature here is precisely the decorative beams on the ceiling, the photo of which is presented below. Without them, it is impossible to create a realistic picture. Competent design is able to highlight belonging to a particular style. The ceiling structure covered with paintings, carvings and vignettes will add luxury to the classic interior. Silver and pastel colors are also used.
At the same time, lacquered decorative beams on the ceiling made of wood with a smooth texture are suitable for this strict classic. Such models look great in modern house. The difference is that such an interior is more suitable for bold decisions, so it is possible to use both neutral and flashy shades. Among design solutions you can find blue, red and pink colors.

Metal beams are found in high-tech and loft. It is possible to form a structure from elements of other textures, but they must be painted with a special paint to simulate a steel sheen. Brick masonry will be an excellent companion for beams in such interior options. Details of the loft style furnishings can be used both in the house and in the city. small apartment. Shine of metal and glass, with the addition of "bare" light bulbs, a little facing brick, beams - that's the right atmosphere is ready!
Colorful decorative with the effect of aged wood are good for rural interior. They may have a rough texture, dark colors, which do not have to be in harmony with the main tone of the space, since the contrast is very relevant here.
Beams in Provence amaze with their accuracy and elegance, so the use of bleached options is a priority.
What are the types
Wooden structures are classics of the beam genre. This is the leading part of the rustic interior and eco-style. Traditionally, pine, ash and oak are used for the production of high-quality beams. They can be hollow and made from a solid array. The first option is more often used due to the possibility of hiding unsightly communications.
Metal beams are more modern, but their installation is not complete without professional help because they are heavy and oversized. It is not worth saving here, since poor-quality fastening of the structure is too big a risk.

More budgetary are decorative beams on the ceiling made of polyurethane. Their cost is low, and installation does not require large time and financial costs. Such products are hollow inside and quite light. The material is not affected by high humidity and does not absorb odors, while it is possible to imitate the color and structure of wood, which is why it has become widespread in bathrooms and kitchens.
Mounting Methods
Installation can be done various methods. With a small size, the design is fixed on liquid nails. For other cases, it is necessary to create a crate from a wooden or metal profile and use self-tapping screws. The combined method is relevant for heavy and long beams. Formed on the ceiling wooden blocks on which structural parts are attached with glue.
Color spectrum
The stylistic orientation directly affects the shade of the beams. To give expressiveness, emphasis is placed on contrast. So the design becomes the main element that attracts attention.
The interior will acquire softness through the use of beams that have the color of the ceiling itself. At the same time, they do not go unnoticed and add volume, dynamics and structure to the ceiling. A harmonious combination is made up of decorative beams on the ceiling with a wooden structure or painted white.
There are many options for combining shades, it all depends on the features of the chosen interior solution. Beams can reflect wood furniture or floors, contrast with ceilings, or match wall paint. There are no established canons here.

It is worth remembering that the space acquires weightlessness through the use of white beams, while black ones make the atmosphere rigid and graphic, and wooden structures bring calmness to the interior, although they look a little cold.
History
The beams that were present on the ceilings of old buildings initially did not have a decorative purpose. They were load-bearing structures that were used as and took on the weight of the roof. Over time, the beams were considered superfluous and began to be hidden with the help of decoration. They were rehabilitated due to the longing for a colorful design and now they have become relevant again, but only as a decorative element.
Where are beams used?
Such details can be found in absolutely any room. They are able to decorate the kitchen, look organic in the bedroom and living room, will be useful in the hallway. The size of the room determines the number and their massiveness. For example, in a large living room, decorative beams on the ceiling can be used in unlimited quantities, while for a modest hallway, you should not use more than two. When located on the ceiling of the kitchen, a functional purpose is added in the form of hooks for all kinds of utensils and holders for wine glasses.
To each his own
Decorative beams on the ceiling are perceived differently. Someone certainly wants to build a massive structure in the usual "Khrushchev", and some owners of houses with load-bearing beams want to add functionality and make them less noticeable.
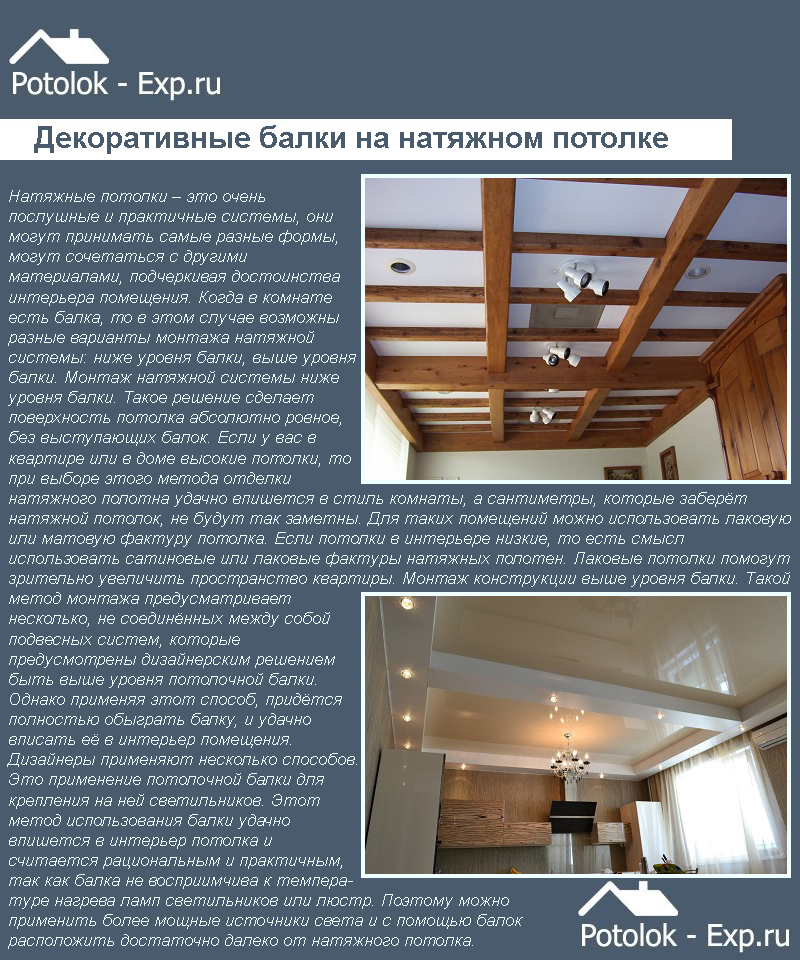
In terms of expanding functionality, the most common use is to attract structures to illuminate the space. It is possible to create very non-standard elements. For example, fixing a chandelier on chains and inserting point light elements into beams. The installation of luminaires with remote mechanisms is rational in the design of metal beams.

LED lighting can be laid on top of structures. This method will give the beam the effect of floating in the air. Such a design innovation is especially relevant when combining films and PVC beams.
Rope trim is a common technique among designers. In this case, both the environmental friendliness of the decor and its aesthetic basis remain the same. Decorative wooden beams on the ceiling with rope winding are common in ethnic, mediterranean nautical style and country.
If desired, beams can be disposed of using a radical method - stitching. Suspended ceilings are able to cope with this task.
How to attach decorative beams to the ceiling
The heaviest elements are made of wood, so fixation of increased reliability is required here. You can make them from a bar yourself or purchase a ready-made version. In the first case, it is desirable to choose wood with a shrinkage of no more than 12% and no traces of rot and visible flaws. It is worth treating with antiseptic agents to protect the material from insects, mold and moisture.
The literacy of the installation of the structure depends mainly on the correctly applied markings. Before installation, it is recommended to mark the attachment points of the profiles with the help of an upholstery cord, tape measure and level, and only then proceed to further work.

Among the main advantages it is worth noting the efficiency and ease of fastening. All elements are light weight, so the standard length polyurethane beam requires the use of only three wedges.
Change of space
Do-it-yourself decorative beams on the ceiling are easy to make. They are able to adjust the geometry of the room. It is possible to visually expand the room due to the structures fixed along the width ceiling covering, and for lengthening, the components are mounted in the form of perpendicular lines.
If the ceilings seem too low, then it is worth making a continuation of the beams on the walls themselves. Laying crosswise will not bring adjustments to the space, but will add volume to the ceiling. High ceilings allow the beams to be lowered to the desired distance and fixed to the walls.
Useful Features
Along the longitudinal center line of the future location of the beams, you can place any communications that will become invisible after installation. Such a solution is very convenient, since there is no need to carry out complex work on pulling communications in walls or under the floor with expensive and energy-consuming chasing. In this case, there will be no unnecessary material and time expenses, as with separate concealment of air and water type heating, air conditioning and ventilation systems.

It should be noted that communications located in the subceiling space are not only invisible, but also protected from mechanical damage. Moreover, the installation decorative beams on the ceiling provides many options for translating ideas.
Conclusion
The history of beams begins in the distant Middle Ages, and today it is possible to create an interior that resembles ancient castles and add the appropriate atmosphere. This decorating technique has become convenient way hiding certain structural flaws in the room. A room with decorative beams on the ceiling acquires a clear correct form, it is comfortable and spacious. Therefore, when setting up country house or apartments worth paying attention to. Perhaps they will become the main part of the entire interior.
10138 0 5
9 ways to make and fix ceiling beams with your own hands
In the interior, I have always liked minimalism: smooth smooth surfaces, a minimum of unnecessary details, a maximum of functionality. And in Lately drawn to something more comfortable, even rustic. I'm still not ready for furniture carvings, lots of textiles or a bunch of small pendants on a chandelier, but I really want to use such noticeable and space-changing details as decorative ceiling beams in the design.
And they just don't exist! Wooden, polyurethane, plastic, chipboard, MDF and drywall - for every taste and opportunity. You can buy ready-made or make your own. But in each case, the methods of fastening will be different.

Choice of design and construction of beams
Before you start doing something, you need to draw up a plan, think over the design, calculate the materials. After all, ceiling beams can not only decorate the interior, but also hide some surface defects, visually change the spatial perception of the room, and become a functional element of the house.
For example, you can use them to:
- hide the joints of the plates on the ceiling or the transition from one type of finish to another;

- visually make the room wider (transverse arrangement) or longer (longitudinal arrangement);

- “ground down” disproportionately high ceilings to make the room psychologically more comfortable. To do this, they are often attached below the main level;

- highlight functional areas by dividing the room with one transverse beam with built-in lights or by placing several in one part;

- false beams hollow inside, having a box section - ideal concealed laying electrical wires, pipes, air ducts and other communications, as well as installation of built-in lamps without installation false ceiling reducing the height of the room.

In order for the interior to look advantageous, not to be overloaded with unnecessary details, it is necessary, of course, to take into account the parameters of the room. For example, if the ceiling height is small, the distance between the ceiling beams should be made wider, and they themselves should be less voluminous.

And sometimes the beams do not have to be installed by ourselves - they already exist and are load-bearing structures that annoy the residents with their appearance. But any disadvantage can always be turned into a virtue, if you know the tricks of how to beat the beam, harmoniously fitting it into the interior.
But I still want to talk not about the aesthetic, but about the practical side of the issue: how these decorative elements - ready-made or home-made - are made and installed.
Wooden
Wood products are massive - from solid wood, and prefabricated - from individual planks. Most often, durable and practical conifers are used for their manufacture.
In any case, the wood must be dry and clean, free of rot and insect damage. And so that they do not appear in the future, it is treated with antiseptic compounds.
Method 1 - push-through mounting
This method is used to install massive beams from a bar, for which a through hole is drilled in it to fit the size of the fastener, and it is screwed directly to the base.

The choice of fasteners depends on the base material:
- If it is a tree, long self-tapping screws are sufficient, screwed in increments of 15-30 cm, depending on the thickness and weight of the decorative element.
- If finishing is done in a block or brick house with concrete floor slabs, dowel nails or anchors are needed.
Fastener caps must be recessed into the body of the beam. After installation, these holes are sealed with putty on wood of a suitable shade.
Method 2 - suspended
Here, special metal linings are used on the wall with a nest in which the end of the beam lies.

This method is convenient when the beams need to be lowered below the ceiling level or when they cannot be flashed through due to the small section of the mounting edge. For example, as in the case of using a thick board placed on edge.
The overlays are subsequently hidden under a layer of plaster or cladding. If such a finish is not planned, they can be disguised by wrapping chains, ropes and other around the ends. decorative ornaments matching the style.
Method 3 - to the console
Another option on how to fix the beam without touching the ceiling is to lay it with its ends on the consoles fixed on the wall at the desired height.

The last two methods are the only possible ones for light suspended plasterboard or stretch ceilings, if you have not thought about embedded elements in advance. But they can only be used for solid beams that are not spliced along the length. And they themselves should not be very long, otherwise they will sag over time, not being fixed along the entire length.
If you take a long and heavy beam, then the only way to correct the deflection of the beam is to install props under it. But they can be beaten by turning them into decorative columns or racks with shelves.

Method 4 - fastening false beams to bars
Wooden false beams can be bought or made by yourself. To do this, you need well-dried edged boards. If you take raw ones, then even with a perfect fit of the joints, they will become noticeable over time, as the wood will dry out.
Depending on the availability of tools, such boxes can be made in two ways: with a saw cut of the ends under 45 0 and without saw cuts. In the first case, you will need this tool:

- We take three boards, outline the dimensions and saw off in length and width. At this stage, you can immediately conduct a preliminary decorative trim each board. For example, age the surface by removing soft fibers from the top layer with a metal brush or a drill attachment.

- Then, with a plunge saw, we cut off one longitudinal side of the side planks, and two of the front ones.

- We lubricate the joints with glue - carpentry, PVA or special furniture, press them together and fix the joint with finishing nails or just thin carnations with bitten off hats.

- When the structure sets, we grind the outer corners with sandpaper, if there are gaps, we close them with putty, after which, after drying, we grind again and cover the entire part decorative composition- varnish, impregnation,.

Now about how to make a similar false beam, if there is nothing to carefully cut off the ends. To do this, after cutting and grinding the blanks, small bars of the same length are screwed to the side parts from the inside. Self-tapping screws should enter the body of the board, but not come out.
Then, holes are drilled in each bar on adjacent faces between the attachment points to fix the front panel.

Before screwing the front bar, glue must also be applied to the lower edges of the bars. Further - the same processing as in the previous version.
Despite the fact that such ceiling beams much lighter than massive ones, they still have a decent weight, so you need to fasten them securely. To do this, first a thick board is attached to the ceiling with a width equal to the internal distance between the side walls of the box. Instead of a board, you can take a couple of bars, as in the next photo.

It remains to put the false beam on the bars and fix it with self-tapping screws, drowning the hats and filling the recesses with putty. If the box is relatively light, you can do it with finishing nails more often - they are unlikely to be noticeable at such a height.
Plasterboard
Drywall is a versatile material. From it you can make a design of any shape, even curved. And the beam is the same box that many make around the perimeter of the ceiling for installing spotlights. Only in our case they will go across it.
Method 5 - on a metal frame
I do not think that there is a need to explain something in detail to those who have already dealt with drywall. And for those who did not have, you can read articles on this topic, where everything is described in detail. Therefore, briefly and in pictures.


After finishing putty, you can finish such ceiling beams in any way: paint, wallpaper, tile, etc.
Method 6 - on a wooden frame
Everything is the same, only the frame is made of wooden bars. They will help you decide difficult task how to beat a beam on the ceiling in an apartment: if it looks unpresentable, it is enough to fix even rails on it and sheathe it with drywall.
- you can add similar parallel or transverse beams;

- or build similar boxes around the perimeter;

- if the crossing beams are pasted over with polyurethane moldings, puttied and painted, you get a similarity coffered ceiling in a classic style;


Finished items
It is absolutely not necessary to invent and make something yourself, since decorative beams can be bought ready-made. They are made from wood-like materials - chipboard, plywood, MDF with veneer, staining, lamination. And also from plastic as cable channels and from polyurethane.

The latest products are distinguished by a variety of designs and shapes. Most often they imitate a tree, and so believably that to distinguish them from natural material impossible.

In addition to aesthetic external parameters, they are lightweight and moisture resistant. The lightness of the product allows you to mount it even to plasterboard ceilings without the installation of mortgages, and moisture resistance - to hide in them water pipes and air conditioning systems, and the fight against condensate on the ceiling under the beams will no longer be a problem.
For each type of finished beams, their own installation methods have been developed.
Method 7 - on wedge bars
In this way, light polyurethane beams are mounted on the ceiling. The whole process is shown in the picture:

- The distance between the inner walls of the box is measured, short wedge-shaped bars are cut to this size.
- Marking is done on the ceiling.
- A hole is drilled in the bars for a mounting screw or anchor, and they are screwed along the marking line in increments of 1 meter, including at the junction of the elements, if any.
- The ends of the bars and beams are lubricated with glue.
- Decorative elements are carefully “fitted” onto the bars, pressed against the plane of the ceiling and additionally fixed with self-tapping screws.
Since the joints of polyurethane products cannot be sanded and covered with putty, they are decorated. You can use coarse twine, rope, staples and other improvised means.

Method 8 - using guides
Some companies produce decorative beams with hidden fasteners. These are metal rails mounted on the ceiling, to which the beams are attached with special clamps.

The guides can be not only metal, but also made of the same material as the decorative box itself, but without finishing - it is still not visible after installation.


Depending on the size, everything can be hidden in them - from wires to air ducts.
Method 9 - cable beams
This is the cheapest, but also the most artificial kind of our decorative element. It is possible to suspect a real wooden beam in it only with a good imagination, since the plastic betrays itself despite neither the pattern nor the coloring under the tree.

The channel itself is attached to the wall or ceiling, and after laying any type of communications in it, the cover snaps into place on it. Everything is simple and fast, but hardly suitable for creating a warm home interior. Although for hi-tech and minimalism - why not? You can even take white or colored without imitation wood.
If the support beam
Supporting structures also need finishing. If you want to hide the beams completely, they are simply included in the frame system for sheathing board materials, lining or panels.
But this is not always possible if the ceiling height is small. For example, in a bathhouse or an old house. Then it remains only to veneer the beam itself with wood or, if the size allows, “dress” it in a polyurethane cover.

But what if the beam is bent or cracked, and there is a danger that it will not withstand the load from the ceiling? There are at least three ways to solve this problem yourself.
- The first is the installation of a retaining beam. I already mentioned him.
- The second way to strengthen the beam is to pull it together with metal strips. For this, her first prop up, returning to the original level, then long strips of metal with a thickness of at least 5 mm are applied on both sides, they are drilled every 15-20 cm and tightened through the beam with bolts. After that, the support can be removed.

- The third is to use a bar of the same section on one side instead of metal plates. After installing the support, it is pulled together with the main studs.
Of course, there is no need to talk about the aesthetics of beams reinforced in such ways, therefore, after repair, it is also desirable to ennoble them by covering them with a box made of wood or drywall.
Conclusion
Because in the near future, if things work out, we are going to buy wooden house, then the problem of its electrification and water supply worries me already now: I don’t like wires and pipes in plain sight. And the ceiling beams, which nothing can prevent me from installing on the walls, perfectly solve these problems, at the same time satisfying the suddenly awakened craving for rustic comfort.
If some of the readers have solved them in a similar way, I will be grateful for the photo and description in the comments to this article.
November 9, 2016If you want to express gratitude, add a clarification or objection, ask the author something - add a comment or say thanks!
Previously, beams under the ceiling solved a completely functional task - they supported the ceiling. Now this one is exclusively decorative element most often found in interiors made in a rustic or old English style, in Provence, country and chalet styles. It is not bad to integrate beams into modern interior styles: loft, modern, minimalism, hi-tech.
The most advantageous decorative look in rooms with high ceilings, which dictates their placement mainly in houses with a ceiling height of three meters. Wooden beams under the ceiling are a stylish element of home decoration, emphasizing the spaciousness of the room, and in some cases also carrying a functional load (for example, they are used to hide communications). Most often, beams are placed in kitchens, halls, halls and offices.
Types of beams
Certainly, modern houses rarely decorated with real wooden elements under the ceiling. Although there are connoisseurs of the natural, who prefer real heavy beams for decorating the ceiling, as a rule, of a country house.
Building materials stores offer huge selection false beams made of lightweight and easy-to-install polyurethane. Visually, such elements are indistinguishable from natural wood, and in practice they even surpass it in some way.

The advantages of polyurethane false beams include the fact that they:
- not afraid of dampness, do not swell from excessive moisture;
- do not crack or deform;
- very easy to mount under the ceiling (including tension).
However, lovers of naturalness can opt for false beams made of MDF or chipboard, hollow inside. Veneers made of valuable wood species are glued onto such beams. You can find options made from lamellae. Beams come with sharp and rounded edges, U-shaped and L-shaped (for decorating joints).

Table. Comparison of polyurethane and wooden false beams.
To design a high-tech style, some designers use metal beams, but such elements are more difficult to install and professionals need to be involved in their installation.

How to make decorative beams on the ceiling with your own hands
Some craftsmen make beams with their own hands, which takes a minimum of time and is inexpensive. For example, in order to make false beams, you can use ordinary foam plastic, which is left over from the insulation of a garage or loggia.
Step 1. Sheets 4-5 cm thick cut into strips of the desired width.
Step 2 Glue the strips with liquid nails into a U-shaped beam.
Step 3 After setting, cut the beams into segments of the desired length.
Step 4 Paste the beams with a self-adhesive film under the tree (except for the side that will be glued to the wall).

Using the same technology, you can make beams from plywood or even from ordinary boards. The boards can then be aged, stained and varnished.
If there is a desire to make beams from natural timber, you can buy edged polished timber, for example, 70x50. When choosing, be sure to check that it is even and dried. Then you need to process the stain and varnish and cut to the required length. It is also an inexpensive and affordable option.
Beam decoration
Each interior style will require its own style of beam design.
- For classic and Victorian styles, you can decorate the beams with gold carvings, decorate with patterns and vignettes. You can find such ready-made polyurethane beams for sale.
- White, black, brown as well as colored beams will be ideal solution for modern interiors.
- For high-tech style, the design of metal-like beams is suitable.
- To create a country style, wood will need to be aged.
- The rural style (country) is characterized by an emphatically rough texture.

Options for placing beams on the ceiling
False beams can decorate any type of ceiling: stretch, plasterboard, plain painted, etc. With their help, you can zone the room or create such a popular decorative element as a false window on the ceiling with imitation of stained glass. Decorative beams can imitate window coverings, between which a canvas with photo printing, mosaics, frescoes and even mirror panels are glued in the process of work. The modern European trend is very interesting, when the beams go to the walls.

Beams can be decorated from above LED backlight, which will give a special decorative effect. The beams in which they are mounted look amazing ceiling lights. All wiring in this case is hidden inside the hollow structure.
In general, the beams on the ceiling will give a feeling of warmth and comfort to the living space, bring a twist to modern interior styles and allow you to create the necessary authenticity in public places such as clubs or pubs.

How to position the beams
If the room needs visual expansion, then the following points should be taken into account when arranging the beams.
- If you need to make the room wider, then the beams need to be placed on the short side.
- If you need to increase the length, the beams should be placed along the entire length of the ceiling.
- The criss-cross arrangement will give the room a visual dimension.
- With one beam, you can select a separate zone: for example, a bar counter.
Location frequency also plays a big role. For example, if the ceiling height is very high (which happens on the first floors of buildings), the close location of the beams to each other helps to reduce it a little. If the ceilings are of medium height, the beams should be fixed at a greater distance from each other. Also, beams can be laid "herringbone". Attic rooms without a ceiling look especially impressive if the ceiling beams pass through the columns and the ends are attached to the walls, creating a hut effect.

How to fix beams to the ceiling
The features of the procedure depend on the material from which the false beams are made. Let's take a closer look at each of the options.
How to glue foam false beams on a regular ceiling
This is the easiest option for placing false beams in a modern apartment. If you want to decorate a kitchen or hall quickly, inexpensively and on your own, the best option can not found.
Step 1. First, marks are applied on the ceiling and on the walls to indicate the places where the false beams will be glued. Places of the sticker must be primed for better adhesion.
Step 2 Then the beam is smeared with liquid nails and glued to the required place. Styrofoam products are almost weightless, and liquid nails seize literally instantly.

Some instructions advise to spread the wall at the same time, but in case of excess glue, the beam may begin to slide down the wall. Therefore, the golden mean must be determined empirically.
Step 3 If the room is narrow, you can stick 2 beams along the long walls of the room, and simply place the cross beams perpendicular to them. Such the simplest ceiling will help to hide the irregularities of a conventional concrete ceiling and will look very advantageous.
How to quickly fix wooden beams to a wooden or concrete ceiling
This is also not very difficult and not expensive to do.

Step 1. On the ceiling we draw lines for placement.
Step 2 We drill holes in the beam with a 12 mm drill with a depth of not more than 0.5 cm every 30 cm.
Step 3 In the same holes we drill 8 mm holes, into which we drive 120 mm self-tapping screws.
Step 4 We apply the timber, mark the places for the holes on the ceiling.
Step 5 On the ceiling in the marked places with a perforator, we drill holes of 8 mm.
Step 6 We drive chopsticks into them.
Step 7 We fasten the beam.

Since the head of the self-tapping screw goes in, we cover these places with putty on wood. After drying, tint with stain, then with varnish. You can cover the caps of the self-tapping screws with wooden corks or special decorative overlays imitating the caps of forged nails. You can attach nails to ordinary dowels - this is an even faster option.
If you plan to cross-distribute the beams, then unevenness may occur at the joints. The design of these nodes depends on the style in which the room is designed. If this is country music, for example, then these places can be covered with leather decorative belts or large string glued in several rows.
Installation of polyurethane decorative beams on beams
This is a professional installation.

Decorative beam B1 made of polyurethane (wenge, cherry, oak, olive, walnut, light oak)
Step 1. For a polyurethane false beam, wedge-beams are made of wood, which fully correspond to the internal cavity of the beam.
Step 2 The ceiling is marked: lines are drawn along which the beams will be attached.
Step 3 Wedge bars are installed along the line every 1 meter on self-tapping screws or dowels.
Step 4 When installing a false beam, glue for polyurethane is applied to the ceiling. This is necessary not for fixation, but for a tighter fit to the ceiling so that there are no gaps left.
Step 5 The beam is tightly put on the bars and screwed through the sides with screws.

Step 6 The screws that fasten the false beam to the beam and the joints of the beams are covered with decorative leather straps with rivet imitation.
Features of the installation of beams on a stretch ceiling
To do stretch ceiling and decorate it with decorative tanks, you should install embedded parts similar to those installed for hanging chandeliers. A mortgage for a decorative false beam is just a wooden block of the required thickness. It is attached to the main ceiling, and the stretch ceiling is stretched so that it passes touching the lower plane of the bar. Then false beams are attached through the ceiling to the timber.
You can use the fastening of beams with suspensions. Hangers are attached to the base. and after stretching the ceiling, cuts are made in the canvas. The specific steps depend on the type of material.
If the stretch ceiling has been hanging for a long time, but you want to somehow diversify the interior without dismantling the canvas, you can use external consoles with fasteners to the wall or internal bars screwed to the walls. Beams will be attached to them with self-tapping screws.
Features of the installation of beams on a plasterboard ceiling
Since the plasterboard ceiling is suspended, you can’t just attach beams to it. You will have to remember / tap the places where the frame profiles go, and attach the beams to them. You can fasten it in any convenient way: with a long anchor through a beam, gypsum board and profile or on a bar attached with a self-tapping screw to the gypsum board and profile. A self-tapping screw screwed exclusively onto drywall will not hold the beam for a long time.

Some nuances
The joints of the beams or the exit points of the self-tapping screws are covered different kind decorative overlays, among which are the following:
- masking with a decorative rope;
- masking with a wax pencil;
- masking with forged copper plates;
- decorative leather belts.
To decorate the space, you can use decorative consoles that are sold with beams and create an imitation of supports on the walls. If cables for lighting devices pass inside the polyurethane beam, they must be hidden in a corrugated protection.
Video - Installation of wooden decorative beams on the ceiling
In this way, you can get a very beautiful unusual interior with an emphasis on wooden beams under the ceiling. This interior does not require a large investment of money, and you can fix the beams with your own hands in just a few hours.
It's starting to come into fashion again. The functional need for such beams has disappeared, because. the technology is outdated, but that is what gives them a certain charm.
Wooden beams are solid and hollow. They can be made from oak, ash and beech, as well as from cherry or pine needles.
Today's construction industry tools have made it possible to reduce weight, add elegance and lightness to ceiling beams. Now they can be used in country houses as well as in city buildings.
Types of decorative beams

Scheme of the device of decorative ceiling beams from MDF. They are often veneered and may be accompanied by solid wood inlays.
Beams are subdivided according to their source material:
- MDF. Massive slabs, consisting of pressed wood shavings. MDF beams can be called economical. In addition, they are often veneered and may be accompanied by solid wood inlays.
- Polyurethane. The most common type of beams due to its cheapness, low weight and a large range of design solutions. This type of foam plastic has excellent impact resistance and strength.
- Solid wood. Environmentally friendly, the strongest and most durable type of beams. They are put not only in order to achieve perfection in design. It is they who can perform their original function - the carrier. Wooden beams are solid and hollow. They can be made from oak, ash and beech, as well as from cherry or pine needles.
Back to index
Functional application
Today, beams are often used only in the design field. Hence the many options for their placement: on the ceiling, on the walls. They can be arranged in a certain order, creating a pattern or intersecting. Since the main function - support - has also lost its significance, the use of hollow materials is allowed in full. In addition, beams can hide unwanted ceiling defects and communication nodes. Visually, the beams increase the height of the room.
Let's move on to general instruction installation of decorative ceiling beams.
Back to index
Stages of installation of decorative beams

Ceiling beams made of polyurethane are the most common due to their cheapness, low weight and a wide range of design solutions.
- the first step is to mark the ceiling (the measured distance between the ceiling beams is transferred to the ceiling);
- wooden bars are attached, which will serve as a frame (the sides should be adjacent to the marked lines);
- beam is selected right size(if its length is not enough, then you need to fasten several bars);
- the beam is “put on” on the bars (the connection should be fixed with self-tapping screws);
- joints can be masked with wax pencils or wooden overlays.
Do not forget that almost all manufacturers do not produce beams longer than 5 m, you will have to dock. There are about 5 options for competent docking:
- Winding joints with decorative rope.
- Closing the seam with a wooden ring with a large section.
- Connection with a wax pencil.
- Covering the hole between the joints with copper plates.
- Fastening seams with decorative forging straps.
Back to index
Preparing for installation
For the installation of ceiling decorative beams, we need:

Scheme of placement of blanks for mounting decorative beams. The blanks act as a frame.
- roulette;
- pencil;
- miter box;
- hacksaw;
- assembly glue (liquid nails);
- self-tapping screws;
- dowels;
- screwdriver;
- drill;
- wax pencil.
First of all, after buying a beam, you should remove it from the package, put it in a secluded place and leave it for about a day. This is done in order for the material to “get used” to the local microclimate of the room. Then the markup is done. If the dimensions do not meet the requirements, its length is adjusted with a tape measure, pencil, miter box and a hacksaw. Remember that the correction is suitable for all types of material, except for polyurethane.
After finishing preparatory work you can start installation.
Fastening products made of MDF or polyurethane is usually done with liquid nails or mounting adhesive(if weight allows). And the connection of wooden (especially solid) bars is made using self-tapping screws. Heavy beams should also be supported. This is done so that the whole structure does not sag. The length of the screws should be 4-5 cm longer than the beam. We drill in the center of the bar through holes so that the distance between them is about 0.5 m. After that, we shift the beam to the wall and make marks at the holes, and then use a drill to prepare holes for installing the dowel. Then the beam is finally screwed to the ceiling. Each docking connection is painted over with a wax pencil to match the color of the bar.
Once upon a time, ceiling beams were a necessary architectural element in the tradition of many peoples. Without them, the construction of spacious village houses, domes of temples, theatrical vaults and long covered galleries was not complete. Today, ceiling beams in the interior are rather a decorative element that reflects a certain style. Often they are multifunctional and practical, but in order for false beams to become a highlight of the design, it is important to follow the recommendations of experts.
Children's bedroom design with wooden beams

Decorative beams on the ceiling in the interior

Kitchen design with flowers and decorative beams
Wooden and metal lintels - part of the construction of the roof, ceiling or roof complex shape. You can’t do without them in the construction of an attic, a large terrace or an extension. In this case, they carry an important functional load.
The main task in arranging a house with ceiling beams is to give the rough logs the most “lived-in” look. It is important that the atmosphere of the living room, hallway or recreation with flights of stairs looks hospitable in a homely way.
Modern decorative ceiling beams in the interior look like wood, although they are made from composite and polymer materials. Most often they are hollow inside, and this is a good opportunity to hide wiring and piping, fix lamps or brackets for suspended structures. In this case, they carry an applied load more than a functional one, and a false tree in the interior is very relevant today.
Wooden lintels can be adjacent to the ceiling, make up a separate lattice, or be a support for connecting inclined planes, as in the photo of the ceiling with beams of the original design.

living room design with corner sofa, paintings on the wall and decorative beams

Apartment design with decorative beams
Interior styles where beam structures are most appropriate
Today it is customary to build houses with an aesthetic reference to a certain style, so that they look like an old “family estate”, and not like a new, unsettled building.
The most popular are buildings in the spirit of Provence, where the floors are made of light wood or whitewashed. In a Provence-style kitchen, decorating with garlands of garlic and onions suspended from beams with dry bouquets of lavender and spicy spices is appropriate.
The natural color of dark wood is used in the style of a chalet mountain house from the Swiss Alps. This style is especially relevant in mansard-type buildings with a habitable attic space. And although here the floors are the basis of the roof, they are insulated and decorated in all possible ways.
The Japanese style was originally focused on collapsible houses, since the elements often destroyed the buildings of the poor and wealthy islanders of the easternmost ridge. Beamed ceilings were easy to build and dismantle after the tsunami and earthquake. This style has taken root around the world, and decorative ceiling beams remain an indispensable attribute of a recognizable minimalist interior, where there is a noticeable tribute to the culture of Japan.

Stretch ceiling with beams in the middle with a chandelier

Bright white design of the combined living room and kitchen with decorative beams

Balcony design in cream color
Loft - this is the reformatting of non-residential premises for urban housing of a large area. Metal or concrete floors, open communications, roughly painted or sheathed with aluminum corrugated beams are appropriate here.
IN classic interior only well-finished wood is used, carved, varnished or painted. Neat beams on the ceiling in a classic or traditional interior look light and elegant. The color of the wood should repeat the shade of the furniture and joinery.
Another classic version- ceiling beams and floors of the same material against the background of white walls. A similar solution is often practiced in imitation of retro or country style.
Beam structures are widely used in high-tech style - as the basis for the original lighting of the kitchen or living room.
A unique design can be created in decor for any historical style, if the use of decorative beams on the ceiling is structurally justified.
Please note: The owners of some buildings try to hide the structural beam base with suspended or stretch ceilings. This is impractical, since you will have to give up a significant part of the height of the ceilings. It is better to think over their decor, down to the fabric upholstery between the painted wooden beams in the bedroom or find another option.

Living room design with stretch ceiling and TV

Wooden partitions in the interior of the kitchen
It makes no sense to hide the marine-style beam structures if the house is designed as a wardroom. They fit perfectly into the styles of bungalows, eco and ethno.
English-style houses are full of natural wood, including ceilings divided into squares with niches. This decision will emphasize the sophistication of aristocratic decoration. It is possible that the old bases will have to be updated and varnished.

Decorative partition in the kitchen

Light kitchen design with brick walls

Bright white kitchen with wooden beams
Imitation of wooden beams
Natural wood for today - expensive pleasure, and massive constructions from natural material very heavy. They create an additional load on the foundation and walls, there are problems with installation and delivery due to the impressive weight. In addition, from high humidity they can be led.
Manufacturers of building materials have offered a convenient budget alternative made of polymer materials. Hollow inside false beams are not inferior in design to products made of natural wood, which have to stand for several months to reduce moisture.
Advantages of polymer decorative beams on the ceiling:
- moisture resistance;
- fire resistance;
- attractive price;
- relatively small weight;
- large selection of textures and shades.
In terms of strength and some other indicators, decorative beams even surpass wood. They have an undeniable advantage - the ability to imitate any type of wood with a natural texture of various shades. For example, wenge-colored false wood in the interior, in harmony with eco-veneer doors, furniture and laminate of the same luxurious chocolate color with a reddish tint.

Mustard bathroom design

Room design in mustard color with wooden beams
Leafing through the catalogs from manufacturers, it is easy to notice that there are different decorative beams for ceilings:
- with the effect of varnishing and painting;
- with cracks and imitation of aging;
- smooth (polished) and "rough" processing.
In such products, everything is thought out for ease of attachment, and natural wood difficult to mount in a hidden way. U-shaped false beams - The best way hide communications in a bathhouse or sauna, in loft-style, country-style living quarters or in classic-type buildings.
L-shaped pseudo-beams are also produced, which are laid around the perimeter of the ceiling, the goal is the same - to hide pipes and wires, and imperfections in the articulation of surfaces. You can also build a rectangular imitation with your own hands to hide defects in the joints of the floor slabs in the apartment.
False plasterboard beams are covered with film materials that imitate wood. This design is visually no different from the original, as in the photo.
Natural wood is preferred in houses made from natural environmentally friendly materials. The fact is that when everything in the house is made of wood, it reacts in the same way to temperature changes or changes in humidity indicators - it “breathes”. If some of the structures are made of materials that are not as plastic as natural wood, an additional load is created, especially during primary shrinkage or during minor seismic factors.

Stone wall in the interior of the living room

rustic room design

Wooden partitions in the interior
Color selection
Wood with high decorative qualities is considered the most demanded for interior decoration:
- rosewood (wenge);
- nut;
- Cherry;
- ebony;
- oak (bleached and stained);
- ash;
When imitation of a cut of wood is used in synthetic counterparts, it is possible to enhance the natural shade or “whiten”.
Color wooden beams on the ceiling in the interior is selected for the overall design concept.
TABLE (Classic variants)

House design with wooden partitions

Corridor design in white
A good example in the photo is the design in country house white.
Advice. When choosing a color, keep in mind that dark wood looks more heavy, white - almost weightless.
Colored floors should be in harmony with the main tone in the interior. Contrasting designs seem to “break up” the space, which is good for spacious rooms with high ceilings.
If the interior design turned out to be expensive, but a little nondescript and faceless, you can transfer all your attention to the upper plane, which will become the “highlight” of the decor, as in the photo.

Decorative beams in the interior of the house

Option to use decorative beams for the ceiling

Living room interior with decorative beams
Decor and aesthetics of ceiling structures
There is no point in hiding well-treated wood under the ceilings, it is better to give the interior with beams more value in the design concept:
- Lintels between columns or pilasters perfectly hold ceiling structures. In order to level the shortcomings of the old building, it is better to reorganize the room using zoning techniques. Decorative beams at the top will help break up a large room into a kitchen block, a dining area and a reception area, as in the photo.
- For a room with a pyramidal or domed ceiling, decorative structures will help to achieve the effect of "open sky" if the background is light blue.
- A stretch glossy canvas behind the ceilings will add depth to the space.
- An inimitable interior will help to create beam structures with different patterns - herringbone, cage, triangles, hexagons.
- Overlappings will serve as the basis for reliable fastening of suspended structures:

- Behind the decor of the ceiling, it is easy to hide the articulation defects of the surfaces. Complex design with jumpers will hide the leaked ceiling, which could not be restored in the usual way.
- The low ceiling in the kitchen can be effectively beaten with the help of ceiling beams, a bar counter and hanging modules and other elements for placing dishes and kitchen utensils. It will look natural, as once in village houses.
- The interior of the attic looks most organically, where the lintels carry a decorative load. When the room is spacious, the frequency of wooden beams gives some order and meaning. It's better when all wooden decor one shade.
- The simple design of the ceiling with beams in a country house always looks very practical. It's mass additional features storage and placement of kitchen utensils and small items. Various brooms and bundles, bags and knots, hooks and nails were traditionally hung along the perimeter for temporary and permanent storage of anything.
- Decorative beam structures in the bedroom are not appropriate in every style. But canopies and other textile decor have long been attached to them. The mirrored ceilings with black lacquered logs in the sleeping area look extravagant and sophisticated.
- Beam jumpers are also used to decorate a mini-pool, a spacious bathroom or a bathroom. In this case, false beams made of polymeric materials imitating wood are recommended. They are not afraid of high humidity, but it is convenient to hide pipes and electrical wiring behind a false tree in the interior. If desired, the internal grooves can be made airtight.
- In a teenager's room, an interior with wooden beams can be advantageously decorated with diode tape or garlands. Older students love artificial lighting and twinkling lights. Such decor can be a source of special pride; teenagers willingly demonstrate the original decor to their friends.
ABOUT self-assembly decorative beams offer video.