In order to make a high-quality set yourself so that do-it-yourself kitchen furniture made will become a matter of special pride, immortalized in photographs, you must at least have an idea of \u200b\u200bwhere to start. We suggest that you familiarize yourself with the stages of work and what is required for this.
Materials for manufacturing kitchen furniture with their own hands should correspond as much as possible to the conditions for further operation of the headset. What do you plan to use for the furniture body:
- solid wood version - a classic of the genre;
- from chipboard - budget;
- from old furniture with proper skill, it can be practically free, not counting the cost of new fasteners and accessories.
Whatever materials you agree to take as a basis for making furniture, before starting work, be sure to study the instructions on how to make headset items from this particular material. Everywhere has its own specifics for each type of furniture.
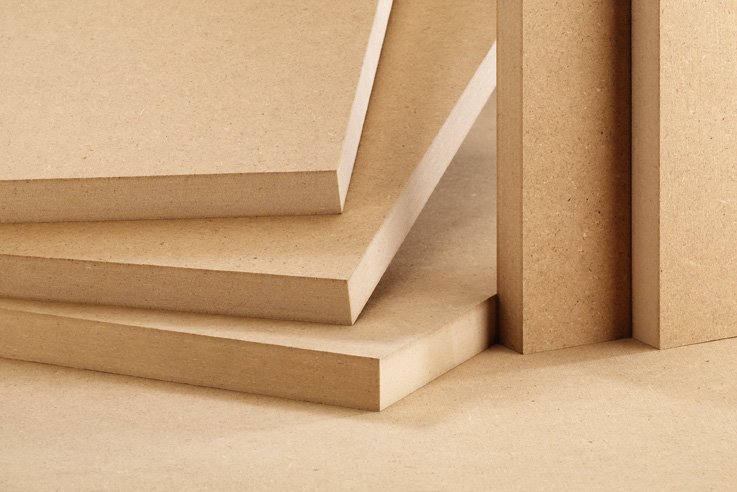
| Material type | Peculiarities | Advantages | Flaws |
| Natural, eco-friendly material with a unique texture and color. | Durable - depending on the type of rock, the service life is from 15 years to several tens. | The material is sensitive to changes in humidity and temperature. Requires treatment with impregnations, antiseptics of all parts. | |
| Chipboard | The density of European samples exceeds domestic samples. The composition contains more glue and paraffin. | Budget option material, easy to process. It is easy to cut out details from it. | With low quality, it may have low strength and exude an unpleasant odor. |
| chipboard | The surface is covered with a protective film during the production process (laminated). | Cheaper than MDF, resistant to harsh operating conditions. | If the moisture-resistant layer was applied by caching, then the film may lag behind. |
| MDF | Density can exceed natural wood. | Outperforms chipboard in terms of strength and flexibility. Convenient for molding. Suitable for decorative items. | Requires painting, more expensive chipboard. |
| Drywall | It is a sheet of layers of construction paper with a layer of gypsum dough with various additives. | Practical, resistant to loads, long service life of structures. It is possible to manufacture a variety of designs. | Fragile, can crack during operation. Not designed for very heavy weight. |
Having decided on the material from which you will make furniture for the kitchen with your own hands, carefully approach the choice directly on the spot.
Solid wood should have a uniform, dense pattern of annual rings. Be sure to check for cracks and chips, fiber delamination. Avoid wood with knots. In the future, this material defect will affect the quality of the parts.
Wood chipboards must be even, without defects. Do not take unnecessarily thin sheets, as the frame of the furniture box will carry a sufficient load. If there's protective film, then it is better to take lamination, and not a cached version. Perfect option- MDF.
Do-it-yourself kitchen furniture made of plasterboard can become great option, since moisture-resistant sheets have been made for a long time. Furniture made from this material can become a real decoration of your home. However, this material requires a wooden or other frame on which the metal profile and parts will be attached.

Drywall


Stages of manufacturing kitchen furniture
The idea of homemade furniture is very relevant in homes where the kitchen is small or has a non-standard layout. If you make furniture for specific dimensions to order, it may turn out to be more expensive than its standard counterparts. In addition, when it comes to furniture for a country kitchen, there is a great temptation to use the details of old furniture in order to spend as little as possible on the purchase of materials.
The manufacture of furniture, whether it be wood, chipboard, drywall, after the details are cut, which you could do on your own or order from specialists, contains 3 mandatory steps:
- work on the preparation of furniture parts - edge processing, impregnation with antiseptics and other protective compounds;
- direct assembly of furniture modules;
- finishing installation furniture set generally.
To make homemade furniture truly transform the kitchen, and you would proudly show a photo of a set made by yourself at home, look detailed video step by step reflected process to understand the specifics of each step.

Material handling

Headset installation

Assembly of modules
Measurements and project creation
Production of furniture for the kitchen is done on the basis of the project. For those who have started cutting parts without completing this item, the result will most likely be unusable. Answer yourself honestly whether you can do the drawings and diagrams with your own hands accurately and competently, taking into account all the necessary nuances.
If one of your friends has recently purchased a headset that fits into the dimensions of your apartment, do not hesitate to ask for a visit and thoroughly study all the details and take measurements on the spot. You can go to the store with ready-made headsets. Of course, you will have to withstand the increased attention of consultants, but you can study the range of drywall kitchen furniture with your own hands and it will turn out to be original and of high quality in terms of layout.
The drawing must be clear, accurately showing the location of the facade sockets and drilling. Important: 1 mm is taken as a unit of measurement - this moment is fundamental!
Also, take into account the allowances for processing the edge cut and between the parts for cut:
- edge - 2 mm;
- individual parts - 5 mm.
Take measurements in an area freed from furniture. Keep in mind that there will be an error in any house - whether the building is Soviet or more modern. For marks on a sheet of chipboard or other material, use a simple pencil. The marker can even show through the decorative coating. Be sure to number the parts before assembling. Consider the location of large household appliances - refrigerators, stoves, sinks. Don't forget pipes. Leave a space between the drawers and the worktop of at least 650 mm.
Determine which type you will use - straight or angled. You can also make furniture for the kitchen on the basis of a ready-made drawing. You can choose an option on the Internet or order a project, for example, students of the last courses. It will be cheaper than a professional designer's work, but they will use quality programs to calculate the project.
After drawing up the drawing, do not forget about the cutting map. This document will help you see the location of parts on sheets of material, calculate the right amount. Leave certain reserves:
- from the edges of the sheet - 10 mm;
- propyl - 4 mm;
- in the place of the cut - if necessary.
It is important to arrange the parts in such a way as to ensure a high-quality through cut. Better to use special programs for cutting, but you can also manually, although it is longer.


After preparing all the drawings, proceed to the calculation of parts. You can competently make kitchen furniture by creating a sketch of the module on separate A4 sheets - you need to write out everything you did, their number, parameters. Remember to consider the thickness of the material used. Moreover, if a plate or sheet can be produced in different thicknesses, calculate the material for several options:
- to calculate the parameters of the inner shelf, subtract the double thickness of the sheet from the module width;
- Do-it-yourself do-it-yourself back wall made of chipboard subtract 3 mm from the width and height of the future module;
- for facades - the total width is divided in half, minus 3 mm.
After calculating everything you need, make a list for the order necessary materials and elements. Milling for hinges is better to order. This will save time, and buying a cutter will cost you about the same cost.


Materials and tools
Do-it-yourself material for kitchen furniture is checked for defects, “non-standard”. Decide in advance what the facades will be - buy or do it yourself. For the back walls take sheets with the smallest thickness. Medium - for shelves, vertical parts. On the countertop choose the most durable option. If you are planning drywall, then make a frame with your own hands from wood, purchase metal profiles.
Accessories needed: edge, screed, legs, drawer guides, dryers, hinges, handles, shelf holders, hooks. Fasteners - finishing nails, dowels self-tapping screws, screws. Take care of the tools:
- circular saw (hacksaw) - used for sawing parts;
- pencil, tape measure;
- confirmations;
- screwdriver, sandpaper, hex key, primer;
- manual milling cutter for wood - used for profiling edges, excavating nests for fittings;
- drill, Forsner drill - for drilling nests for furniture hinges;
- level, laser rangefinder;
- iron (glue the edges);
- screwdriver and / or electric drill;
- jigsaw;
- electric planer / planer.
Get to work making sure you have everything you need.

Material preparation
Kitchen furniture made of wood, chipboard or drywall begins with the preparation of materials and the processing of parts. After the markup has been applied to the sheet, do not forget to outline the awnings, handles, and other fasteners. For marking, it is better to use cardboard templates. Holes are drilled immediately.
Cut out the pieces with a circular saw. Do this from the inside so that the outside edge remains neat. For wood and slabs, the edge is processed first. Facing can be done with both melamine and plastic. The edge will protect the material from moisture and swelling. Use an iron. After gluing and the material has cooled, cut off the protrusions at 45 o, and then process the bend with sandpaper.
For drywall, preparation consists in marking and fixing metal guides. If it is assumed that the part will carry a significant load, additionally use a timber reinforcement.

markup

Cut out the details

Installing guides
Assembly and installation
To assemble a kitchen from wood with your own hands, fiberboard, drywall, the basics of events are based on the same principles:
- it is necessary to separate all the elements, arrange them according to the list and delimit them so that it is clear where which module is;
- if not done yet, then carry out antiseptic treatment, varnish (3 layers minimum);
- first, facades are attached to the varnished elements of the module, then they are installed in place;
- the upper cabinets can be hung as is, but to install the lower ones you will need a level without fail;
- the countertop is laid without fixing, markings are made for the sink, stove, taps. Remove the countertop, make holes;
- before installing the tabletop canvas on the cabinets, do not forget to also process and varnish it, if the surface requires it.
The place for washing is treated with sealants, as it will be exposed to regular moisture. The sequence is exactly this - cabinets, then the countertop.

Antiseptic treatment

We fix facades

Installing upper cabinets

We mount the countertop
Facade installation
Facades can be made from the most different materials- wood, chipboard, plastic, glass. Depending on the material used, when choosing hinges, consider the weight of the facade. Wooden will be heavier, and you need to mount it on a quality base. Particle boards and plastic is lighter.
Blind or paneled facade panels must exactly match the dimensions of the box, otherwise after installation you will get sloppy protrusions that will be extremely problematic to fix.
If you have manufactured or purchased facades, make sure that all edges are processed along the perimeter before installation. This is important, since during the operation it is the facade that will be exposed to the maximum impact - it is cleaned, moisture and the main pollution get on it.
Installation of facades on the box occurs according to the marking of hinged loops. Therefore, it was very important to calculate all the markup at the project stage. Installing by eye here will not work - after all, the loop can get to the level with the shelf and, as a result, do not work as it should.
This article is great home master(programmer by education) Dmitry Podpalchenko will tell you in detail how he made a kitchen set with his own hands at home. So, word to the author:
DIY kitchen set
Phew, the renovation is over, the queue for furniture. We start, of course, with the kitchen.
Having made miscalculations with furniture makers - starting from home-made garage ones and ending with well-known brands - I got figures (Kiev) from 4 to 7 thousand dollars (I will keep silent about Italian and German brands). This is despite the fact that the kitchen has only the lower part. And this is without taking into account the cost of equipment, washing, mixer. Well, it’s not a fact that by paying decent money, you will get a result of the appropriate quality. My neighbor paid 3,000 for the kitchen - incorrect measurements, multiple trips to “finish it on the spot”, inexpensive fittings (it doesn’t smell like closers), the countertop swelled up after a few months of use.
Pricing for furniture makers, as it turned out, is quite simple - the total cost of materials is multiplied by a factor from 2 (garage) to 3 and even higher (brand). Two-thirds of the cost of a high-tech kitchen comes from fittings. Fittings for one Blum Tandembox Intivo full extension kitchen drawer cost a little less than $100, but each drawer will cost the end customer $200-$300. Not a bad cost-benefit, given the very easy to assemble and well-documented fittings, right? In practice, this is a profit of $ 100-200 for 15 minutes of work. Do you want to do something out of the ordinary? No, that is absolutely impossible! But in fact, just no one wants to turn on the brains.
In search of our solution and style, my wife and I looked at thousands of photos different cuisines. As a result, we agreed that the lightness of the interior is above all and we do not need upper cabinets - we refuse them in favor of open shelves tempered glass. For the lower cabinets, the only right solution was chosen - full extension drawers. The undisputed leader in these solutions are the products of the Austrian company Blum, and we will work with them. Of course, in any business there are many nuances, and the devil, as you know, is in the details. We replenish the theoretical base on the forums, study photos. The internet has all the answers.
We divide the work into stages:
Measurement
The simplest step, which, nevertheless, must be carried out with particular care. As you know, there are no right angles, and you, to the nearest millimeter, need to draw a drawing of the place where you want to place the kitchen, while indicating the location of the outlets for water, electricity, and all sorts of stupid pipes, if you have them.
Even at the repair stage, I bought a Leica Disto D2 laser rangefinder. This is a very convenient thing that will come in handy more than once in life, so you should not be stingy.
During the measurement, I was faced with the fact that the angle was not quite straight - 91 degrees. And this one degree here will give us a five-centimeter hole between the wall and the butt of the last pedestal on a three-meter segment - this is if we assemble it “correctly”, at a right angle. Later I will show how I solved this problem without difficulty.
Design development
Kitchen furniture almost always has a modular design - that is, it consists of separate cabinets. The width of the cabinet is usually a multiple of 15 centimeters - 30, 45, 60, 75, 90, 120 cm. In fact, this is just a tribute to the unification of production, so nothing stops you from deviating from this standard. During assembly, kitchen cabinets are fastened together and covered - so the modularity of the design may not be obvious.
What is a kitchen cabinet? Bottom, two sidewalls, two narrow strips fastening the sidewalls from above (they do this only to save material) and the back wall is made of thin fiberboard. It is the foundation on which everything else hangs. Is it difficult to do this? Not at all. At the design stage, we do not even need to know how we will fasten all these parts together.
There are several popular furniture design programs. Some do it in AutoCAD, some do not use software at all and make drawings on paper. I used the PRO100 - it's really simple to disgrace, you get used to it in a couple of hours.
Here's what I got as a result: 
Everything about Blum products is great - just an example of German-Austrian engineering. Use the proprietary Blum Dynalog program and, as a result, you will receive drawings with all the markings necessary for installing fittings: 
I will describe the design details below, using the example of photos of finished products.
Purchase of kitchen appliances
I recommend not to leave this stage “for later”. At a minimum, it is desirable, if not to buy, then at least to clearly define what you will buy later and download all the documentation for these products. Oven, stove, sink - although they are made according to some kitchen standards, they may have design features. Make do-it-yourself kitchen set, without even imagining what kind of equipment you put there - wrong, you are tormented. For example, I didn’t take everything into account with the oven - therefore, the facade under it had to be additionally milled, which was not originally included in my plans.
I bought an oven and induction hob Gorenje, Eleyus hood, Franke Java sink, faucet with Grohe Blue filtration system.
Order firewood (chipboard, fiberboard, facades)
I used to think that the production of furniture meant large workshops, expensive machines, dozens of people. It happens, of course, and so, but many work in garages. In order to produce furniture, you do not need to cut chipboard and make facades - dozens of people do this in large workshops on expensive machines. We are on our way there.
The result of the design should be an Excel file containing a list of all the panels we need. Here's one: 
In terms of materials, my choice was as follows:
Chipboard Egger Cappuccino 18mm as body material
- Chipboard Egger Platinum White 16mm as drawer material
- Egger fiberboard for the rear walls of the cabinets
- Painted MDF as
Now the nuance! The company we are visiting has a chipboard warehouse program - these are the thicknesses and colors that they keep in stock constantly in large quantities. If the chipboard you need is in the warehouse program, you will pay for that much square meters how much you need. But if it is not included, you will have to buy chipboard sheets. One sheet, in the case of chipboard Egger, is 5.8 sq.m. And if you need 6.3 sq.m. still have to buy two sheets.
Companies that are engaged in cutting and edging chipboard, the production of facades, today can be found in almost any regional center of the country. You give them blueprints and money. They are for you - all your firewood in packaged form with delivery even to the apartment, although, for example, I had to sweat and drag these hundreds of kilograms from the entrance to the apartment.
Cutting and edging chipboard, fiberboard, facades, delivery - all this cost me $ 650.
Hardware order
No problem. But there is practically no point in scouring large construction hypermarkets - there are mainly inexpensive mass markets. It is better to find a decent supplier of furniture fittings with a large assortment and buy everything there.
I bought:
- 12 sets for Blum Tandembox Intivo full extension drawers
- 2 hinges + bluemotion for under-washbasin door
- 1 roll-out grid with a closer under the oven
Detail: 
Do-it-yourself kitchen set: tool purchase
In general, any handy kid already has some tools. I had to buy a Makita screwdriver, a Bosch jigsaw, clamps and a Wolfcraft jig.
I’ll warn you right away - there’s nothing to do without a screwdriver in assembling furniture! There's a hell of a lot of screws in there. And Chinese disposable crafts for 40 bucks will not help you. You need a serious, good screwdriver. Do not be stingy, in life it will come in handy more than once.
So, at the beginning of the process we have:

First of all, we will take the firewood to the balcony and sort it into cabinets. Fortunately, each item has a sticker corresponding to the part number in the above parts list: 
Well, let's get started!
Almost all Italian cabinet furniture is assembled on dowels (chops) - the advantage of this method is that no parts of the fasteners come out, the disadvantage is that furniture assembled on dowels is not separable. Furniture makers prefer confirmation for such purposes - it is much less demanding in terms of tolerances.
The connection on the dowels requires an accuracy of fitting the reciprocal holes of 0.5 millimeters. Such a result is difficult to achieve without the use of a special tool. So I bought this tool: 
This is a Wolfcraft Dowelmaster dowel jig.
So, our task is to assemble the first cabinet and understand whether our hands are growing from the ass, or still from the shoulders. We take the sidewall, we will make holes that will be connected to the bottom with dowels. Pay attention to the drilling depth gauge on the drill. What it is for, I hope it is not necessary to explain. Bzzzin: 
Here's what we got: 
Holes on the sides - 40 mm. from the edges, center in the middle. Sidewall width (it matters, I'll tell you later) - 560 mm. The conductor works in the mode of both drilling reciprocal holes and copying. Copy to the second side. This is the principle of operation of the conductor for drilling reciprocal holes, I show the example of the drawer: 
Let me remind you that when connecting to dowels, the accuracy of drilling the reciprocal holes (plus or minus half a millimeter) is important. With these tools, I have never had a problem with this - the parts fit into each other with little effort. This device will greatly save your time - for the sake of interest, I tried to do manual marking on test pieces of chipboard - this is many times more time and a much higher probability of error.
Here is the bottom of the box with counter holes already drilled for the sidewalls: 
I drilled 20 holes and voila, my hands don't grow out of my ass: 
Do-it-yourself kitchen set: moving on
Now we need to equip the cabinet with drawer guides, legs and a back wall made of fiberboard. There is nothing complicated in mounting guides - all in the same Blum Dynalog program, you get exact dimensions points where the guides will be attached. One rule applies here - measure seven times, cut one: 
Just like two and two. If you make a mistake within 3 millimeters, everything will still work fine. Excellent technique! 
Mounting the legs is also not difficult. The main thing is to set yourself a standard for their location and follow it on all pedestals: 
Another pedestal (the widest, 80 cm) is ripe. It already has guides and legs. 
You should not worry at all due to some fragility of the product - as soon as the back wall is mounted - the cabinet will be filled with pleasant strength. This shows the initial stage of fastening the backdrop - the bottom is fastened with two screws on the sides, the diagonals and angles are measured, the top is fastened with a clamp to the side. Now you can safely peel the screws (after making a preliminary drilling with a two-millimeter drill): 
Well, as if there is already progress: 
Do-it-yourself kitchen set: we hang facades
On the left on the facade - a drilling jig (the same Wolfcraft), to the right - a manual countersink: 
Unfortunately, I did not film the process of assembling the boxes, but with this fitting it is a very simple job. One box takes 10-15 minutes. Three hours of work and the facades are already on the boxes: 
Here an electric jigsaw came into play - I sawed holes for sockets with it, after which I asked for an open cut. Well, I hung the filter control unit and the holder of the filter itself: 
When all the cabinets were ready, it was time to reunite them. At this stage, it is important, by adjusting the legs, to bring them into level - that is, the top of the cabinets should lie in the same plane. We clamp the cabinets together with clamps, and be sure to make a “lining” - a wooden block into which the drill will come out. If this is not done, serious chips will appear at the outlet. 
Well, we mount the hinges - crocodiles, as real furniture makers call them (I'm not real). The holes for the hinges were ordered - in general, you can make them yourself, for this there is a Faustner drill. 
I brought a countertop, Luxeform Boston 38 mm. I asked to make cutouts, they did, but look how interesting it is: 
Basically, they are right. Transporting a massive table with a full cutout is a risk - it can break. I had to work with a jigsaw. The cut must be covered with silicone - the open end of the chipboard will quickly swell if this is not done. Well, here you can also see how the issue with an obtuse angle was resolved - everything is very simply leveled. Naturally, I previously made a drawing with geometry calculation. 
A small ambush was waiting with a shell. The instructions say "Comrade, take the core and fuck it well in the center of the sticker." On the reverse side, in the place where the holes should be, a cut was made - that's just like on the countertop. I took the core, took the hammer and let's, carefully so, bale on the sink for $ 500. The hand did not rise, the heart contracted. In general, I despised the instructions, made holes in a circle, after which I poked it once, processed it with a file and everything became fine: 
I also dealt with plumbing. 
Oh, how I exhausted myself with the choice of a faucet ... Filtered water is needed, but I didn’t want to bring out this vile additional faucet at all - I set out to find a faucet with both filtered and tap water supply. The choice of such mixers on the market is extremely scarce. I was wildly delighted when I found such a thing as Grohe Blue. Its charm, as it were, is that it is not only a mixer, but also a branded filter, and I am ready to trust a company like Grohe blindly. As a result, we are very satisfied: 
Do-it-yourself kitchen set: result


Based on Dmitry Podpalchenko's blog (http://podpalchenko.livejournal.com/2013/06/04/»>http://podpalchenko.livejournal.com/2013/06/04/)
Having succumbed to the temptation to purchase a ready-made kitchen set, sometimes instead of positive emotions, we experience bitter disappointment. New furniture is not always suitable in size, layout and as a result becomes inconvenient to use. Making a kitchen with your own hands, taking into account the size of the area and individual preferences, will not only save you from such troubles, but, among other things, even help save money.
Having taken up the renovation of the interior, first of all it is necessary to make a project of the future kitchen with a detailed plan of the room entered into the drawings.

It must accurately reflect:
- room height;
- wall width;
- dimensions of window and door openings;
- communications scheme: wiring, gas, water, heating;
- ventilation system.
Making a kitchen with your own hands and drawings
How you plan to arrange kitchen furniture depends on its functionality and comfort in the cooking process. The most common forms according to the method of arranging headsets are:
- linear;
- L-shaped;
- U-shaped;
- island.
In small kitchens, in order to save space, linear and L-shaped forms are more appropriate. In spacious rooms, you can afford U-shaped and island furniture.


Regardless of which shape is more suitable for your room, do not forget to put on the drawings five main areas of the kitchen:
- Working surface.
- Washing.
- Cooktop.
- Food storage area.
- Place to store crockery and cutlery.
A reasonable solution for small areas would be to combine several zones. For example, plan a countertop that will serve as a sink and work surface. The place to store kitchen utensils also goes well with the work area.
When making drawings, try to mark the furniture so as not to violate the classic working triangle, the vertices of which form a sink, stove and refrigerator.
Designing a kitchen in pro100 (video)
Do-it-yourself calculations for the kitchen
We have already agreed that the drawings show communication schemes. Based on this, a place for washing is chosen next to the outlet of the water supply and drainage pipes. Maximum distance from gas stove to the gas pipe should not exceed more than 2 m. It is undesirable to place the refrigerator close to the hob.
To make furniture yourself means to be able to take into account also such individual parameters as the height of the hostess, whether she is right-handed or left-handed.
Such seemingly trifles determine:
- height of horizontal surfaces;
- on which side of the sink to place the countertop;
- how to fix fittings on furniture;
- where to install sockets;
- how to arrange lights and switches.

All details and elements of the future headset should be carefully calculated and rechecked. Not only each locker is counted separately, but also each drawer and shelf. In the drawings, the cabinets are “disassembled” according to the boards, on which their dimensions are indicated.
After all the parameters and calculations are transferred to the drawings, you can start making templates for your furniture.
Special computer programs will help to make calculations and select the optimal dimensions of individual elements of the headset. With their help, you can design furniture and create a kitchen design for every taste.
Modeling kitchen furniture in 3ds Max (video)
Furniture assembly tools and necessary materials
To make furniture yourself, you need a certain set of tools.
Check if you have:
- drills;
- screwdriver;
- hammer and nails;
- pliers;
- jigsaw;
- hacksaws;
- building level;
- roulettes;
- square;
- mounting knife;
- sandpaper.
For beginners in carpentry, experienced craftsmen are advised to purchase or order ready-made facades for furniture, and already build drawings for furniture for them. If this is your first build, it will take a lot of effort to make neat doors and drawer ends, and the result does not always match the work invested.

So, a set of materials for assembling a kitchen includes:
- doors for cabinets;
- laminated MDF for walls 16 mm thick;
- laminated fiberboard for drawer walls - 5 mm;
- Chipboard for countertop 32 mm thick;
- fittings - door handles, hinges, furniture edges, euro screws, ball guides;
- washing;
- drying;
- grids;
- shelf holders;
- euro ties.
Cutting the material according to the dimensions of the template
If you decide to make furniture yourself from start to finish, the production will begin with cutting MDF sheets according to the drawings. We do it carefully, as the work requires precision. Standard MDF panels have dimensions of 2440x1830, and for an inexperienced owner, cutting them for the first time can be quite difficult. Therefore, it makes sense to order cutting boards at the enterprise or directly in the store.
For example, let's consider how to calculate the template of the details of a standard kitchen cabinet. Conditional product size:
- width - 300 mm;
- height - 800 mm;
- depth - 550 mm.

The doors for the cabinet are made smaller in width and height so that when opened, it does not touch the module standing next to it and does not scratch the floor covering:
- The width of the facade will be 296 mm - 4 mm is enough to ensure the smooth movement of the door.
- The height of the facade will be 700 mm, so the door will be about 100 mm above the floor level.
In addition to the facade, the main details include:
- side walls - 2 pcs.;
- lid.
The back wall is made of fiberboard, so it is not among the main parts.
We subtract the thickness (32 mm) of the side walls, and we get the dimensions of the side walls - 800x550 mm, the bottom and cover - 284x550 mm. In the same way, all other dimensions of the furniture set are calculated.
Cutting materials is an extremely crucial moment. It must be done as accurately as possible, otherwise a few extra millimeters will spoil the entire geometry of the kitchen.
Chipboard cutting rules (video)
Assembly and installation of kitchen furniture
The cut parts must be prepared for assembly, after which you can start twisting the cabinet. Each individual module kit is labeled and placed next to the place where it is planned to be installed. So you will save yourself from the fact that the parts are mixed and mixed up.
The order of assembly of furniture is as follows:
- Sections of parts must first be edged. First, they are sanded with sandpaper. Then the edge tape is applied to the saw cut and glued with a hot iron. The edges are cut with a mounting knife when the edge has cooled. This technique will not only provide furniture more attractive appearance, but also keep it from swelling and swelling under conditions high humidity on the kitchen. Therefore, it is recommended to cut not only the visible parts of the headset, but also those that are hidden from prying eyes.
- The next step is marking and drilling holes for fasteners and shelf supports. Do not rush to work with a drill, otherwise an inexperienced hand can make a through hole.
- The locker is assembled according to the principle of the box. Vertical side walls are attached to the horizontal lower surfaces. Lastly, screw on the lid.
- Roller guides for pull-out drawers are fixed at the building level. They must be located strictly horizontally parallel to each other, otherwise the boxes will not fall into their designated places.
- The legs are mounted on an inverted fully assembled locker.
- Facades are installed last. To do this, lay the box flat on the back wall. The door is placed in the open position. It is more convenient to do it together. The part is fixed at 95 degrees and places for fasteners are marked. Then the facades are hinged to the side walls with self-tapping screws.
- The final touch is the fastening of handles and other fittings. The assembled cabinet is immediately filled with drawers, shelves, nets.

Installation of furniture in the kitchen
Before installing the kitchen with your own hands, everything repair work indoors must be completed. The set is installed on flat floors against dry walls:
- Start mounting the headset from the extreme module. The bottom row of cabinets is set according to the building level. The horizontal must be perfectly flat, otherwise there will be difficulties when laying the countertop. The lockers are connected to each other with euro ties.
- The tabletop is fixed with screws to the cabinets. From above, markup is applied with a pencil for a future sink and stove. The holes for them are cut with a jigsaw.
- Having completed the installation of the lower row of furniture, proceed to the installation of the upper one. The standard distance from the countertop or cabinet lid to the lower edge of the upper hanging modules is 650 mm. To this value add the height of the cabinet minus 6-7 mm for the mount. The resulting figure is the mounting height of the mounting rail.
- A universal canopy is attached to the back wall. Finished cabinets are hung on the wall, aligning vertically and horizontally.
- If a hood is planned for your headset, it is attached last.
Kitchen assembly instructions (video)
Conclusion
Even a novice master can successfully make a kitchen with his own hands. The main thing is to perform accurate calculations, to draw up detailed drawing and boldly begin to implement your plans. Made with your own hands, with a soul, such furniture will serve your family faithfully for many years. It’s not for nothing that they say that if you want to do something well, do it yourself!
A well-designed drawing of the kitchen is the guarantor of the prompt and trouble-free assembly of furniture. A detailed project of a kitchen set with dimensions will help to avoid common mistakes during installation. The article contains practical advice professional furniture makers, answers to frequently asked questions from beginners, ready-made drawings of standard and corner kitchens, as well as well-calculated detailing of the main types of cabinets.
The dimensions of the kitchen set are dictated by the dimensions of the premises, the nuances of the location of communications, doorways, windows, niches and ledges. Therefore, it is extremely important to make accurate measurements, indicating all the elements on the plan.
Form measurements:


When developing a kitchen project, one should take into account the dimensions of household appliances, countertop standards, acceptable cabinet dimensions (height, width, depth).
- Information about the dimensions of the equipment is in the technical data sheet prepared by the manufacturer.
- Standard sizes of countertops made of laminated chipboard:
- height: 28 and 38 mm;
- length: 3050 and 4200 mm;
- depth: 600, 800,1200 mm.
Standard sizes of kitchen cabinets
The height of the upper tier varies between 70-90 cm in increments of 5 cm.
Height of the lower tier of the kitchen: 850 or 900 mm. Depth of the lower cabinets: 500 mm - in this case, the overhang of the tabletop will be 4 cm in front (above the facades) and 6 cm in the back.
Depth wall cabinets- 30 cm excluding doors.
Standard width of kitchen cabinets: 300, 400, 500, 600, 800, 1000 mm. Standard for mesh-cargo (bottle): 150, 200, 300 mm. Hood cabinet width: 600, 700, 900 mm.
Overall dimension of the lower corner cabinet: 800x800 or 900x900 mm.
Upper corner cupboard: 550x550 or 600x600 mm.

Arrangement of standard cabinets in a direct kitchen

Drawing of a standard set of furniture for a direct kitchen

Location of standard cabinets in the corner kitchen

Standard drawing corner kitchen with horizontal drawers
Design principles for custom cabinets
If it is impossible to use standard sizes of kitchen cabinets, you must independently create a drawing of each cabinet separately, taking into account the nuances of the room. Some options when custom furniture is needed:
- Ledges or niches in the wall. In this case, the depth of the cabinet changes depending on the size of the wall deformation. That is, if there is a niche of 200 mm behind the proposed furniture, it is quite possible to increase the depth of the cabinet by 150-180 mm. If, on the contrary, there is a protrusion behind the back wall of the furniture, then the depth should be made less.
- The presence of communications, sockets. Here you need to make sure that there is free access to important communication nodes (joints, connections, ventilation grilles, valves, taps, etc.) and to the free use of the outlet for its intended purpose. To do this, a schematic representation of objects is first placed on the kitchen drawing, and during the design of each cabinet, they are drawn with a dotted line on the back wall. The dotted line is an option for indicating places for cutouts during assembly and installation.
- Individual idea, complex configurations of furniture, etc. In this option, each piece of furniture is developed individually with a separate drawing. It is desirable to draw all complex connections in close-up.

Ledge in the wall: rough drawing of the lower kitchen cabinet

Drawing of a hinged box with a recessed back wall for a gas pipe
Examples of kitchen sets with dimensions
The construction and design of the kitchen is always based on the overall dimensions of the room. After all the strategic objects (pipes, sockets, protrusions, etc.) have already been placed on the drawing, you can proceed to the location of the cabinets under household appliances. Next, you should place standard furniture, and only then - non-standard designs.
Ready-made projects of direct kitchens
When developing your own kitchen drawing, you can rely on ready-made kitchen projects with dimensions, while correlating the actual dimensions of the room with those indicated in the sketch.
Standard kitchen set with dimensions:


Drawing of a direct kitchen with non-standard cabinets:


Variants of drawings of corner sets
Standard corner kitchen with dimensions:

Standard corner kitchen with dimensions
Designing a kitchen with a trapezoidal corner element:

Drawings of a custom-sized corner kitchen:


Detailing of the main kitchen cabinets: drawings and dimensions
- The calculation of detailing is made taking into account the thickness of the chipboard.
- The standard thickness of laminated chipboard for the manufacture of kitchen furniture is 16 and 18 mm.
- The lower kitchen drawers are mounted on adjustable supports 10 cm high.
- The support bar (lower plinth) is recommended to be made in one piece - inseparable for the entire kitchen set.
- The detailing and drawings of the kitchen below are designed for chipboard 16 and a 28 mm worktop.
- The height of the lower tier is 850 mm, taking into account the countertop, the upper one is 720 mm.
Cabinet for built-in oven

Cabinet under the sink
The width of the cabinet varies depending on the length of the sink.

Drawing of kitchen cabinet for sink 800 mm
Drawer cabinet
The width varies according to the size of the room or the wishes of the customer.

Sketch of a cabinet with 4 drawers, size 400x500
Bottom cabinet with hinged fronts
The size can be varied in width within 300 ... 1000 mm.

Drawing of a kitchen cabinet with two doors, width 600
Corner cabinet: two options

Sketch of the L-shaped corner section 900x900

Drawing of the lower corner pedestal in the form of a trapezoid 900x900
Cabinet for telescopic hood
The width of the cabinet varies depending on the width of the hood, the height is calculated according to the dimensions recommended by the appliance manufacturer.

The project of a hinged kitchen cabinet for a standard telescopic hood 600 mm
Wall cabinet with hinged fronts

Drawing of the top drawer with hinged facades 800x720
Hanging corner cabinet: two options

Drawing of a corner L-shaped cabinet 600x600

Sketch of a trapezoidal corner top cabinet 600x600
FAQ: answers to common newbie questions
- How to take measurements of the kitchen yourself?
It is necessary to measure the room at different heights: at floor level; in the area of the working surface (850 ... 900 mm from the floor); at the level of human growth. This is necessary to reveal the irregularities of the wall. It is also better to measure the height at several points - to detect the curvature of the floor, ceiling.
Important! Horizontal measurements to objects in the kitchen (meters, pipes, windows, etc.) must be done from one corner, taken as the base.
- What computer programs are suitable for a beginner to independently develop a kitchen drawing?
The simplest design software is PRO100. Intuitive and easy to understand: Astra Furniture Designer, bCad-furniture maker, KitchenDraw, WOODY, IKEA kitchen planner (great for standard furniture sets), AutoCad, 3D-constructor, Basis.
- Why do kitchen dimensional drawings always include a gap around the walls?
In the development of kitchens, especially corner ones, it is very difficult to predict how perfectly the furniture will “fit” into the given dimensions of the room. No one is immune from the oversights of builders who left after their work uneven walls. A small gap of 5-7 cm helps furniture makers to install a set without major alterations - if the sizes do not match, the furniture can be moved within these limits, and at the end of the work, the remaining gap can be covered with a detail in the color of the facade.
- What distance should be between household appliances in the kitchen?
Between the equipment it is best to leave at least 500 ... 600 mm.
- Can a washing machine be installed in the kitchen?
Oh sure. Rule of thumb: distance from washing machine to the nearest kitchen cabinets should not be less than 3 cm on each side.
- How many centimeters should be between the lower and upper tiers of kitchen furniture?
The optimal distance is 60 cm. The exception is the cabinet under the hood - here you need to rely on the recommendations prescribed in the technical data sheet of the device.
- In what order is it better to arrange household appliances on a kitchen drawing?
For right-handers, the most acceptable option: refrigerator, sink, stove. In this case, the hostess moves from left to right: she takes food out of the refrigerator, cleans and washes them, then cuts them (between the sink and stove), and then boils, fries, stews. For left-handers, it is better to use a mirror version of the location of household appliances: stove, sink, refrigerator.
- Why is it considered that furniture with legs is more durable than the one in which the side parts of the body are lowered directly to the floor?
Kitchen cabinets with adjustable legs can always be leveled relative to the floor. In addition, in the event of various kinds of emergencies (the neighbors flooded from above, the tap fell off, etc.), only the lower base deteriorates, the replacement of which is less expensive than updating the side parts of the cabinet.
- What should the back wall of kitchen cabinets be made of?
It is better to use fiberboard here - it does not negatively affect the reliability of the structure, and is more attractive at a price.
- In what units of measurement should the dimensions of kitchen sets be indicated in the drawings?
Only in millimeters.
- Where should sockets be located?
Socket layouts for household electrical appliances:


- Is it possible to install a countertop 40-50 cm in depth against one of the walls in a corner kitchen?
No problem. The only condition is that in this part of the kitchen set there should not be built-in household appliances and sinks. All kitchen appliances have standard dimensions, calculated under the countertop 60 centimeters.
- Are standard kitchen drawings with dimensions better or worse than design developments?
There is no single answer. For a typical kitchen, you can use a standard set of furniture, but for rooms with redevelopment, an individual calculation of the kitchen set is really necessary.
Creating a drawing is a difficult and time-consuming process. But step-by-step planning, clear measurements, proper placement of furniture and appliances, as well as strict adherence to the instructions and advice of professionals will certainly be crowned with success. A linear sketch of a direct arrangement or a 3-D drawing of a corner kitchen with dimensions and details is the first step towards the kitchen set of your dreams.
Modern life makes demands on housing, among which there is not only beauty, but also functionality. Everyone knows that multifunctional appliances have a high cost, as well as an aesthetically furnished kitchen. Modern kitchen set good quality will cost a fortune. Despite the fact that for each person the concept of "inexpensive" has different limits, a family with an average income will not be able to afford such a purchase. For this reason, many families try to make their own kitchen furniture. From this article you will learn how to assemble a kitchen set with your own hands and what you need for this.

Features and Benefits
To make your own furniture, it is not necessary to have the education of a carpenter or joiner. All you need is the desire and the availability of free time, as well as tools. When creating furniture with your own hands, you will receive the following benefits:
- individual project of exclusive quality;
- financial savings;
- new experience;
- enjoyment of manual work;
- Of no small importance is the fact that a kitchen created by certain brands will fit perfectly into the interior of your kitchen.

There are several ways in which you can carry out your plans. For example, you can contact a specialized company where you will be provided with services for cutting and edging, or you can buy ready-made components. The last option is the easiest. However, in this case, your headset will have standard sizes. There is a third option, which lies in the full-fledged manufacture of furniture for the kitchen on your own.

How to DIY
You can make a homemade table for the kitchen using the available materials. Initially, you need to decide on the dimensions, and, as in any other work, prepare a sketch. You can draw a sketch from scratch yourself or use a ready-made option. You can take the drawing as a basis or draw the necessary details.


With your own hands, you can create not only a kitchen set, but also a transforming table, high chair to the kitchen, or furniture for giving. You can read more about the instructions for making furniture below.


materials
First of all, you should decide on the material from which you will make furniture. V modern world many solutions, and each product has its own features and benefits.


As a rule, wood is the basis of any furniture. Many people use European-made chipboard in their work, because it has the best performance compared to Russian products. If you prefer MDF, remember that it requires further painting.

MDF is more expensive than chipboard and better in quality. From such material, you can create decorative elements, it is also convenient for molding. In some cases, MDF is superior to natural wood in terms of density, so it is in demand on the Russian market.


If you are a supporter of natural and healthy materials, you can make a kitchen set from wood. Remember that such furniture will be sensitive to changes in temperature and humidity. Each blank will need to be treated with a special impregnation and antiseptic.


Tabletops are made of chipboard, MDF and natural wood. The main load falls on this part, so many experts advise using natural or artificial stone in their work.


Some elements, such as the bottom of the drawers, can be made from plywood, as well as the side parts.


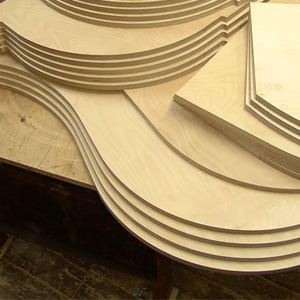
To date, furniture boards have gained popularity. They are a piece of wood, made in the form of a shield. A similar shield is glued together from several parts using special glue. Several tree species can act as a material:
- Birch;
- Pine;
- larch;
- aspen;
- cedar.


Kitchen set from furniture board more convenient, because there is a wide choice of standard sizes.

OSB boards suitable as a decor, for example, for covering an apron area, or for creating an original shelf. They are also used to make openwork cabinets and bookshelves in other rooms.


Drywall can also be used to make furniture for the kitchen. The advantages of this material include low cost and availability, along with ease of use. GKL sheets can accept any fastening, even glue. You only need to calculate the load. Each product should be decorated with finishing materials, because in original form GKL is not attractive.

Brick kitchen furniture deserves special attention. This style is called "murovanny". He is not very popular, but he still has fans. Brick furniture looks impressive in the room and gives it solidity. Best of all, such material will look at big kitchen, as it will be difficult to small space accommodate full lockers.


Required Tools
For self-manufacturing furniture, you will need to prepare the following tools:
- electric drill;
- electric jigsaw;
- screwdriver

Do not forget about furniture hinges, confirmants, self-tapping screws, dowels, drills, pencil and tape measure.

Preparing everyone necessary components will help you quickly cope with the task and not be distracted by work trips to the shops.

Step-by-step instruction
With the help of this instruction, you will be able to assemble the kitchen set yourself and avoid possible mistakes that may occur during the work:
- The first step is to take measurements and create a sketch. Make accurate measurements of the room and record them on paper. Draw the room on a scale that is convenient for you so that the finished kitchen set fits into it with maximum benefit.

- Decide where the sink with stove will be located. If the current location of the furniture does not suit you, indicate on the drawing the place where you will transfer them. The issue of the location of the stove should be thought out to the smallest detail, because the size of the kitchen furniture depends on it. Consider the dimensions of the refrigerator and its location.


- Now it is necessary to enter kitchen furniture into the resulting free space. Consider not only the bottom row, but also the upper cabinets, the hood.

- If you have the opportunity, you can order the required components for the kitchen, taking into account the selected dimensions. When calculating the parameters, pay special attention to the size drawers. The size of the decorative facade will depend on these dimensions. Solving the issue with the location of the shelves will help you determine the required amount.
- Remember to record all measurements in your sketch and decide what type of material will be best for your kitchen.


Restoration
Most people will agree that only the most patient person can restore old furniture, since this process is comparable to real art. Not every person will like to work with a headset, gradually restoring the previous look of products.


To make a decent product out of old furniture, you will need to carry out the following activities to create a new design:
- carefully disassemble the product;
- cleaning and rinsing;
- eliminate defects in the varnish surface;
- work with wood defects;
- carry out repairs and strengthen fastenings;
- wood should be painted and primed;
- decorate the appearance of furniture with the help of "aging", varnishing, painting and polishing.

most challenging task is the restoration of the table, or rather the alteration of its legs. To do this, you will need to remove the old veneer, restore its former shape with the help of liquid wood.


Assembling the finished headset
Sections of components must be edged in advance. They are pre-sanded with sandpaper. After that, the edge tape is applied to the saw cut and glued with a hot iron or building hair dryer.

If you use a regular iron, then when gluing it is necessary to attach a piece of thin material to the edge.
Trim the edges of the edge when it cools down. Such a technique can give furniture attractiveness and keep it from swelling in high humidity.
The next step is marking and drilling holes for mounting and shelf holders. Do not rush to work with a drill, because a mistake will lead to a through hole.

The cabinets are assembled like a box. Vertical side walls should be attached to the lower horizontal surface. The lid is screwed on last.

Roller guides must be installed using the building level. They should be horizontal and parallel to each other. Otherwise, the boxes cannot be placed in the allotted place.

Installation of the legs is made on a fully assembled and inverted cabinet. It is required to put the front part last, after which they are hinged to the side wall.

To update the interior, you can use simple decor techniques:
- thematic stickers on the wall and ceramic tiles;
- ornament using a stencil;
- different panels and plates;
- painted furniture and walls.

Such decorative elements can give furniture or individual elements bright accent. Interesting stickers are sold in various stores or you can cut them yourself from self-adhesive film. A decorated platform above the table, on the apron area or above the work surface, will add style to the kitchen interior.

In small rooms, you should select decorations with small and elegant elements, and for large or empty walls buy large parts.


Screen painting looks very stylish on kitchen furniture. You can make a pattern out of thick cardboard or plastic and make an original ornament. Artistic painting will look very stylish.


The following items will look great in the interior of the kitchen:
- various plates;
- cutlery;
- wine corks;
- sea shells and pebbles;
- paper and silicone molds, as well as pasta.


If your kitchen furniture is different from beautiful and fashionable interiors, do not be upset. With help creative ideas, which you can implement with your own hands, a standard headset will turn into a real work of art.

How to decorate furniture:
- staining;
- decoupage;
- non-standard fittings;
- plastic decorative overlays with thread imitation;
- film.