Furniture self made is becoming more and more popular. However, not everyone has the tools and skills to assemble a product from scratch. And here to give new life an old wardrobe, sideboard or table is quite a feasible task. According to statistics, chests of drawers are most often restored at home - a large area of the working surface and the absence of elements of complex configuration open up a wide range of opportunities for creativity. The finished product is taken as the basis, the design of which varies depending on personal wishes.
The first thing you need for work is the chest of drawers itself - old or modern, but just lost its presentable appearance. Its external condition does not play a special role, because after the restoration it will look like new. The most important thing is that the frame remains strong, able to withstand further use.
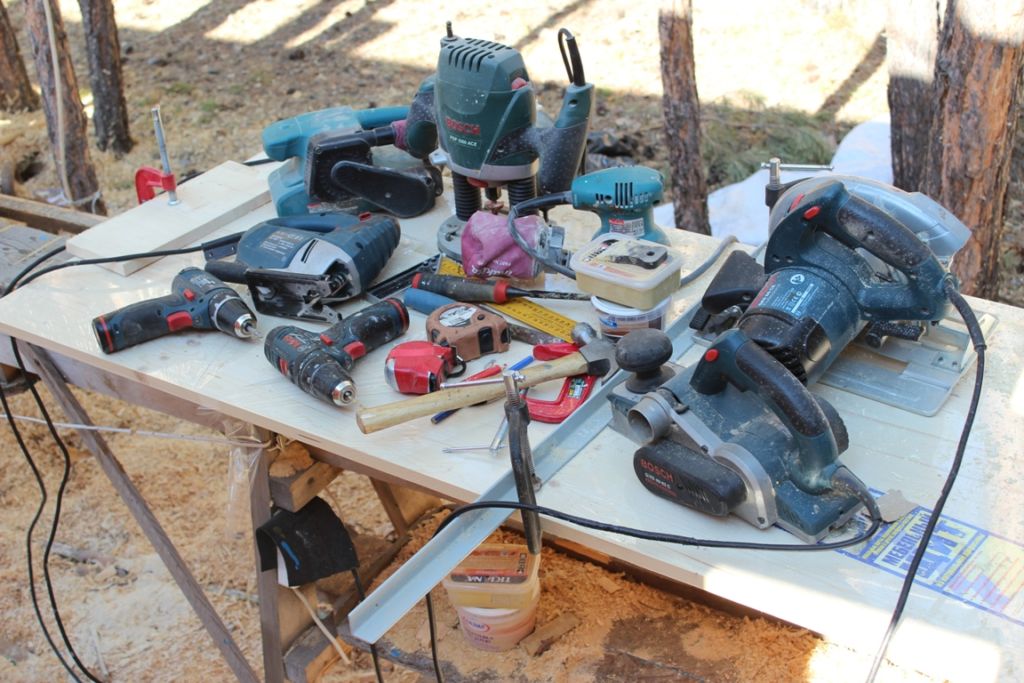
In addition, certain materials and tools should be prepared for full-fledged work. It is also necessary to decide in advance in what style the restoration will be carried out. All this information will be needed to compile the list. decorative elements, finishing materials, LKP. In addition, a basic set of necessary tools is provided:
- For preparatory work you need a grinder, screwdrivers or a screwdriver, self-tapping screws, putty, spatula. Do not do without special glue for wooden surfaces.
- For finishing, you may need an old toothbrush, paint roller, brushes, varnishes and paints.
- To protect yourself from the harmful effects of dust, vapors of paints and varnishes, it is advisable to use gloves and a respirator.
If there is no grinder, it can be replaced with sandpaper of varying degrees of grit.
In addition, if desired, new fittings can be installed on the chest of drawers. It is also worth taking care of its acquisition in advance.
Preliminary preparation
Before proceeding to finishing work to give a new look to furniture, a number of preparatory measures should be carried out. First of all, you need to pull out all the contents from the drawers - the chest of drawers must be completely empty. For high-quality implementation of decorative finishing measures, it is recommended to disassemble the chest of drawers into its component parts. All hardware is unscrewed. Get it drawers. Filmed hinged doors. If necessary, you can separate the tabletop. All this is necessary for a more detailed and thorough study of each individual element. The output will be the highest quality product.
Further stages of work:
- Removal of old coating. This is the most important component of the restoration work, because decorative trim It is applied exclusively on a clean, impregnated surface. To eliminate any paintwork, you can use a special solvent and a conventional spatula. If you need to remove the plastic film, experts recommend arming yourself with a building hair dryer. small plot heated, the coating peels off under the action of hot air and is torn off without problems. So piece by piece gradually clean the entire furniture.
- Elimination of cracks, surface leveling. The procedure is carried out by means of putty, which is applied over the entire area of \u200b\u200bthe chest of drawers. Thoroughly work through each element and piece of furniture, after which the product is left to dry completely - sometimes this may take at least a day.
- Grinding of the treated surface. At this stage, you should use grinder, but in its absence, sandpaper is also suitable. Particular attention should be paid to corners, transitions. The end goal is a perfectly flat surface.
- Primer. It is a necessary base for decorative finishes.

Apply a thinner to remove the coating
Remove a layer of old varnish

Walk through hard-to-reach places

Treat the surface with a grinder

Sand small parts with sandpaper

Spot treat all deep damage with putty

Sand the putty spots

Stages of restoration, taking into account the chosen technique
After all the preparatory work is completed, the chest of drawers should be wiped first with a dry, then with a damp cloth. In this way, the dust settled during the drying process is removed. Further actions will depend on the technique chosen for restoration: staining, decoupage, and the method of artificial aging are most often used. Master classes selected on thematic resources will help you do everything correctly, in the right sequence.
Decoupage
A common decoupage technique is quite simple to perform. For work, you will need PVA glue and special napkins, which are distinguished by a variety of patterns and patterns. Everyone can choose a theme according to their personal preferences.
When applying decoupage elements, it is important to pay attention to the integrity of the pattern over the entire surface of the chest of drawers. Experts recommend that before fixing each piece, apply it to the place of the future location to adjust the overall harmonious picture. It is advisable for beginners to first create a sketch of the future product with a study of all the nuances.
How to restore an old chest of drawers step by step:
- White acrylic paint cover the entire surface of the furniture and leave it to dry completely.
- While the dresser is drying, prepare the decor. Cut out all the necessary patterns and drawings, clearly defining their location.
- Fix the cut parts on the dried surface with PVA glue. In the process, you can adjust their angle of inclination.
- Smooth out all applied elements, eliminate air bubbles. You can use a special roller at this stage.
- To fix the result, varnish the entire surface.
Instead of napkins, you can use fabric scraps. The application principle will be the same.
At the final stage, the fittings are screwed, all parts of the furniture are assembled in the desired sequence. The restoration of the chest of drawers is completed, the updated piece of furniture is ready for use.


Hardware replacement
After restoration, the appearance of the chest of drawers very often changes dramatically. As a result, there is a need to update the fittings. As a rule, it is selected in advance in accordance with general design products. The number and dimensions of handles, clamps, plugs are also calculated at the initial stage. It is possible to install fittings in new areas, in this case, in the process of preparatory work, all old, unnecessary holes should be masked, new ones should be drilled in the places selected for this.
It is important to remember that the installation of fittings is carried out after all the measures for the restoration of the chest of drawers with your own hands. The procedure is always the final step. In addition to decorative, visible elements, care should be taken to replace guides and fasteners. This is necessary not only for aesthetics, but also for the full functioning of the furniture.

Painting
The simplest, but at the same time quite effective method of restoring an old chest of drawers is staining. On the modern market building materials presents a wide range of colors of paints, glossy, matte, imitating surfaces of different texture compositions.
You can paint the chest of drawers in a color that matches the interior. Or, on the contrary, make it a bright accent by using shades that contrast with the design of the room.
To update an old chest of drawers with your own hands, painting each element with a separate color is often used. It turns out a colorful, unique product. There are many options, it all depends on personal tastes and the courage of design decisions.
After carrying out the preparatory measures, the entire surface should be covered with a layer of paint. Next, you need to give it time to dry completely, after which it is recommended to carefully examine the product. So it will turn out to understand how tightly the paint layer lay down, whether the chosen shade looks harmonious on the furniture. If necessary, one or more coats of paint should be reapplied, depending on the end goals pursued. To get a glossy shine, a restored chest of drawers or its separate sections coated with a special varnish.


Artificial aging
Due to the popularity of the vintage direction, you can restore the chest of drawers at home using the technique of artificial aging. Finished goods look quite original, expressive.
To work, you may need sandpaper, two colors of acrylic paint, a wax candle, a sponge and brushes. To create an "old" chest of drawers, you need to follow three simple steps:
- Initially, preparatory measures for surface treatment are carried out. Then the furniture is painted over with a base layer of paint. Then you need to wait for it to dry completely.
- The main stage of aging is to create "age" scuffs on the surface. In the indicated places, more often along the edges, rub with sandpaper with varying degrees of intensity to achieve a natural effect. The main condition for this is not to overdo it, otherwise unnatural spots may appear. Scuffs are recommended to be treated with a wax candle.
- After applying a layer of paint of a different shade. Places treated with wax are wiped with a sponge. The paint is easily removed.
To consolidate the effect and give the wood a glossy finish, a layer of varnish can be applied to the finished "antique" furniture.


Renovation of children's furniture
When it comes to restoring nursery furniture, you can experiment with non-standard colors, fun designs and patterns. An old chest of drawers will look quite original with drawers painted in bright, contrasting tones. Yellow, red, blue, green or purple will fill the nursery with light and fun. The countertop can be painted in a calmer shade, it will be more practical.
The decoupage technique is also used quite often to decorate children's rooms, since you can always pick up colorful images with your favorite characters. So it will turn out to create an even more original chest of drawers with your own hands. The child’s hobbies will help you decide on the design theme, and on numerous thematic resources you can pick up a ready-made master class that tells in detail what to do and in what sequence.
For school-age children, experts recommend restoring a chest of drawers by pasting with old wallpaper. As a result, the furniture will look interesting, stylish. It is very important that the restoration of the children's chest of drawers takes place with the direct participation of the child himself. It is he who can act as the author of ideas for a new design.


Video
We continue to fill the piggy bank of ideas for updating the chest of drawers so that it becomes a spectacular decoration for any room in your home. In we showed different variants use of this small piece of furniture, and also offered 3 thematic plots for updating a dresser that does not suit you in appearance, + about 40 ideas in pictures.
And here we have put together practical guides, thanks to which, in just a few simple steps, you can update your chest of drawers with your own hands.
According to the materials and techniques used, they can be divided into several parts:
- methods 1 and 2 can be implemented from the remnants of wallpaper or fabric;
- for 3 and 4 you will need stickers or stencils;
- method 5 is possible with different materials(paints, fabrics, wallpaper);
- 6, 7, 8 - how to give the chest of drawers an "aged" look and add original handles in the colonial style;
- method 9 - another small contribution to upgrade options;
- guide-10 is a solution for lovers of sophisticated style with a budget imitation of luxurious “mirror” facades (plain food foil is used).
You will see each guide in pictures. A large photo is the result of creativity. The first of the small ones is the “original view” of the chest of drawers + materials and tools. The rest are incremental steps.
Find among our ideas the one that will allow you to turn your standard (or just old) chest of drawers into a unique designer piece. Enjoy your creativity and excellent results!
__________________________
how to update a chest of drawers, method number 1: SUMMER MEADOW

This chest of drawers in the style of "summer meadow" will look especially good against a smooth wall and next to a vintage armchair.
You will need:
- remnants of floral wallpaper with a large pattern or a couple of large sheets of wrapping paper (not foil!);
- furniture handles to match - made of glass or acrylic;
- pencil, ruler, scissors (cutter), transparent or white PVA glue.
Cut out the wallpaper with an allowance of about 5-10 cm, then glue it on the fronts of the drawers, carefully tucking the edges on the inner surface. Smooth the wallpaper with a dry cloth to avoid "wrinkles" and "air bubbles". For practicality, after the glue has completely dried, you can cover the surface with a thin layer of transparent acrylic varnish.
After the facades are ready inside find a hole for the handles and carefully cut through the cover from the outside. If the handles are fundamentally different, drill new holes. This technique can also be used for linen or calico.
__________________________
how to update a chest of drawers, method number 2: JAPANESE MOTIVES

The Japanese-inspired theme would therefore look great paired with a matching Japanese-themed poster or fan.
The technology is almost identical to the previous one, but it is recommended for a wooden chest of drawers that can be painted. So, in addition to the materials described above, you will also need paint (translucent glaze) for wood to match the main surface of the wallpaper + a flat brush.
All surfaces of the chest of drawers, with the exception of those that are covered with wallpaper, must be painted. After the paint has dried, go through all the steps described in method No. 1.
__________________________
how to update a chest of drawers, method number 3: CAFE-SHANTAN

The chest of drawers updated in this way will perfectly decorate a laconic interior.
You will need:
- stencils with letters folded into words, chopped font (in the photo they are made manually using drawing tools and special paper), light and dark paint for wood and brushes (wide - for painting a chest of drawers and short hard - for drawing) - if the chest of drawers is wooden ;
- stickers from an advertising vinyl film, contrasting with the background - if the chest of drawers is made of MDF or chipboard.
If the chest of drawers needs to be painted, make a “glaze”: mix the paint with a little water and lightly remove the paint from the brush, cover the entire surface of the chest of drawers. You should get a slightly vintage (uneven) effect.
After the main surface of the chest of drawers has completely dried, paint over the letters according to the stencil, dipping the tip of the brush into the paint. Then go over lightly with sandpaper to get a vintage effect.
If the chest of drawers is made of composites, just place stickers on it without removing the “middle” letters from the part. Smooth the stickers with a cloth to avoid "air bubbles". If you manage to purchase special mounting paper with markings, things will go much faster.
__________________________
how to update a chest of drawers, method number 4: FOLK GLAMOR

This method is similar to the previous one, but a different style is chosen. Gentle "romantic tones" of colors and stickers + a little bit of humor will help to create such an original chest of drawers for a nursery or a girl's room.
__________________________
how to update a chest of drawers, method number 5: SPRING GARDEN

A light eco-style story is created by a composition of an updated chest of drawers and a canvas stretched over a frame (similar frames are sold at Ikea).
You will need:
- cotton fabric with a large pattern in natural colors;
- very sharp fabric cutter, scissors, glue, acrylic lacquer, hammer, small nails.
You need to cut out the elements of the pattern from a piece of fabric and stick them on the chest of drawers. From above, the drawing is varnished for practical reasons. Stretch a large piece of the same fabric over the frame and attach with carnations.
__________________________
how to update a chest of drawers, method number 6: SPANISH CLASSIC

Another composition of several items. This time - large-scale and luxurious. The "trio" includes a wooden chest of drawers, a chair and a mirror in a wooden frame.
Details - in the special issue "" (master class No. 2)
__________________________
how to update a chest of drawers, method number 7: SEA WOLF

Sometimes you want something completely different. This chest of drawers in a colonial style will look especially impressive surrounded by "trophies" from long-distance (or just sea) travels. We use a wooden chest of drawers, even a very old one.
You will need:
- white and light gray paint for wood,
- brushes, wire mesh, sandpaper;
- a piece of real thick rope (2-3 cm in diameter);
- natural wax for finishing.
Get a wood paint that doesn't dry too quickly, and coat every piece of furniture. Alternate strokes of white and gray paint, and then create a more uneven look by sanding with twisted wire mesh.
After complete drying, go over all surfaces with transparent wax or first with mother-of-pearl glaze, and then with wax.
Remove the varnish from the old wooden handles and paint with the same paint as the chest of drawers. Tie the rope with a "nautical" knot and thread the handle through it so as to hide it almost completely. Return the updated handle to its original place. Top coat with natural wax.
__________________________
how to update a chest of drawers, method number 8: FRENCH BOUDOIR

This is a variation on technique #7, but the chest of drawers becomes an old-fashioned bathroom vanity. In addition to the chest of drawers, a mirror and a bowl of an overhead sink are involved in the creation of this item.
See more in the special issue "" (master class No. 3)
Not a single house, like a single bedroom, is complete without a good, beloved chest of drawers for storing things, bed linen, towels and other useful and necessary things. For example, we often store small things in it, such as corkscrews for wine, champagne, can openers or hairpins, etc.
It can be a good wedding gift, and jointly acquired property of a married couple, or just individual choice. Therefore, its purchase should be approached thoughtfully, taking into account a whole range of factors and characteristics, the interior of the room, price / quality ratio, and other criteria.
To avoid problems with convenience, ergonomics, the right choice materials for manufacturing and appearance, we recommend buying a chest of drawers from the manufacturer https://usadba-mebel.ru/products/category/komody-iz-dereva. Buying goods in a trusted store, you automatically receive high criteria for quality control of products, competitive prices on the market, and good quality service and delivery of goods.
How to restore a wooden chest of drawers at home
Many in our time can be found an old wooden furniture, which is either inherited from grandparents, or earlier generations. And some people buy such furniture at antique auctions. It is worth considering that we are talking not only about antiques, it can be from Soviet times, but made from natural wood different species, such as oak, ash, beech, pine, etc.
Consider several recovery methods:
1. Sanding and varnishing
2. Pasting with veneer
3. Pasting with a finish film with a wood grain texture
The initial state could be, for example:
Sanding and varnishing
For sanding the chest of drawers, it is better to use cloth-based sandpaper. For example, in Kharkov, I often used Zaporozhye sandpaper for similar purposes with P60-P80 grit to remove the old paintwork, and then P180-P320 for finishing surface grinding. Sandpaper on paper basis wears out faster and is ineffective.
First you need to wash and dry the wood with some kind of cleaning agent with a soft washcloth to remove dirt. Then remove the varnish layer with P60-P80 grit sanding paper, it is also worth going through the places where the coating has worn off to restore the color of the wood. You can use the manual method - attach sandpaper to a wooden plank 10 cm by 15 cm or use a grinder. It can be both tape and vibration.
Next, you need to sand the entire surface with sandpaper with grit P180-P320. If there are small dents on the surface that could not be removed by grinding, you can use wood putty, or you can do otherwise - mix the remnants of small sawdust with varnish and cover them with an ordinary spatula. In this way, you will be able to keep a fairly accurate shade of the original wood, and with small amyatinkas, you will keep the texture.

Next, a layer of primer is applied on wood, and after it dries, 2-3 layers of paintwork. There are many options here, but it is worth considering that alkyd or epoxy varnishes will be the most resistant. Also, the first layer of varnish can be used as a primer, but after that it is necessary to sand the surface with fine emery, lightly, to knock down the raised pile of wood. And then apply already 1-2 finishing coats of varnish. An example of a lacquered chest of drawers can be seen below:
You can also use wood paints, they are also better to buy on alkyd or epoxy based. The fact is that during the restoration old furniture it is better to take care of the durability of the coating. And then your furniture will serve you faithfully for more than a dozen years, and the abrasion of the coating is possible in 5-7 years after its application.
Veneer gluing
To restore a wooden chest of drawers with your own hands, you can use a method such as pasting with veneer. To do this, it is better to buy natural (planed) material, and stick it on a surface sanded with rough (P60-P80) emery contact adhesive, for example Bindan-S, Moment, etc. For a thin one, building PVA glue is also suitable.
Also, do not forget that before coating the surface must be cleaned, and hidden with one layer of primer on wood, waiting for it to dry completely. Also, the material should be chosen with a moderate thickness, about 1.5-2 mm. The texture can be chosen at your discretion, taking into account the interior of the room and the cost.
It is better to stick the veneer with small tolerances along the edges, and then cut it off in fact with an electric jigsaw, or a plunge-cut saw. Because the edges of old furniture are not always smooth. Of course, you can also use a clerical knife and a plywood bar as a cutting guide. There are many options.
However, I note that more or less amenable to processing at home is veneer made from softer woods (pine, maple, spruce, etc.), or mahogany, and of small thickness - 1.5-2 mm. If you take thicker wood, it will be stronger, but this strength is not due to anything. Enough 1.5 - 2 mm. It can be cut with an ordinary clerical knife in several passes.
Veneering is a more complex restoration option than paintwork and sanding. It is worth using it when the surface of the old wood is dotted with pits and other furrows from inaccurate use of furniture. Or if you do not like the appearance of wood. Because for a good result, it is necessary to accurately mark and cut the strips and clean the base well, and use high-quality glue. An example of a chest of drawers restored by veneering can be seen below:

Pasting with a finish film with a texture under the tree
This is a cheaper and easier method than the previous two, but it should be used if there is an understanding that such a film is not natural wood. And if in previous cases were used natural materials, then this film is an artificial material, and not as durable as the wood itself. However, in appearance, you can find a film with a texture very close to the real one. It looks something like this:

First, as in previous cases, it is worth completely washing and cleaning the chest of drawers with coarse sandpaper. And then primed the tree and stick the film. Such a film is self-adhesive, it only needs to be well smoothed. However, the film will not hide surface irregularities. Therefore, irregularities must be puttied with putty on wood, or mix sawdust from sanding and PVA glue.
After pasting, it is better to hide the film with alkyd or epoxy varnish. Because by itself it is not very resistant to abrasion.
That's all, we looked at several ways to restore an old wooden chest of drawers with your own hands. Of course, these are not all methods, but they allow you to achieve excellent results, with a relatively small financial investment.
Very skillful hands. Decorate a chest of drawers in the bedroom - 8 simple but effective ways how to upgrade an old chest of drawers.
"Keep or throw away?" - often this question worries the owners of old or simply boring furniture abruptly Hamlet's "to be or not to be." The site team votes for the first option, because giving an extra life to things you once loved is easy and exciting. Today's participant in our "Fashionable Sentence" is a chest of drawers in the bedroom. We take it out of the pantry or garage, shake off the dust and start.
Restoration
Restoration is the longest and most boring stage, but at the same time the most important. You will not sit on the twine without first warming up the muscles? So the chest of drawers needs to be carefully prepared for the upcoming changes. Don't worry - we've prepared step by step instructions this process.

Stage 1. Internal examination of the dresser. We take out and measure damaged boxes and parts in order to buy / make new ones.
Tip: take a closer look at the handles, chest of drawers legs. If they differ slightly in shape or size, it is likely that they were made by hand. In this case, it is better to change all the accessories.

Step 2 Clean the surface with soapy water. For hard-to-reach places, use an old toothbrush.

Stage 3. Remove the top layer of paint or varnish. To do this, apply acetone to the prepared surface and cover the chest of drawers with a film or oilcloth for an hour to enhance the effect.

Stage 4. We remove the remnants of paint or varnish with a spatula and carefully process the surface with a grinder. For small details, use sandpaper or a sanding sponge.

Stage 5. We cover up chips and scratches with putty on wood.

Stage 6. Final. We cover the chest of drawers with paint or stain with a brush / roller. Then we varnish, and then we apply one or two more layers of paint. Until the end, the final layer of varnish remains. Further fanfares sound and salute volleys are heard.
Tip: when choosing a color, be guided by the style and color scheme of the interior. For the bedroom, muted shades and pastel colors are suitable.
Dresser decor in the bedroom

After restoration, you can safely proceed to decorating. Everything is used for decoration: from beads, coffee beans and old newspapers to nails, apartment numbers and plastic figures. The only limit is your imagination (well, you should not take away your favorite toys from children). To know what to start from, we introduce a couple of ready-made techniques and inspiring ideas.
Decoupage

Necessary materials: pictures for decoupage, scissors, PVA glue, roller / brush for coloring, varnish.
According to Wikipedia, decoupage is the decoration of objects using napkins, pictures, fabrics or photographs. The technique is suitable for beginners. All you need is to cut out the illustration you like along the contour (you can use decoupage cards, ordinary three-layer napkins, postcards) and glue it to the selected area with PVA glue. Mix 2 parts of glue with 3 parts of water and cover the picture with the finished mixture. The final layer of lacquer, and an ordinary chest of drawers turns into a work of art.
stencils


Necessary materials: stencil (or lace doily / old tulle), adhesive tape, acrylic paints, sponge / brush, varnish.
Another simple but effective technique. We fix the stencil on the surface with adhesive tape and carefully apply the paint of the desired color. After carefully remove the stencil and wash it. To make the result please as long as possible, cover the resulting pattern with matte varnish.

As a stencil, you can use old lace napkins or unnecessary tulle. The principle of operation is the same, but it is better to replace acrylic paints with spray paint - the pattern will be clearer. The output will be original furniture, which will perfectly fit into a romantic girl's bedroom.
Antique decor

Necessary materials: acrylic paint, roller or brush for coloring, sandpaper, sheet metal, glue, varnish.
An antique-decorated chest of drawers is suitable for a bedroom in country or Provence style. It's funny that even the traces of time have to look stylish, so you have to work a little. On the prepared surface (the 5th stage of our list), we apply two layers of acrylic paint in contrasting colors. After the paint is completely dry, we process the corners and protruding places with sandpaper.

If you want to give the chest of drawers a sense of former luxury, additionally use a thin foil called gold leaf. Apply glue to the selected areas, and then lay the potal on top. Give it at least two hours to dry, wiping off any excess. The final stage of work, as you probably guessed, is varnishing.
Volumetric decor

Necessary materials: stencil, masking tape, acrylic putty or bulk paste, spatula, acrylic paint, brush / sponge, sandpaper.
The stencil is in motion again. The first step is to fix the stencil on the surface. Next, apply putty and level with a spatula. After we remove the stencil, patiently wait for complete drying.

In the final, there are two ways to develop the scenario: either we cover the chest of drawers with acrylic paint, or we create the already familiar worn effect. To do this, paint the surface with one color, then rub the three-dimensional pattern with a candle and cover everything with paint of a different shade. After drying, we process with sandpaper. Done, you are amazing!
We paint a chest of drawers in an original way


Necessary materials: paints (acrylic, slate, paints for marker board), masking tape, varnish.
Play with color: paint the drawers or chest of drawers in different colors or use the ombre effect that is popular today (when the color fades to a lighter or darker shade). This can be achieved by mixing the selected tone with white paint. For each next shade, increase the amount of white. Number of shades = number of boxes.


Prefer straight lines and clear shapes? Then cover the chest of drawers with stripes or geometric patterns. To do this, you will have to make friends with masking tape: apply the base color, stick the tape with the desired pattern, and then cover the surface with a different color. Your new striped friend is ready!


Or paint for turning an ordinary chest of drawers into a field for love messages, tic-tac-toe games and drawing. Write down dreams, inspirational quotes here, or just make a menu for the day. Beautiful and functional - everything we love.
We put our hand on the handles of the chest of drawers

Necessary materials: replacement for handles (toys, ropes, wine corks), drill, bolt, washer and nut, glue, marker.

If you are tired of the look of a chest of drawers, it is not necessary to bother with spatulas, grinding machines and paints. Just replace the old handles with children's toys, ropes, keys, branches,. Yes, yes, you heard right. This is one of the simplest and original ways upgrade. We have a detailed how to do this.
Turning a chest of drawers into an open storage system

Necessary materials: replacement for boxes (wicker baskets, suitcases, wooden boxes).
Another way for those who do not want to bother. To turn a chest of drawers into an open storage system, just take out the drawers and replace them with something more original. For example, wicker baskets or old suitcases. Just. And how effective!


To give furniture a second life, it is not necessary to have an art education. It's enough to arm yourself necessary materials, put aside right/wrong ideas and just let the inner child express itself.
If the number of options makes you dizzy, check out our style preferences. At the same time, you will learn something new about your inner designer.
In this article I will talk about how to give new life to an old chest of drawers. How to restore, update and paint it at home, how to decorate it with fittings, about the pros and cons of rework. I will describe the methods of restoration, the preparation process. I will tell you about the materials and tools necessary for the work.
Pros and cons of dresser restoration
Restoring antique furniture is a painstaking job that requires high-quality materials.
Depending on the dimensions, materials used, and the condition of the dresser, the restoration process takes from 2 to 10 days.
Restoration prolongs the period of use, visually transforms the chest of drawers.
Cons in the restoration of chests of drawers:
- high price for quality material;
- lack of experience in restoration;
- careful selection of materials;
- long recovery time.
Positive aspects in restoring a chest of drawers:
- additional furniture;
- in the process of restoration, it is possible to change the functioning of the chest of drawers;
- the look of the interior is updated;
- the value of the dresser rises;
- a wide range of restoration materials;
- extends the life of the furniture.
How to upgrade at home
If you have free time, you can not go to buy a new item in the room, but remake an old chest of drawers.
First you need to accurately visualize the final result of the work, clean the room for work and purchase the necessary materials.
To transform a chest of drawers:
- degrease and wash the surface, allow the wood to dry;
- sanding the old paint with sandpaper;
- apply a primer to damaged areas;
- degrease the coated areas with a primer with alcohol;
- apply acrylic primer and paint;
- let the first layer dry, cover with the second and wait for complete drying.


This standard instruction to restore old furniture. Depending on the material from which the chest of drawers is made, suitable tools are used.
During the reconstruction process you will need:
Necessary materials and tools
Of the materials needed:
- sandpaper, jigsaw;
- grinding machine, hammer;
- hacksaw, spatula;
- file, nails, self-tapping screws;
- glue, roller, brushes and paints;
- Chipboard, fiberboard or plywood.
Preparatory work
It is necessary to prepare a space where the furniture will be transformed. Newspapers or thick polyethylene are laid on the floor.
Furniture should be wiped with a dry cloth from dust and carefully inspected for defects.
Notice:
- swollen coating;
- deep cracks;
- dents;
- protruding nails;
- traces of pests of rodents and insects.
Next, they remove the old coating layer, get rid of swollen places - remove, if necessary, the top layer of wood. Irregularities on wooden surfaces removed with an electric planer. Sometimes you have to use foreign objects to get rid of dust clogged in the cracks - with an old toothbrush. The handles are unscrewed, those that are not subject to restoration are replaced with new fittings. Then wash, allow to dry, cover with a primer. If the material is not wood, then putty.
Do not use detergents with a high alkaline or acid content.

Coloring process
After complete cleansing and primer coatings, the surface is coated with the first layer. The coating is selected resistant to mechanical damage and abrasion. Enamel ones are not used for restoration; oil-based ones are also not suitable. An acceptable option is acrylic.
This is an expensive material, but the price is justified by the fact that:
- no pungent odor;
- does no harm;
- does not need to be diluted with a solvent;
- changes color when adding color;
- reacts with water, which helps to increase the volume of the paint.
To repaint, it is necessary to remove the old coating, treat the wood with putty and sand it, then paint it. There may be a pattern or bulging finish on the surface. These parts are painted with a thin brush. The upper and side parts are painted with a roller; in its absence, the surface is painted with a wide brush along the wooden saw cut.

Painting the chest of drawers perpendicular to the saw cut results in visible streaks after the coat dries. Can be painted in white, blue, gold and other colors.
Painting with acrylic options is carried out several times. After the layers have dried, they are varnished. Poor quality varnish has a short shelf life. The chest of drawers will crack regardless of whether the sun's rays fall on it or not.
High-quality varnish meets the requirements:
- water-based composition;
- no pungent odor;
- used without personal protective equipment.
Ship and floor varnishes will ruin the surface.

Restoration methods
Restoring old furniture is possible in several ways:
Craquelure method
One-step craquelure is characterized by small cracks that regular paint make it difficult. If necessary, cover with a layer of paint, then with craquelure varnish. Lacquer should be applied in 2-3 layers. Use a hair dryer to dry quickly. Next, apply the last layer. It is often not necessary to drive with a brush in one place, the paint rolls into lumps together with the varnish.

The peculiarity of this method is that cracks are not formed from paint. The last layer of varnish is a catalyst for the formation of cracks. The tree is covered with the first layer of varnish and paint, allowed to dry. Then covered with decorative craquelure varnish.
The composition of the varnish contains a pigment, which, when the varnish dries, tightens the paint. The first cracks are rubbed with oil paint, pastel. It is possible to use cosmetics. To complete the dresser is covered with a regular layer of varnish.

decoupage method
Decoupage combines aging and sticky decorations.
For abrasions, a stain is used, which is applied with a dry brush. Next comes a layer of dark acrylic, the dried layer is treated with wax, the last layer of coating is applied. The surface dries 3-4 hours. For decorations, stencils or a large paper print are used. Small pictures are glued with PVA glue in a chaotic manner. Coated with a layer of varnish.

Aging
The surface in this case is cleaned, primed, applied to the accent areas. dark color coatings. Treated with wax and varnished. Sandpaper can be used instead of wax. Then a layer of varnish is applied twice.

It is not difficult to transform, it does not take much time.
Do not save on materials for the restoration of the chest of drawers.
Restoration of old furniture includes decor. Can be decorated with various accessories.


Qualitatively done work guarantees long-term service of furniture in a new way. The value of the restored furniture increases and he becomes the center of attention of the furniture owner.


